Welcome to Device Manager
Your Guide to Achieving Maximum Value from Your Hardware

Written by Jake Tannenbaum
Updated at July 14th, 2025
Table of Contents
Welcome to Device Manager!
We at Digital Matter would like to congratulate you on your choice to invest in the longevity and performance of your Digital Matter hardware by subscribing to Device Manager. To get started, we have outlined the learning pathway that we recommend for your first week with the system. Broadly, this pathway can be summarized with the below diagram:
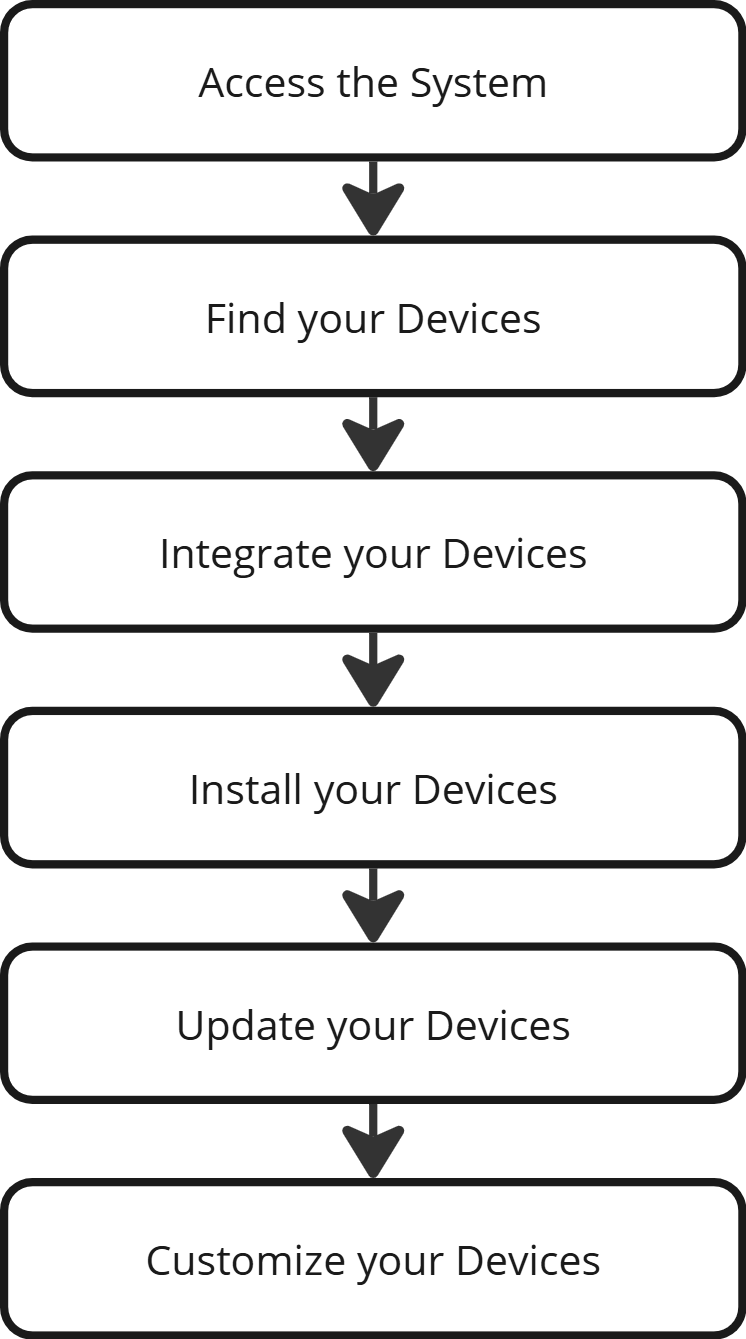
To assist with progression along this pathway, we have curated a series of articles for each stage that will all be accessible via this page. You may use this page as a checklist to move through the pathway and learn how to use Device Manager.
Access the System
The first milestone of accessing the system is successfully logging in. For help with this process please see:
Next, depending on whether you are the administrator for your account, you will need to learn how to grant access to other team members or special customers and set their permissions:
Find your Devices
Now that you and your team can access the system and navigate around, your first priority will be to learn how to find the devices that you have ordered and organize them for ease of use.
After logging in, your first page will be the Dashboard:
Then, we recommend conducting a search, which will take you to the Device Grid from which you can click on a device to see its Device View page.
Having located all your devices, we advise labelling them appropriately so that you can find them again without consulting an almanac of serial numbers stored in Microsoft Excel.
Creating and Assigning Device Groups
Labelling Devices with Comments
Integrate your Devices
Now that you have located and labelled your devices, it is time to integrate them into other systems so that when you install them, the data will begin flowing somewhere useful.
The first step in this process is to decide upon an integration strategy before creating and applying Connectors as appropriate. If you have ordered Edge devices, you will first need to create Forwarders.
Choosing an Integration Strategy
Configuring Forwarders (only for Edge devices)
Install your Devices
By this stage, your devices should be configured to send any telemetry and or sensor data to a final destination outside of Device Manager. To test that this is all functioning as it should, it is now time to install some devices and ensure that they come online.
Update your Devices
Often, the firmware that is added to a device during manufacture is not the latest version. Before deployment, we recommend updating your firmware.
There are actually three different firmware types that you will need to be familiar with, depending on hardware. The process for updating each is outlined as follows:
Customize your Devices
Many applications do not require any changes to device factory settings, but as end-users become more discerning, the need to create custom configurations to solve specific needs may arise. To customize device behaviour, you will need to change device parameters.
An overview for configuring devices can be found here
Once you have determined the correct parameters for your application, the next step is to apply them to all relevant devices:
Written instructions for applying Parameter Templates can be found here:
Next Steps
Once you have applied all of the information laid out in the learning pathway above you first batch of devices should be online and contributing to a more connected world. As you move into the next phase of supporting your deployment, we recommend becoming familiar with troubleshooting steps and learning more about general IoT concepts and use cases for inspiration as to your next connectivity solution with Digital Matter.