Set Up A Panic/Duress Button

Written by Matthew Clark-Massera
Updated at December 6th, 2023
Table of Contents
Applies to:
| Device | Firmware Version |
| Dart3-2G and Dart3-4G | All Versions |
| G120-2G and G120-4G | All Versions |
| G100-3G | All Versions |
| G150-Global | All Versions |
| G70-2G and G70-4G | All Versions |
A duress button is an example of a "Dry Contact" device. Dry contact is a synonym for 'no voltage'. Since to detect that the push button is closing, we aren't needing to provide any power. We are just detecting when there is a closed circuit, and when there is an open circuit.
We set up with a Normally Open push button switch, one side connected to one of the Digital Inputs and the other to ground.
Dart3 Wiring
To use either Digital Input 1, 2 or 3, you will need to use the corresponding wires. Dart3 Harness Definition
- Digital Input 1 = PINK
- Digital Input 2 = BLUE
- Digital Input 3* = GREEN
*Digital Input 3 is shared with one of the Driver ID lines, so DI3 cannot be used at the same time as a DM RFID reader, or Wiegand Reader.

In this configuration, when the button is OFF (switch open) it is
- Not pressed
- an open circuit,
- and there is no complete path from the input to ground.
When the button is ON (switch closed) it
- Is pressed
- closes the loop.
- Connects the input to a low signal (GND)
G70 Wiring
To use either Digital Input 1, 2 or 3, you will need to use the corresponding wires. G70 Harness Definition
- Digital Input 1 = BLUE
- Digital Input 2 = ORANGE
- Digital Input 3* = PURPLE
*Digital Input 3 is shared with one of the Driver ID lines, so DI3 cannot be used at the same time as a DM RFID reader, or Wiegand Reader.

In this configuration, when the button is OFF (switch open) it is
- Not pressed
- an open circuit,
- and there is no complete path from the input to ground.
When the button is ON (switch closed) it
- Is pressed
- closes the loop.
- Connects the input to a low signal (GND)
G100 Wiring
You will need to connect a toggle switch to one digital input, and another digital input wire to the momentary push button.
The options for inputs are:
| Wire Colour | Function |
|---|---|
| Pink | Input 1 |
| Blue | Input 2 |
| Green/Black | Input 3 |
| Brown | Input 4 |
You will need to add the relevant digital inputs to the system parameters as well. This will allow you to set buzzing options to alert the driver when the buttons have been pressed and set the input as pull up or pull down as per the wiring.
G120 Wiring
To set up a panic/duress button in the G120, we use either of the 6 digital inputs available. The digital input lines are colour coded in the 24 wire harness- G120 Harness Definition
- Digital Input 1: Pin 16 - Pink
- Digital Input 2: Pin 17 - Blue
- Digital Input 3: Pin 18 -Green/Black
- Digital Input 4: Pin 19 - Brown
- Digital Input 5: Pin 4 - Brown/Blue
- Digital Input 6: Pin 5 - Violet/Red

In this configuration, when the button is OFF (switch open) it is
- Not pressed
- An open circuit,
- And there is no complete path from the input to ground.
When the button is ON (switch closed) it
- Is pressed
- Closes the loop.
- Connects the input to a low signal (GND)
G150 Wiring
To set up a panic/duress button in the G150, we use either of the 4 digital inputs available. The digital input lines are colour coded in the 2x10-core harnesses - G150 Harness Definition
- Digital Input 1: Harness 1 Pin 4 - Blue
- Digital Input 2: Harness 2 Pin 1 - Red
- Digital Input 3: Harness 2 Pin 2 - Black
- Digital Input 4: Harness 2 Pin 3 - White
In this configuration, when the button is OFF (switch open) it is
- Not pressed
- An open circuit,
- And there is no complete path from the input to ground.
When the button is ON (switch closed) it
- Is pressed
- Closes the loop.
- Connects the input to a low signal (GND)
Parameters
The configuration would be:
- Bias resistor set to 'pull up'
- When the button is not pressed (OFF) and nothing is connected to the input, the input is held high (so we consider this level 'off' (active level = low).
- The Active Level is set to low
- When the button is pressed (ON) the input is pulled to ground.
- The digital input is considered on when the button is pushed.
- We want immediate notification of duress button pushes, so we set Log on Active and Upload on Active to Yes.
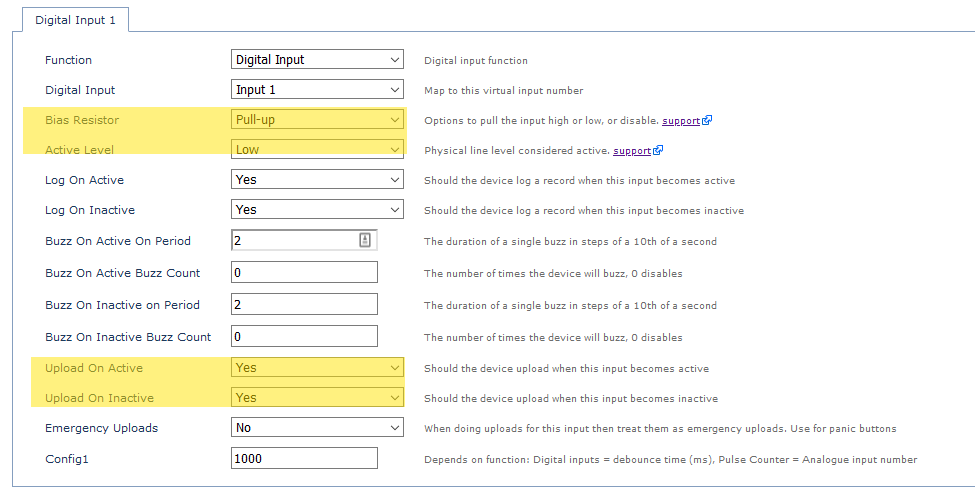
If you have a No Comms Zone configured when setting up Geofence Downloads to Device, the Emergency Uploads parameter can be set to Yes. This means that the device will be able to do emergency uploads, like when panic button is pressed, even when it is in a no communications zone.
Alerts in Third-Party Platforms
When the state of a digital input changes a record will be sent with Log Reason 9 - Digital Input Changed.
Then to determine which input has changed, Field ID = 2: Digital Data contains the state of all digital inputs.
Alerts in Telematics Guru
See the guide here - Panic/Duress Alert on Telematics Guru
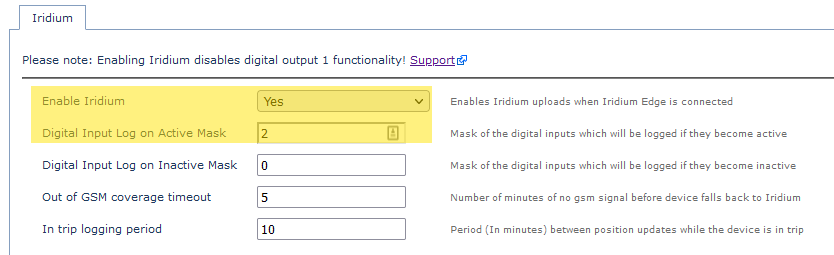
Duress Alerts over Iridium (G120 & G150 Only)
The G120 and G150 are able to be used as Iridium Hybrid devices. When connected to an Iridium edge - they will fall back to Iridium when out of cellular coverage. See G120 & G150 Iridium Set Up and Operation
Only a subset of device data is sent via Iridium to save on data costs. By default digital input status/changes aren't sent. The specific input(s) to be sent are controlled by a change mask in parameters
Duress Button + Pendant Options
DM do not supply duress buttons or pendants, however listed below are some potential 3rd party options.
Generally a client will require either of:
-
Duress Button
- Installed in the cab of a vehicle along with the DM device
- These are low cost and simple. In general, ANY push button to switch which closes when pressed will work
- Non-latching (i.e. it doesn't lock closed when pressed) is preferable
- We simply connect the push button to the digital input, and the device can detect when it is pressed
-
Wireless pendants and receivers
- In this case the user can carry a wireless pendant
- The pendant transmits to a receiver in the vehicle cab - which is connected to device digital inputs.
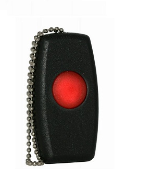
Duress Buttons - In Vehicle Cab
Examples
Notes on selecting a suitable push-button
Given pretty much any push button will work, it is up to the reseller to decide which will be best suited to the use case. Some key considerations are:
- Price
- Form factor
- Ruggedness (i.e. IP67 rated? Durable?) Consider if it's going to get dust/water in it in a harsh environment, or if drivers will be rough
- Mounting options (i.e. some are threaded so you can screw a nut to the other side to mount on a panel
Remember to TEST your Duress button function to ensure the safety function is operational and wired correctly before deployment
Wireless Duress Pendants
A Duress Pendant is used in conjunction with a programmed receiver to set a Digital input which in turn creates an alert to notify of a duress instance. This can be used in solutions such as Remote worker & Lone worker.

Examples of Duress Remotes
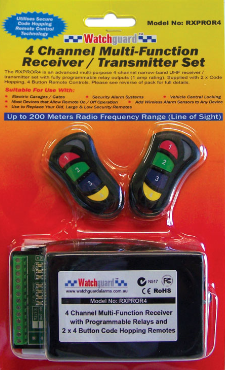
Bluetooth Pendants?
While it would be possible to integrate a BLE pendant, 433MHz pendants (like the examples) are preferred. They are available at a range of price points and transmission ranges.
The higher frequency BT signal does not travel as far, and can be easily blocked by surrounding buildings or other obstructions. They may not perform to the standard of a regular RF pendant, and as such they are not the preferred option.