First Start - Barra Fusion Cat 1bis EUK
Barra Fusion EUK with chip SIM overview

Written by Daan de Waard
Updated at June 15th, 2026
Table of Contents
Introducing the Barra Fusion Cat 1bis EUK
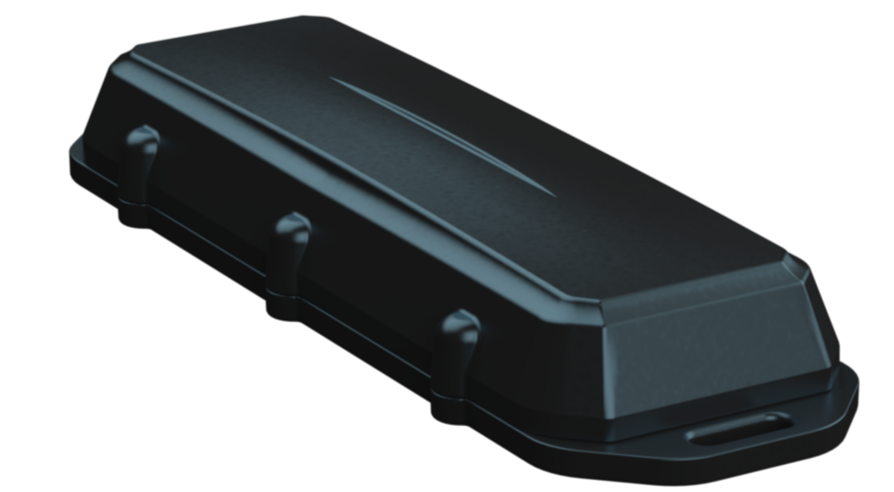
The Barra Fusion Cat 1bis EUK (Product code Barra-Fusion-EUK) is Digital Matter's ultra-rugged and compact Indoor/Outdoor battery-powered asset tracker.
Key Features:
- Location via True GNSS (Multiple constellations: GPS, GLONASS, Galileo, BeiDou and QZSS), Wi-Fi Access Point MAC Address Scanning, and Cell Tower location scanning for indoor/outdoor asset management.
- Deploy-once battery life with up to 10+ years on only 2 x AA user-replaceable batteries.
- Cloud-based location solving (versus on-device) for substantial power savings.
- Tracks assets when they’re on the move and enters sleep mode when stationary to save power.
- ‘Battery Low’ and ‘Battery Critical’ alerts.
- Magnetic activation and tamper detection.
- Weatherproof and ultra-rugged IP68 and IK07 rated housing.
- Global Roaming eSIM
- LTE Cat1 bis Connectivity.
Barra Fusion Key Info and Resources
Key Technical Specifications
- 2.2-3.6V input voltage range - LiFeS2 batteries recommended, do not use LTC batteries
- Global Roaming eSIM
- LTE Cat1 bis modem
Full Technical Specifications
Find full technical specs on the product page on our website: https://www.digitalmatter.com/devices/barra-fusion-cat-1bis
High Resolution Images
Download high-resolution images for the Barra Fusion here: High Res Images
Device Manager Documentation
Device parameters and firmware are configured via our Device Manager interface. Make sure to check out the resources here. In particular, Device Manager - Getting Started.
Technical Support and Advice
Digital Matter partners should Contact Support for any product issues or enquiries.
Device Warranty
The Barra Fusion is backed by a 2-year manufacturer's warranty. See Digital Matter Warranty Returns Policy for details.
Initial Provisioning
This guide is intended to assist new users in getting a Barra Fusion online for the first time. Once you have some experience with the device, this process may change slightly.
e.g you may wish to queue firmware and parameter updates before inserting a SIM and batteries - so that the device picks up new settings once it gets online.
Magnet Removal for Activation
NOTE: In order to get the Barra Fusion online, you need to remove the magnet (signified by the tape covering it) from the back of the device. If this is not removed, the device will not be able to connect.
The Magnet Function can be reconfigured to be used for a Tamper Alert once in the field - for full details see:
Magnetic Activation Mode and Tamper Detect on the Barra
In the Box
You will get a compact box containing the Barra Fusion + standard housing. The 8 housing screws will be in a small packet inside the housing.

Provisioning Process
Electrostatic Discharge (ESD) Warning
The components used in the device can be damaged by Electrostatic Discharge (ESD). Suitable anti-static precautions (such as a grounded wrist strap) need to be taken when inserting the SIM card or handling the printed circuit board. Avoid touching any of the components or the GPS & GSM antennas. The manufacturer's warranty does not cover ESD damage.
Connect to a Tracking Platform
While this is not specifically required to 'fire up' a device, it is generally helpful to do this step first as it will mean if all goes according to plan, we'll simply see our device appear online in this platform.
Telematics Guru users can follow the guide here Creating Assets in Telematics Guru
Special Connector Type
As a device in our Fusion series, the Barra Fusion sends location data (WiFi and Cell Tower Scan data) through the The Location Engine to be resolved into positions when it cannot resolve a GNSS position with sufficient accuracy. This requires both a Connector and a Forwarder with appropriate settings and will deliver a message payload which is different from a GNSS-only device.
Telematics Guru users will see a series of preset connector options available in the Connectors dropdown. These TG presets have forwarders built-in and are prefixed with "Location Engine". e.g. Location Engine -> TG (APAC 02) if your server is apac02
1. Provision on Tracking Platform
While this is not specifically required to 'fire up' a device, it is generally helpful to do this step first as it will mean if all goes according to plan, we'll simply see our device appear online in this platform.
Telematics Guru users can follow the guide here Creating Assets in Telematics Guru
2. Remove Magnet
In order for the device to come online: the magnet at the back of the device needs to be removed. By default, this magnet is used for activation mode for the device, and thus if the hall sensor in the device detects the presence of a magnet: the device will not come online.
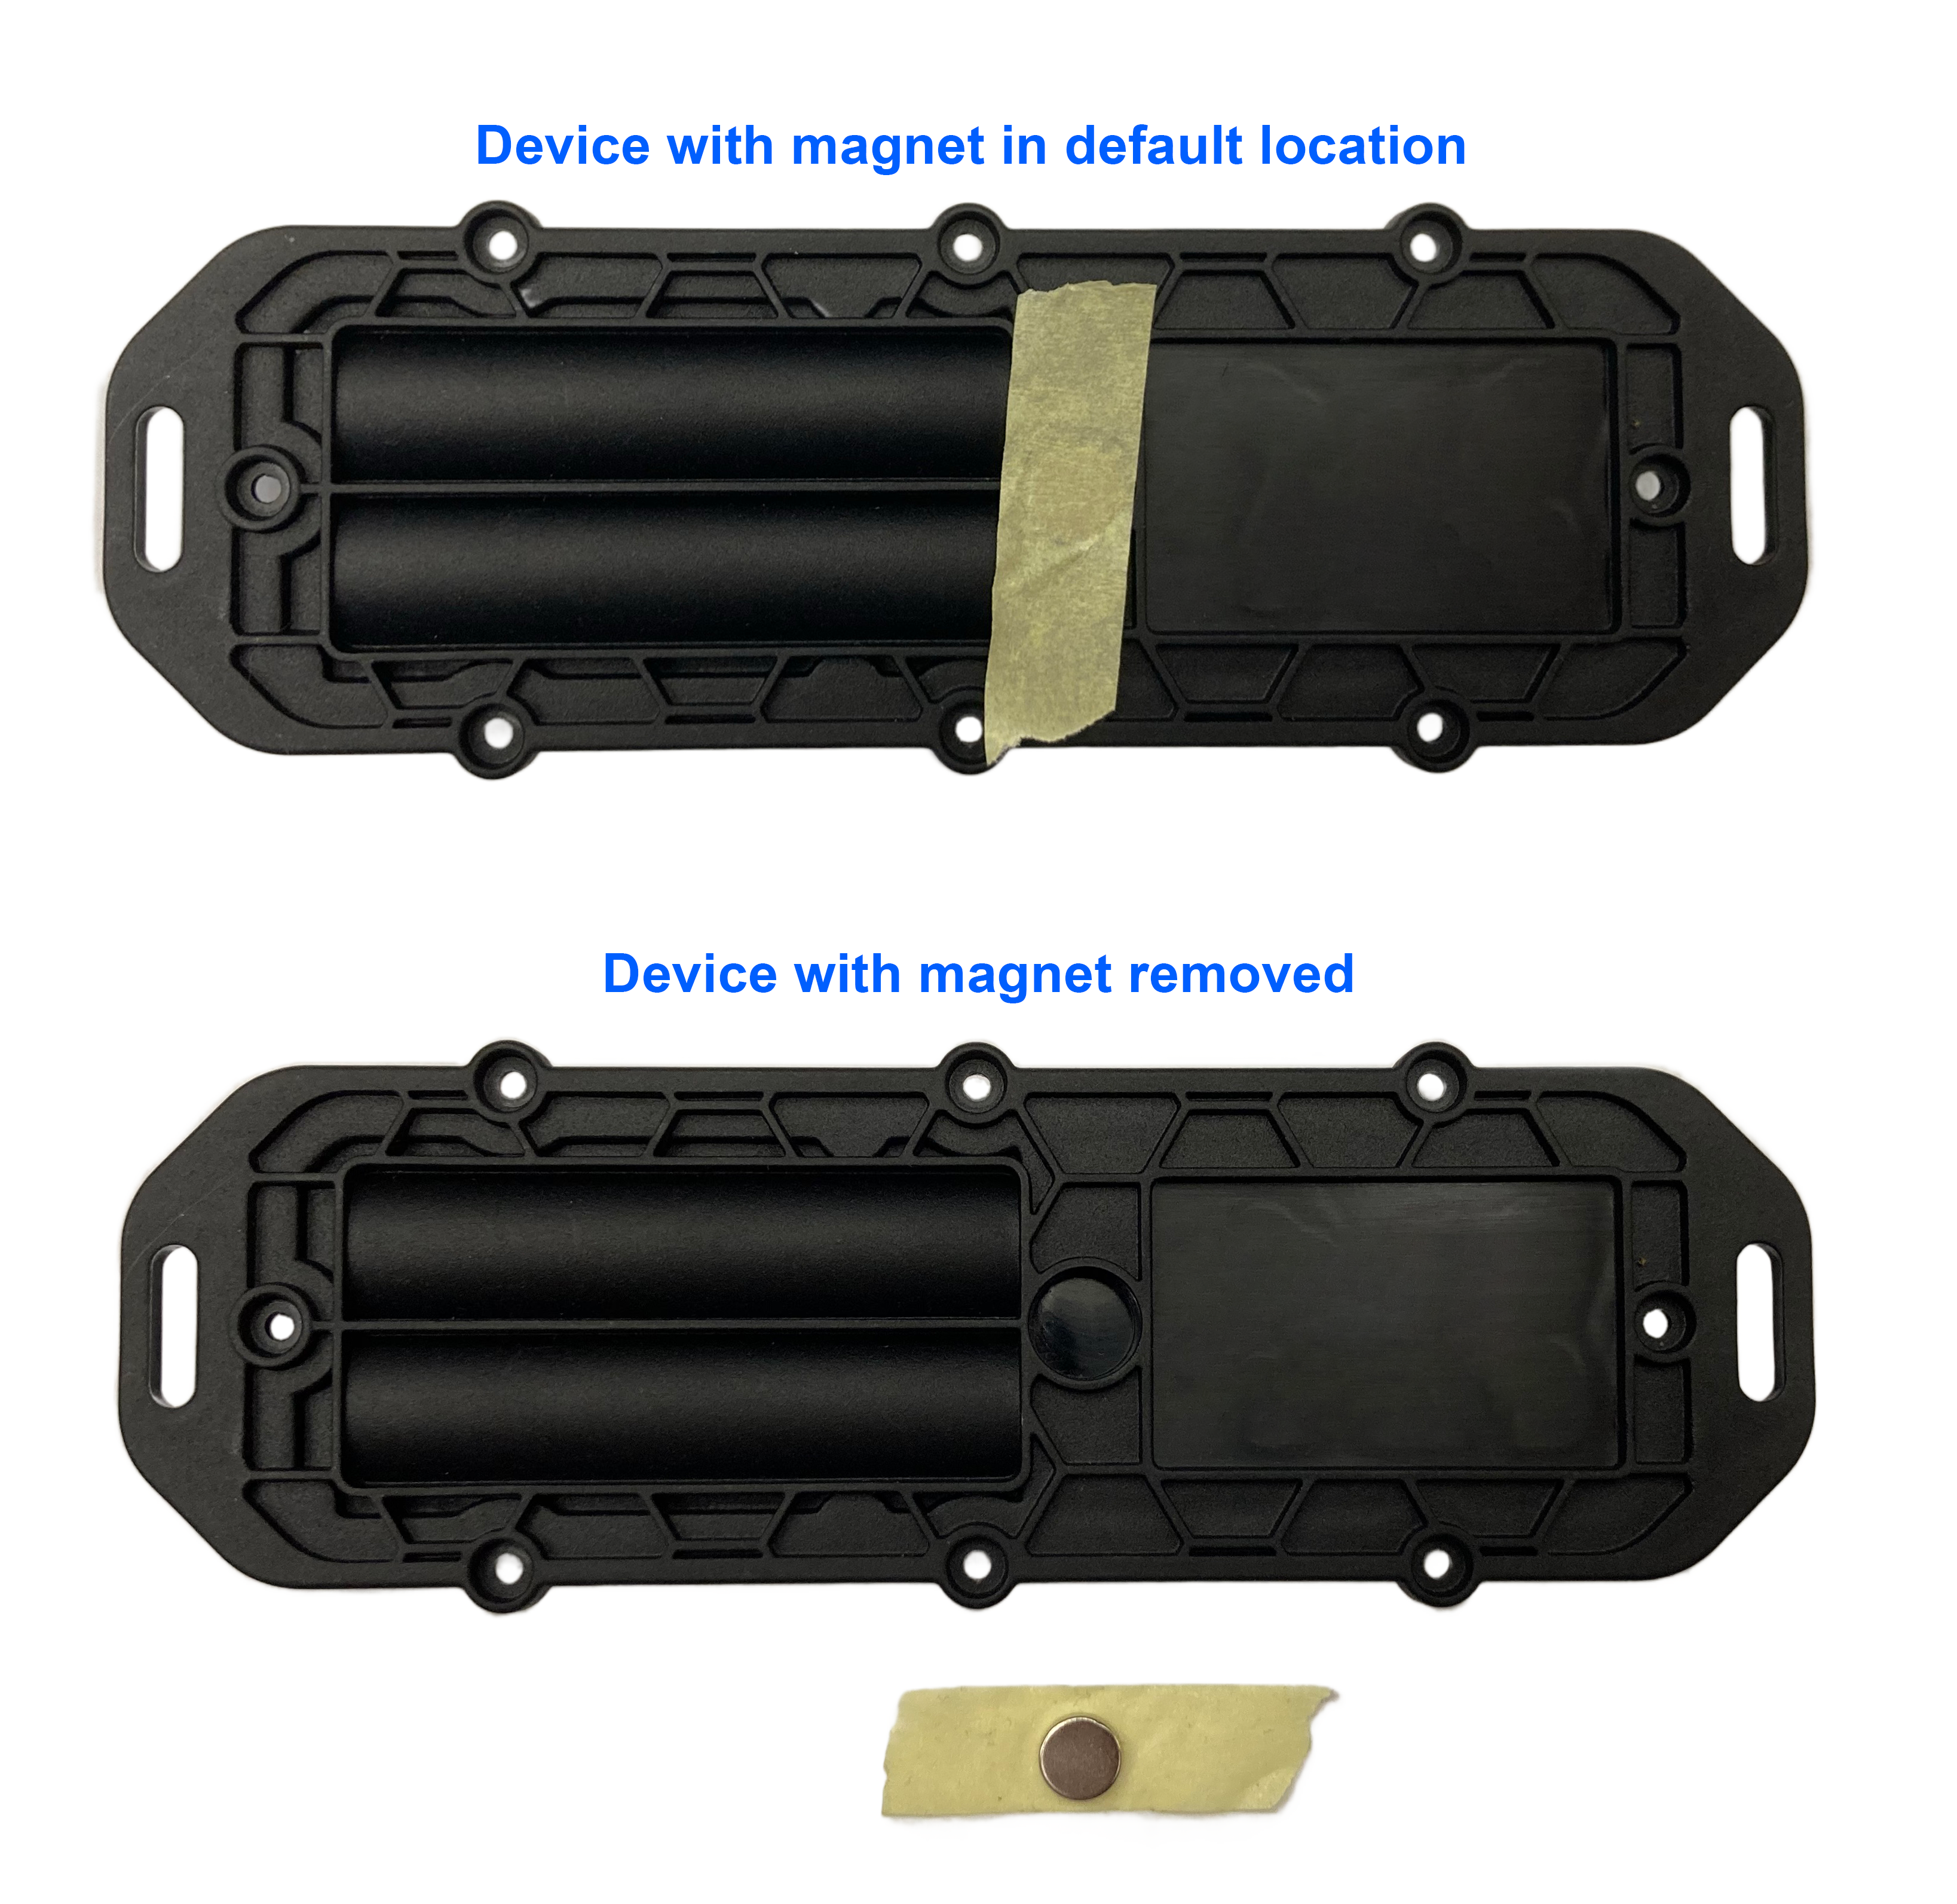
Note: the magnet can be used for tamper detection, which is configurable on OEM under the System Parameters for the Barra Fusion.
3. Supported Countries and Network Selection
The Barra Fusion EUK can only connect to LTE Cat1 bis networks and is pre-configured with a KPN Global Roaming eSIM. The default settings will facilitate device connectivity.
Can I optimise my Network settings for better Battery and Device Performance?
The following article can assist with network optimisation and provides a list of supported countries.
Network Settings - Barra Fusion Cat 1bis
4. Insert Batteries
Battery Selection
The Barra Fusion requires 2 x AA batteries. Selecting a suitable set of batteries is critical to the overall device performance. The Barra Fusion can take alkaline and LiFeS2 batteries, not LTC.
For more detail see Battery Suggestions
See also: Barra Fusion Cat 1bis Battery Life Calculator
Key Requirements:
- 2.2-3.6V Input Voltage Range (use 1.5V cells)
- LiFeS2 batteries are recommended for optimum performances, specifically Energizer Ultimate Lithium. These batteries
- Have good temperature tolerance (-20° -> +60°C operating range)
- Low rate of self discharge - so long shelf and service life.
- Readily available at supermarkets or hardware stores, and are user replaceable.
- Alkaline batteries can be used - they are often easy to find cheaply and easily off the shelf. However note:
- Lower cost Alkaline batteries often have very high self-discharge rates, and will be partly discharged already just from sitting on the shelf at the store
- Alkaline batteries often don't have the same temperate tolerance as LiFeS2 option
- We have found some Alkaline battery types prone to early, unexpected failure (i.e. halfway through their expected capacity
-
There are exceptions to the above however - high quality Alkaline batteries do exist! Just be careful in your selection
If in doubt, speak to our support team.
Insert the batteries, following the markings on the battery holder indicating the polarity. The springs are the negative terminals.
5. Getting Online
Once the batteries are inserted, the internal LED will come on and flash. The device will do the following:
-
Connect to the server: If the SIM card works, the device will connect to the OEM Server and attempt to download any firmware and parameter updates then fetch fresh GPS-aiding data.
-
Get a GPS Fix: The device will attempt to get a GPS fix. You can speed this up by moving to an area with good GPS signal.
-
If it is unable to get a GPS fix, it will attempt a Wi-Fi scan.
- If needed, upon uploading, the device will scan for cell towers, and send the Wi-Fi/cell tower scan to the Location Engine for resolution.
-
If it is unable to get a GPS fix, it will attempt a Wi-Fi scan.
-
Reconnect to the server: The device will attempt to connect again to upload the result of the GPS Fix.
If the device does not complete these steps within 10 minutes, it will go to sleep and try again on the next heartbeat or the next trip start.
We are Online!
Once these steps are completed, if all has gone to plan, we will be able to see the device on the map on our tracking platform.
The Installer Page
Some users/installers may not have access to our end tracking platform, so the installer page can be used. It allows for a quick device check without giving away any sensitive information. It's also a handy tool for those with Device Manager/TG access.
Locate the serial number on the barcode of the device. Go to devicemanager.digitalmatter.com/installer and search for the serial number to confirm that it has:
- Connected
- Committed
- Got a GPS Fix
Now that you have some experience with the device, this process may change slightly. You may wish to queue firmware and parameter updates before inserting a SIM and batteries - so that the device picks up new settings once it gets online.

Troubleshooting
In the rare event that the device does not connect, commit, or get a location. Troubleshooting steps are detailed below.
The device does not connect
-
Check the LED is flashing, if the LED is not flashing, either:
- The batteries inserted are dead. Test with a battery tester to check, or try a fresh set
- The device may have an issue, in which case contact DM for RMA information
-
The device has not properly reset. Remove batteries for 20 seconds, and reinsert.
-
Confirm your Chip SIM is active:
- Speak with the Digital Matter team.
-
Try a fresh set of batteries (they may have enough power to flash the LED but not enough to upload data)
- If it is your first time using a new type of network, you may need to apply certain network settings with a DMLink Cable.
The device does not commit
Typically, this is due to the device not yet being configured on the end server. Make sure this has been done.
See Since Committed/Since Connected and Troubleshooting for troubleshooting steps.
The device does not get a GPS fix, but does updates its location
If the device fails to get a GPS fix after 5-10 minutes (the very first one can take a short while):
- Take the device outdoors, with a clear view of the sky.
- Remove batteries for 20 seconds, and reinsert. This restarts the device and it will immediately attempt to get a fix. Since you have moved locations now, the device should get better GPS signal and should get a fix.
- Try increasing the GPS Fix Timeout in System Parameters

- Failing this, the device may have an issue with the GPS. See GPS Troubleshooting, or contact DM Support.
The device does not update its location at all
If the device fails to update a location (the very first one can take a short while):
- Check that the lookup settings are correctly configured. See Location Engine Lookup Settings.
- Double check your Forwarder setup
- Remove batteries for 20 seconds, and reinsert. This will cause the device to restart, and once again attempt a GPS fix, and failing that, a wifi scan.
Sealing the Device
The Barra Edge has an IP68 and IK07 rated housing. The device must be sealed carefully to achieve the IP68 rating.
It is difficult to provide an exact torque figure with which to tighten screws. This is because upon first sealing the device, the screws cut threads into the nylon glass housing. So on the first assembly, the screws may be quite stiff. If the housing is opened and then resealed, the torque required for resealing will be lower than that of the first assembly.
The key goal we are trying to achieve in sealing is firm, even pressure on the silicone seal - as this is what keeps the device water-tight and dust-proof.
To achieve this:
- Ensure that the clear silicon seal is in good condition, is lying flat, and is not fouled by any plastic debris or other material.
- Close the housing, and gently squeeze it shut. Foam on the lid will compress against the batteries, holding them firmly in place.
- Tighten the 8 screws to uniform tightness - such that there is an even gap at all points along the interface between the base and lid.
- The screw heads are Posi-Pan head. As such a Posidriv bit should be used. A Phillips screwdriver can strip the threads.
- The screws are a thermoplastic screw: 2.5mm x 8mm (BN82428). If you are after a stainless steel variant, the product code to source is BN82429.
- It is a good idea to use a screwdriver with a torque limiting clutch, start with the screwdriver on the lowest setting, and gradually increase the torque until there is a small gap between the base and lid (no need to over-tighten as you risk cracking the housing)
- The final torque when finished will be around 0.7Nm most of the time. (Value is a guide only)
Mounting and Installation
The Barra Fusion can be mounted onto an asset to be tracked using screws, bolts, cable ties, magnets, or industrial adhesives.
When choosing a mounting point, you have two competing goals
- To minimise the chances of the device being accidentally crushed, dislodged or discovered by a thief
- To maximise the GNSS and mobile reception and provide adequate ventilation.
Key mounting notes:
- Avoid installing the box completely enclosed in a metal box
- Avoid installing in a location that will result in elevated temperatures. For instance, mounting the device in direct sunlight on the dash of an non-ventilated cabin may cook the batteries, leading to abnormally short service life.
- Try to orient the GNSS antenna towards the sky where possible (screw heads facing down)
Maximising GPS Reception
Since the Barra Fusion is a battery-powered device, reception is critical to its performance.
The Barra Fusion has several key features that allow it to get a GPS fix in difficult, low-signal environments:
-
High-quality GPS receivers
-
Low Noise Amplifiers
- GPS Aiding Data
This allows the device to get a fix where others wouldn't. However, in reduced signal, the device will work harder (use more battery) to get a fix which results in reduced battery life.
The best possible mounting location for optimal GPS reception gives a clear, 180-degree view of the sky and is free from obstructions. This is not to say the Barra Fusion must be mounted here, in fact, many are installed in difficult locations such as the undersides of trailers, and underneath car seats.
It is important to note that the Manta Fusion also has the ability to resolve its location via Wi-Fi (similar to our Edge devices). Therefore, even if the device has poor GPS signal, in urban environments, it will likely be able to accurately resolve its position using nearby access points.
Test GPS Signal Strength
Turn on GPS Debug logging and check the signal strengths. See GPS Troubleshooting.
If you are installing a device in a covert location within a vehicle and the vehicle is otherwise completely out in the open, this is the 'best' reception the device is ever likely to see. If at this point the GPS signal received is fairly low in strength, then the device might fail to get fixes in more 'difficult' locations like when the vehicle is parked near tall buildings.
Simply check whether or not you could get a fix and the reduced strength might go unnoticed.