Telematics Guru - History Views
Table of Contents
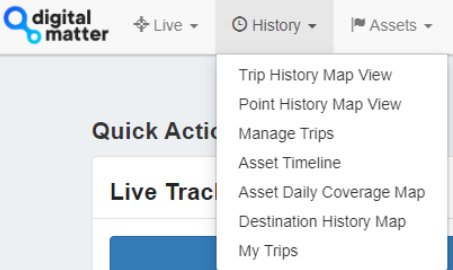
The Data that is recorded by Telematics Guru can be viewed in several different ways. These views are separated into seven different ways of displaying data and are accessible from the dashboard or the History drop down.
 |
 |
Overview Video
Trip History Map View
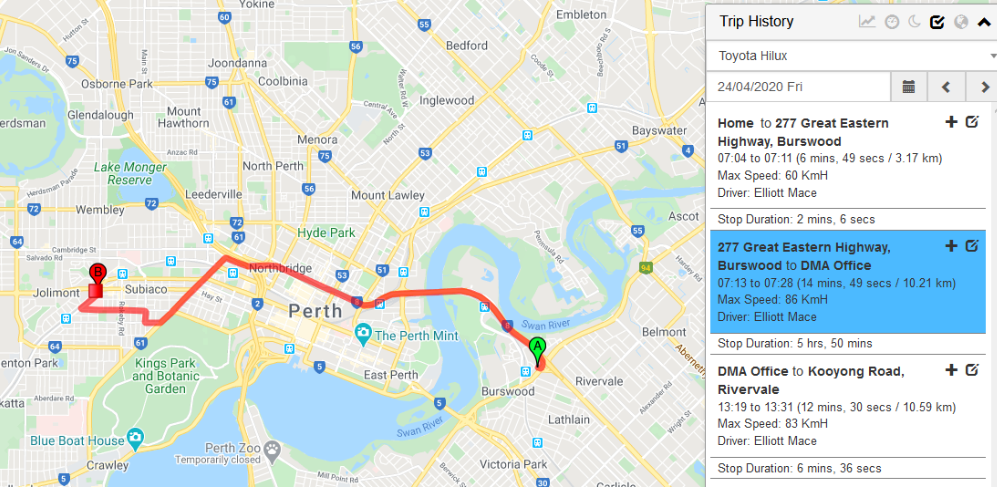
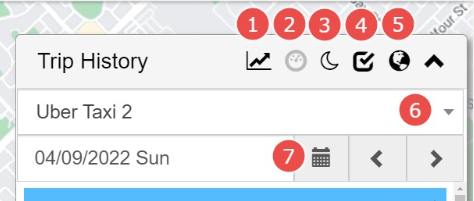
This view displays the selected day's trips chronologically, displaying information on start and end location, times, distance, max speed and driver details (if configured).
To view the Trip History Map View:
- Trip History View functionality must be enabled for the organisation
- Users must have the Trip History View permission
|
 |
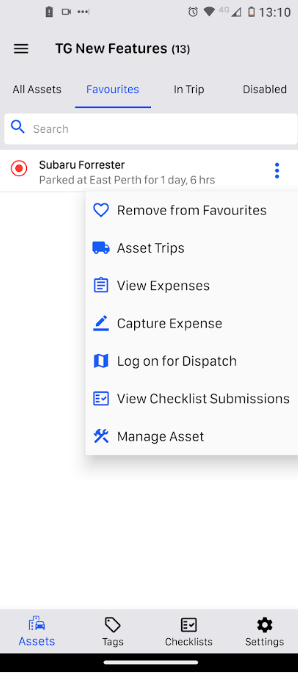
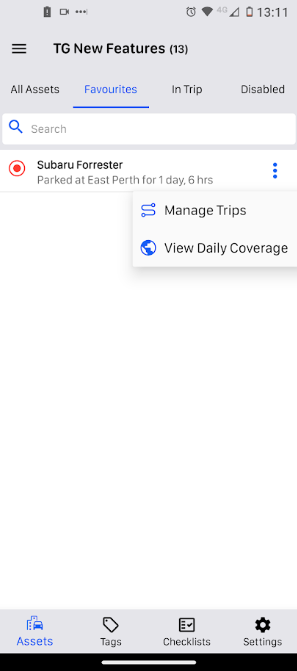
Trip History can also be viewed via the TG App
 |
 |
Point History Map View
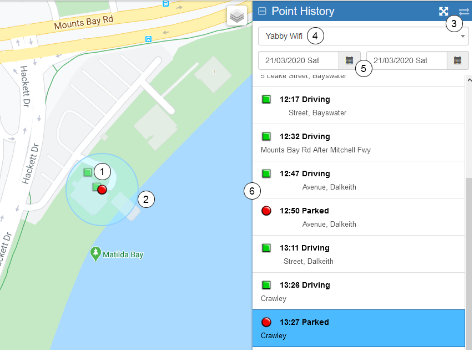
This view displays pins for each point based asset, Red for a still asset, and green for an asset that's moving.
To view this page:
- Point History functionality must be enabled for the organisation
|
 |
Manage Trips
Manage Trips view is a bit more interactive, with functions that let you Create Geofences, set a Trip Type, Project, mark the trip Business or Private for logbooking, write a trip comment, Assign drivers and export data.
See also TG App - Managing Trips and Logbooking

- Select Asset
- Select Date, Jump to Today or Most recent logs
- Set Range of trips shown, Day, Week or Month
- Trip Filter (See more below)
- Export selected trips as a CSV (this runs the Trip List Report with any applied filters)
- Assign Trip Operations
- Select individual or multiple trips
- View Trip in Trip History View
- End Location (Geofence name will show if the trip ends in a geofence)
- Business or Private trip toggle button
- Driver
- Globe icon - Create Geofence at this location
Trip List Filter
Trip list filter has many options to view trips based on criteria. Some uses for this could be:
- Viewing out of work hour trips
- Viewing All Business type trips
- Viewing All Business trips without a comment
- All Weekend only trips
- All trips by a certain Driver.
- Any trips over 50kms
- Any Trips belonging to a project

Asset Timeline
The Asset Timeline view is useful to see the events of an asset for a date range.
Event types can include:
- Trip Start/Stop
- Duress
- Harsh Acceleration/Braking
- Accidents
- Speeding events
- Any Custom event you've defined
- Any change in Asset State

- Select your Asset
- Select your event type, or leave as All
- Select your Range or use most recent logs
- View trip on the map
- If you click on the start or end of a trip, the start will show in green and the end highlighted in red.
Asset Daily Coverage Map
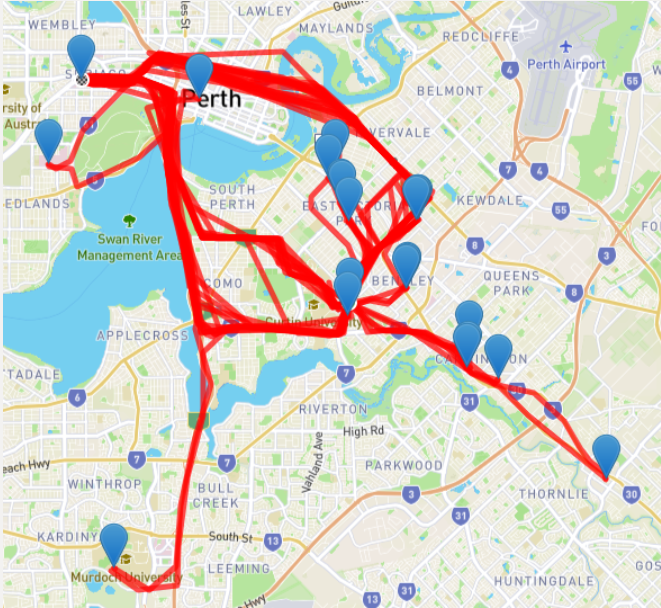
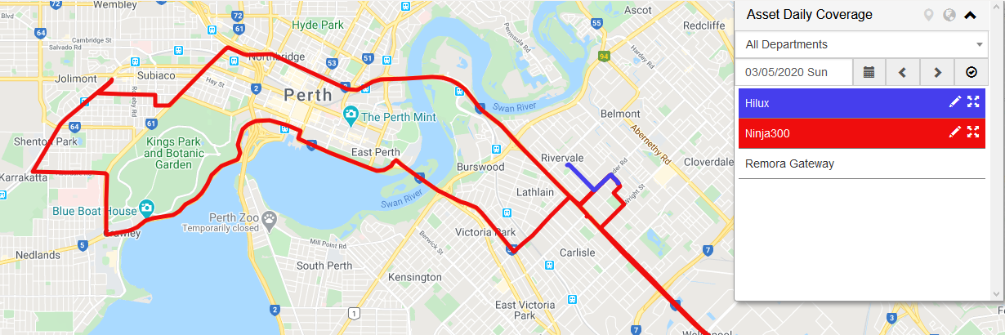
The Asset Daily coverage map shows the trip paths of all Assets for the specified date.
This could be used to easily show asset usage inside a specified/restricted area, or to show Asset travel and reach.
Destination History Map
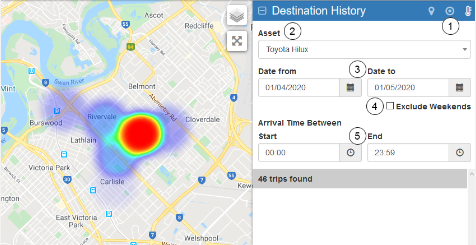
The destination history view provides another great way of visualizing tracking data:
- See on the map where the asset has ended its trips, and the stop time at each location. (left)
- Cluster the trip ends to show the most visited destinations. (middle)
- Show the destinations as a heat-map, representing the most visited destinations. (right)

Access the Destination History Map under History->Destination History Map. If this is not an option, contact your partner to enable the function on your organisation.
|
 |
Pro-Tip:
This only works for "trip-based" assets. Point history devices will not appear in this view. An asset needs to end a trip (and send a "End of Trip" log to Telematics Guru to appear in this view.
Driver Trip History View (My Trips)
The Driver Trip History View (My Trips) allows a user's view of trips to be restricted to trips done by the user's driver.
The main use case for this view is:
- A driver needs to do log booking.
- When they login to the system, they should only see trips linked to their driver. All other trips are hidden from them.

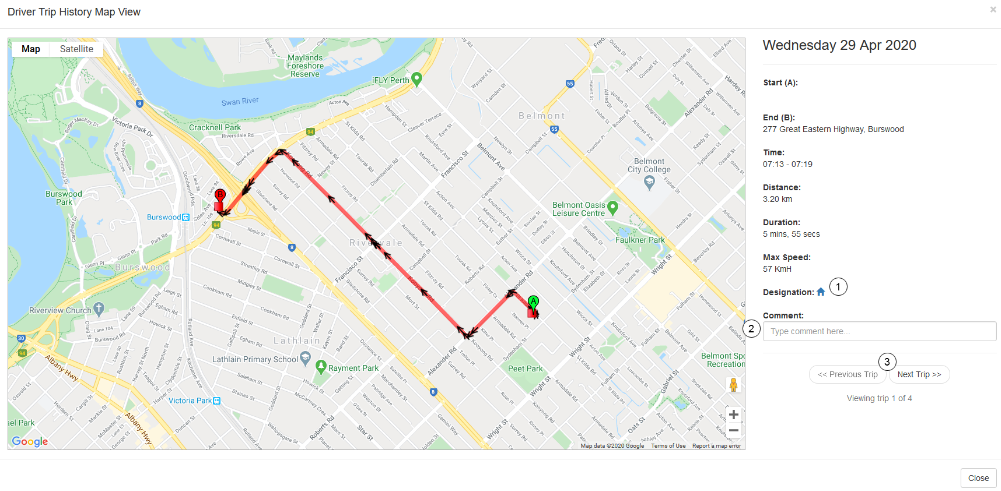
The Driver can also click on the Magnifying Glass Icon to see the trip on the map and set the trip type from the My Trips view. To access this screen, go to History->My Trips. If you cannot see this option, ensure it is setup according to the instructions below.
The Map view also allows:
- Drivers to login and only see their trips.
- Assign a Business/Private designation to the trip. Click the B/P Icons to change the designation.
- Add a Comment to the Trip. Enter the comment by clicking and typing in the Comment column.
Set up Driver Trip View
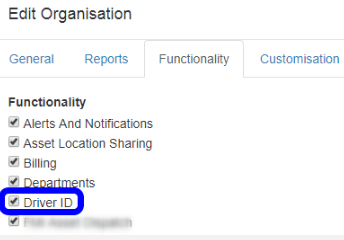
Make sure the Driver ID functionality is enabled in the Organisation Settings: Admin->Organisations->Edit. Go to Functionality. Tick Driver ID.
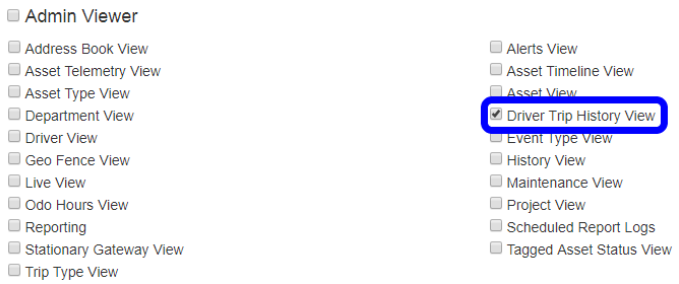
Enable this permission for the user in the User Settings: Admin->Users->Edit. Go to Permissions. Tick "Driver Trip History View". If doing log booking only, this will be the only permission for the user.
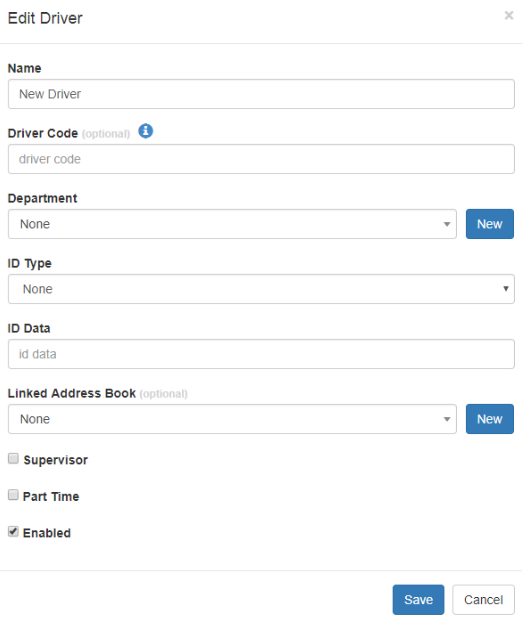
Ensure you have a Driver created for the User. Go to Admin->Drivers. Click New. Enter the required details. If you are not using a physical Driver ID collection tool on the tracking device, set the ID Type to "None".
Associate a Driver with the User. This is important for the feature to work. Go to Admin->Users->Edit. Go to the General Tab. Under Associated Driver, choose the driver to link to the User.
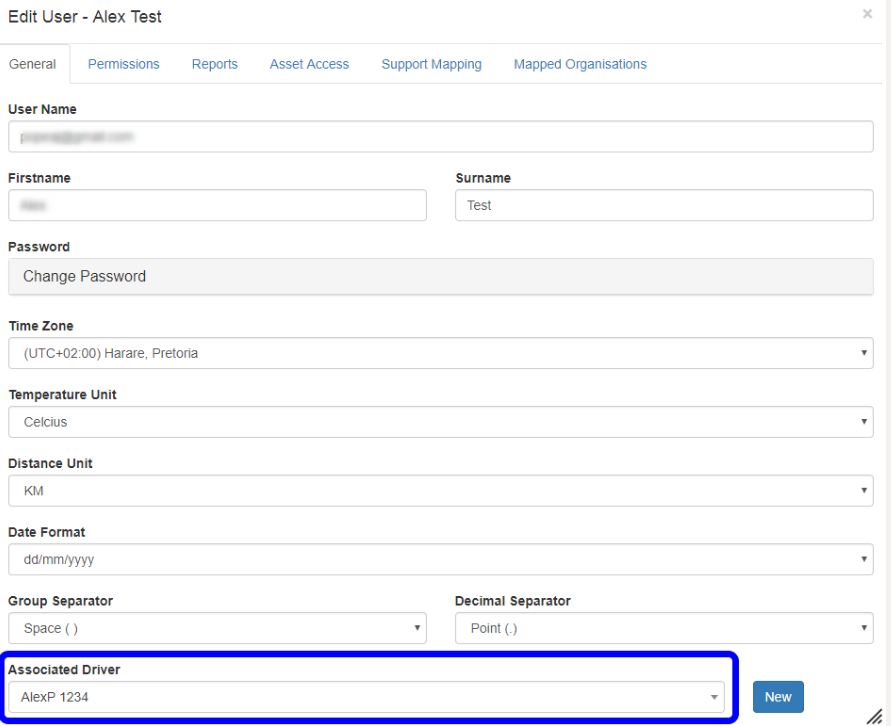
After this, the Driver Trip History View should appear in the menu for the User. Login as the user. Go to History->My Trips.
How to associate a Driver with a Trip:
This is important if you want the Driver to see the trip in the Trip View page. There are a few ways to do this:
Asset Default Driver. All trips done by the asset will get this driver assigned. Go to Assets->Managed Assets. Click on an asset to edit. Go to the Drivers Tab. Assign a Permanently Allocated Driver. Do not tick "Enable Driver Management" unless you know what you are doing - rather leave it un-ticked.

Assign Drivers to Trips in the Manage Trips View. Go to History->Manage Trips. Use the tick-box to select the trips in question, and select 'Set Driver' in the Trip operations menu.
Use a Driver ID peripheral on the tracking device. These include: RFID readers and iButton readers. When a driver ID is provided to one of these peripherals, the Driver is assigned to the trip in TG.
Common Troubleshooting:
The main reason the "My Trips" option does not appear in the user's menu is that they don't have a driver associated with their user. The account administrator should edit their user account and assign a driver to the user. See the instructions above.
View multiple days' trips at once
Telematics Guru will only let you see either a trip by itself, or a days worth trip of an asset. There isn't an option now to see multiple days worth of trip in map view. But we can make use of the Trip List Data Export report in Telematics Guru. This report will let select the date range and multiple assets for which you want to see the trip history.
Download this report either as a GPX or KML file, and then use a gpx viewer online ( https://gpx.studio for example) to run th file. Below is what the end result might look like.
