Initial Provisioning [Yabby Edge]

Written by Matthew Clark-Massera
Updated at September 27th, 2023
Table of Contents
This guide is intended to assist new users in getting an Yabby Edge online for the first time. Once you have some experience with the device, this process may change slightly.
e.g you may wish to queue firmware and parameter updates before inserting a SIM and batteries - so that the device picks up new settings once it gets online.
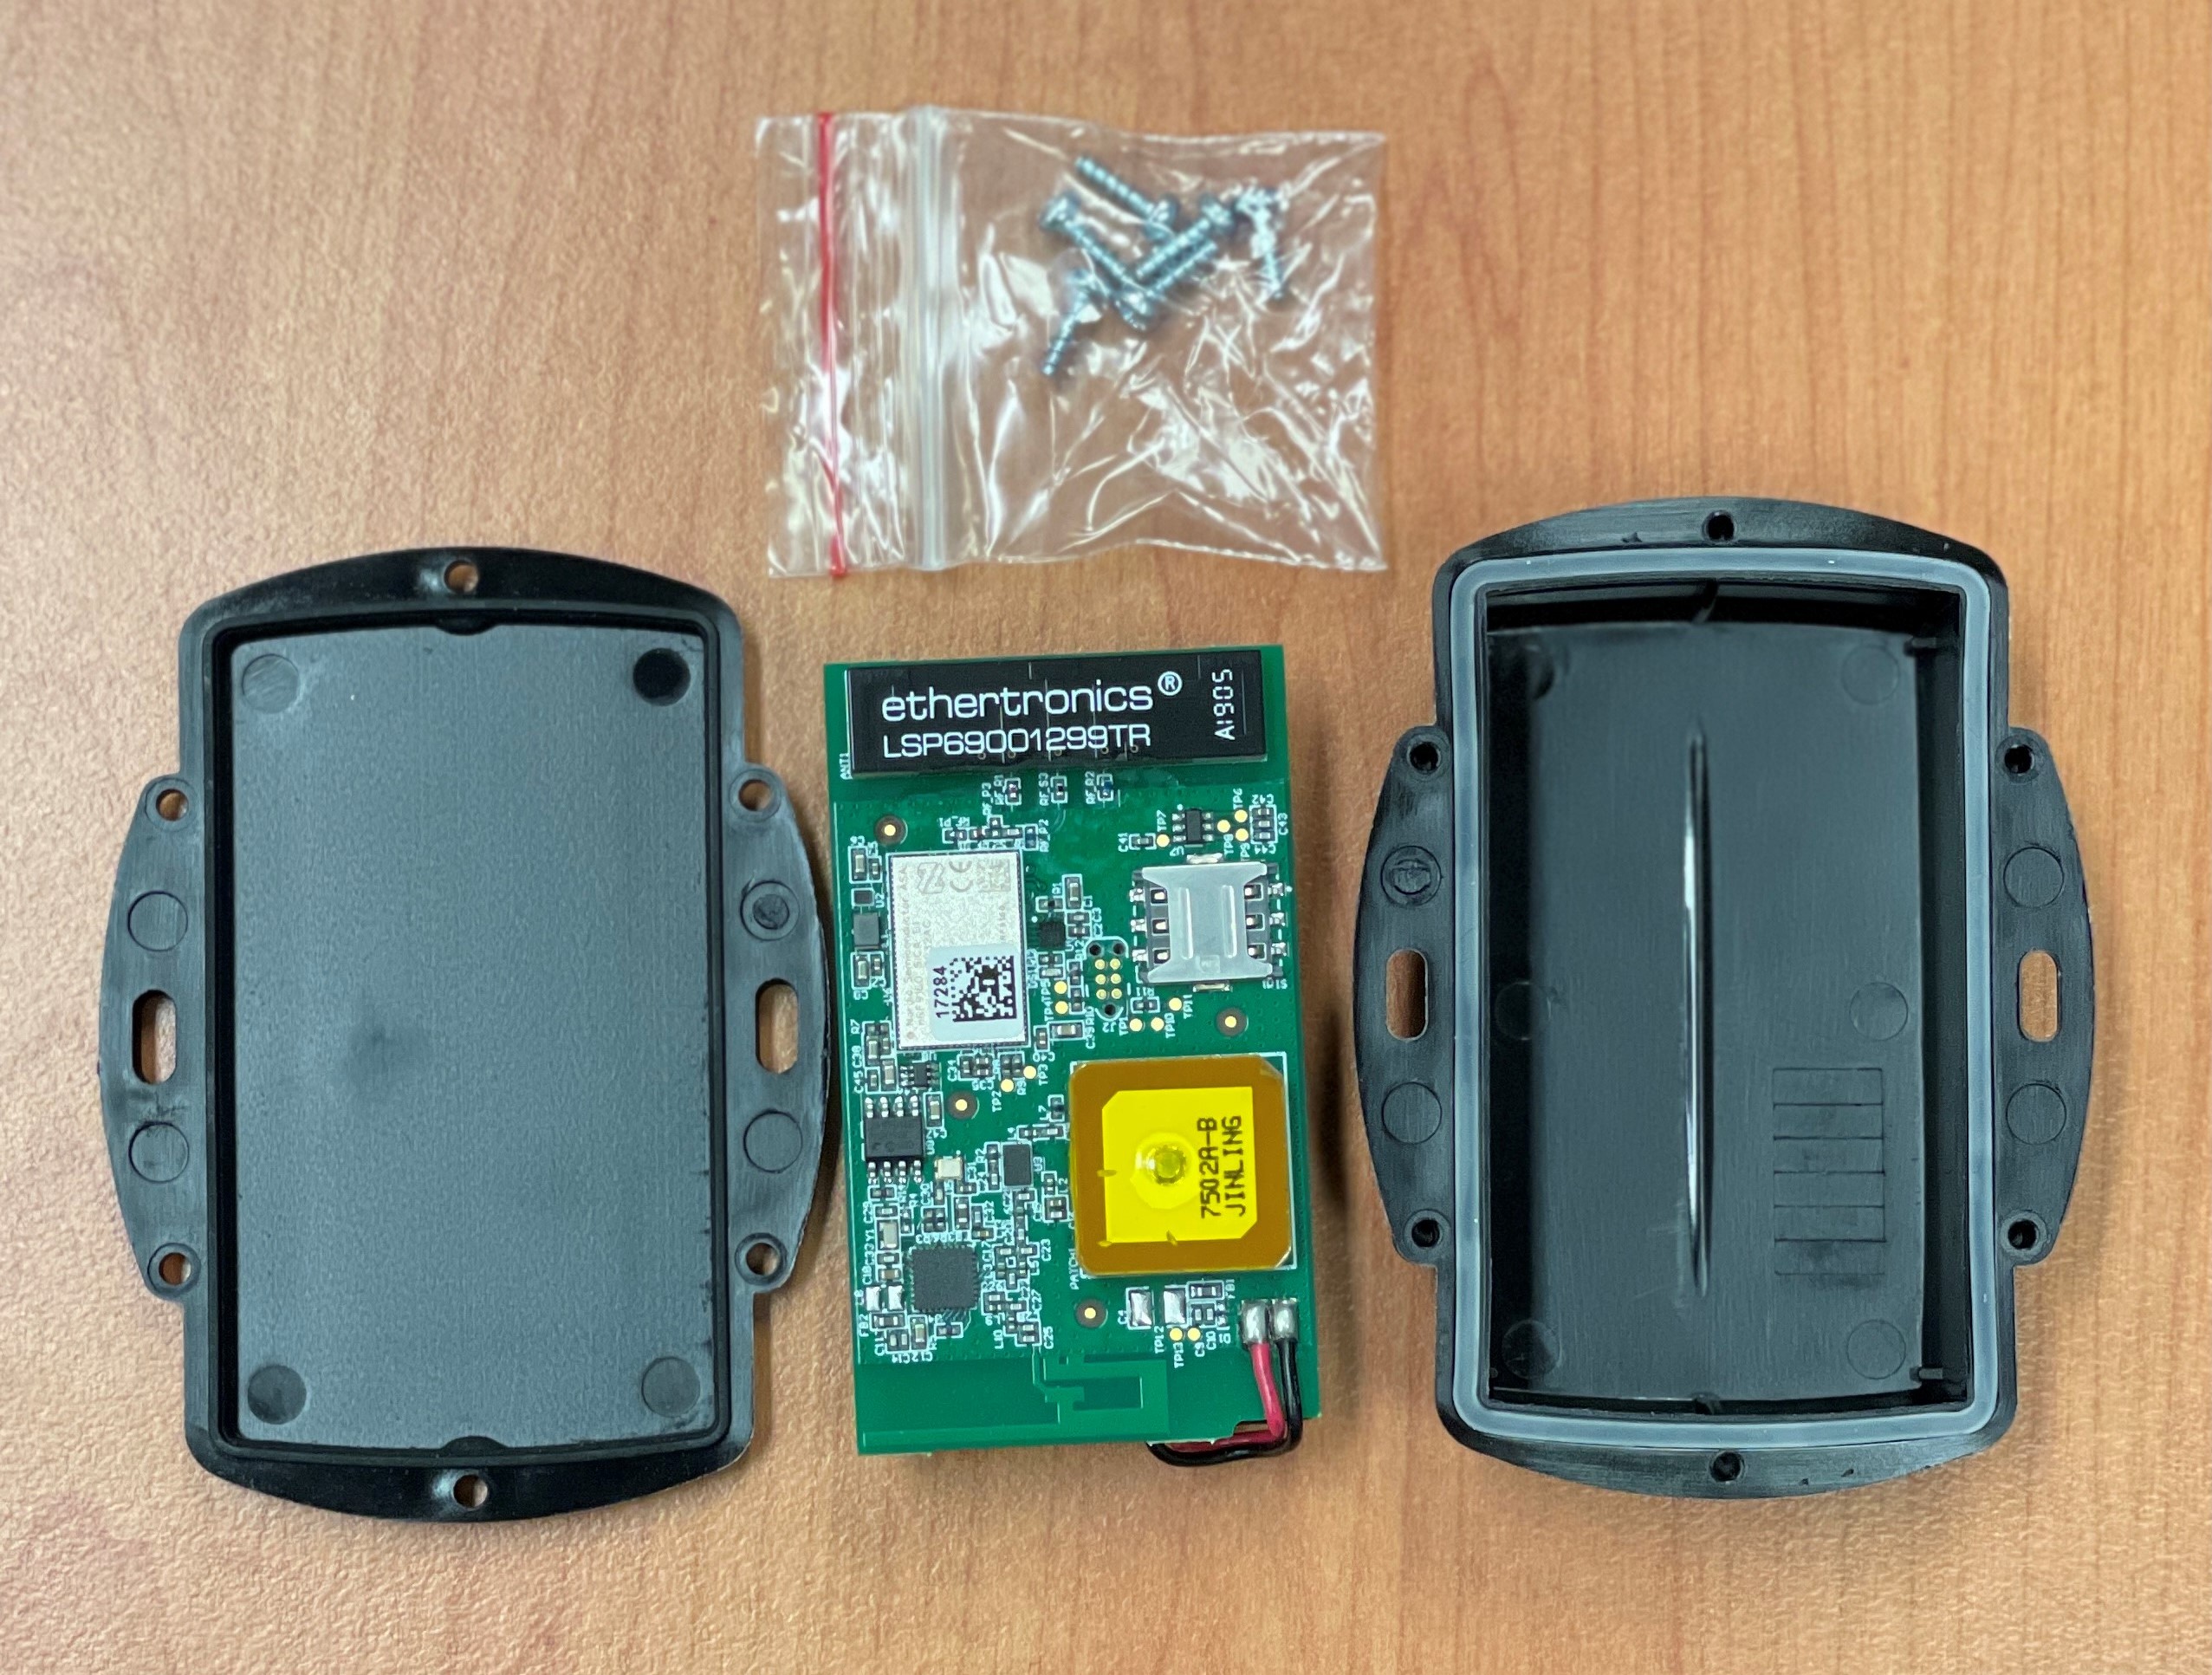
In the Box
You will get a compact box containing the Yabby + standard housing. The 6 housing screws will be in a small packet inside the housing.
Provisioning Process
Electrostatic Discharge (ESD) Warning
The components used in the device can be damaged by Electrostatic Discharge (ESD). Suitable anti-static precautions (such as a grounded wrist strap) need to be taken when inserting the SIM card or handling the printed circuit board. Avoid touching any of the components or the GPS & GSM antennas. The manufacturer's warranty does not cover ESD damage.
1. Provision on Tracking Platform
While this is not specifically required to 'fire up' a device, it is generally helpful to do this step first as it will mean if all goes according to plan, we'll simply see our device appear online in this platform.
Telematics Guru users can follow the guide here Creating Assets in Telematics Guru
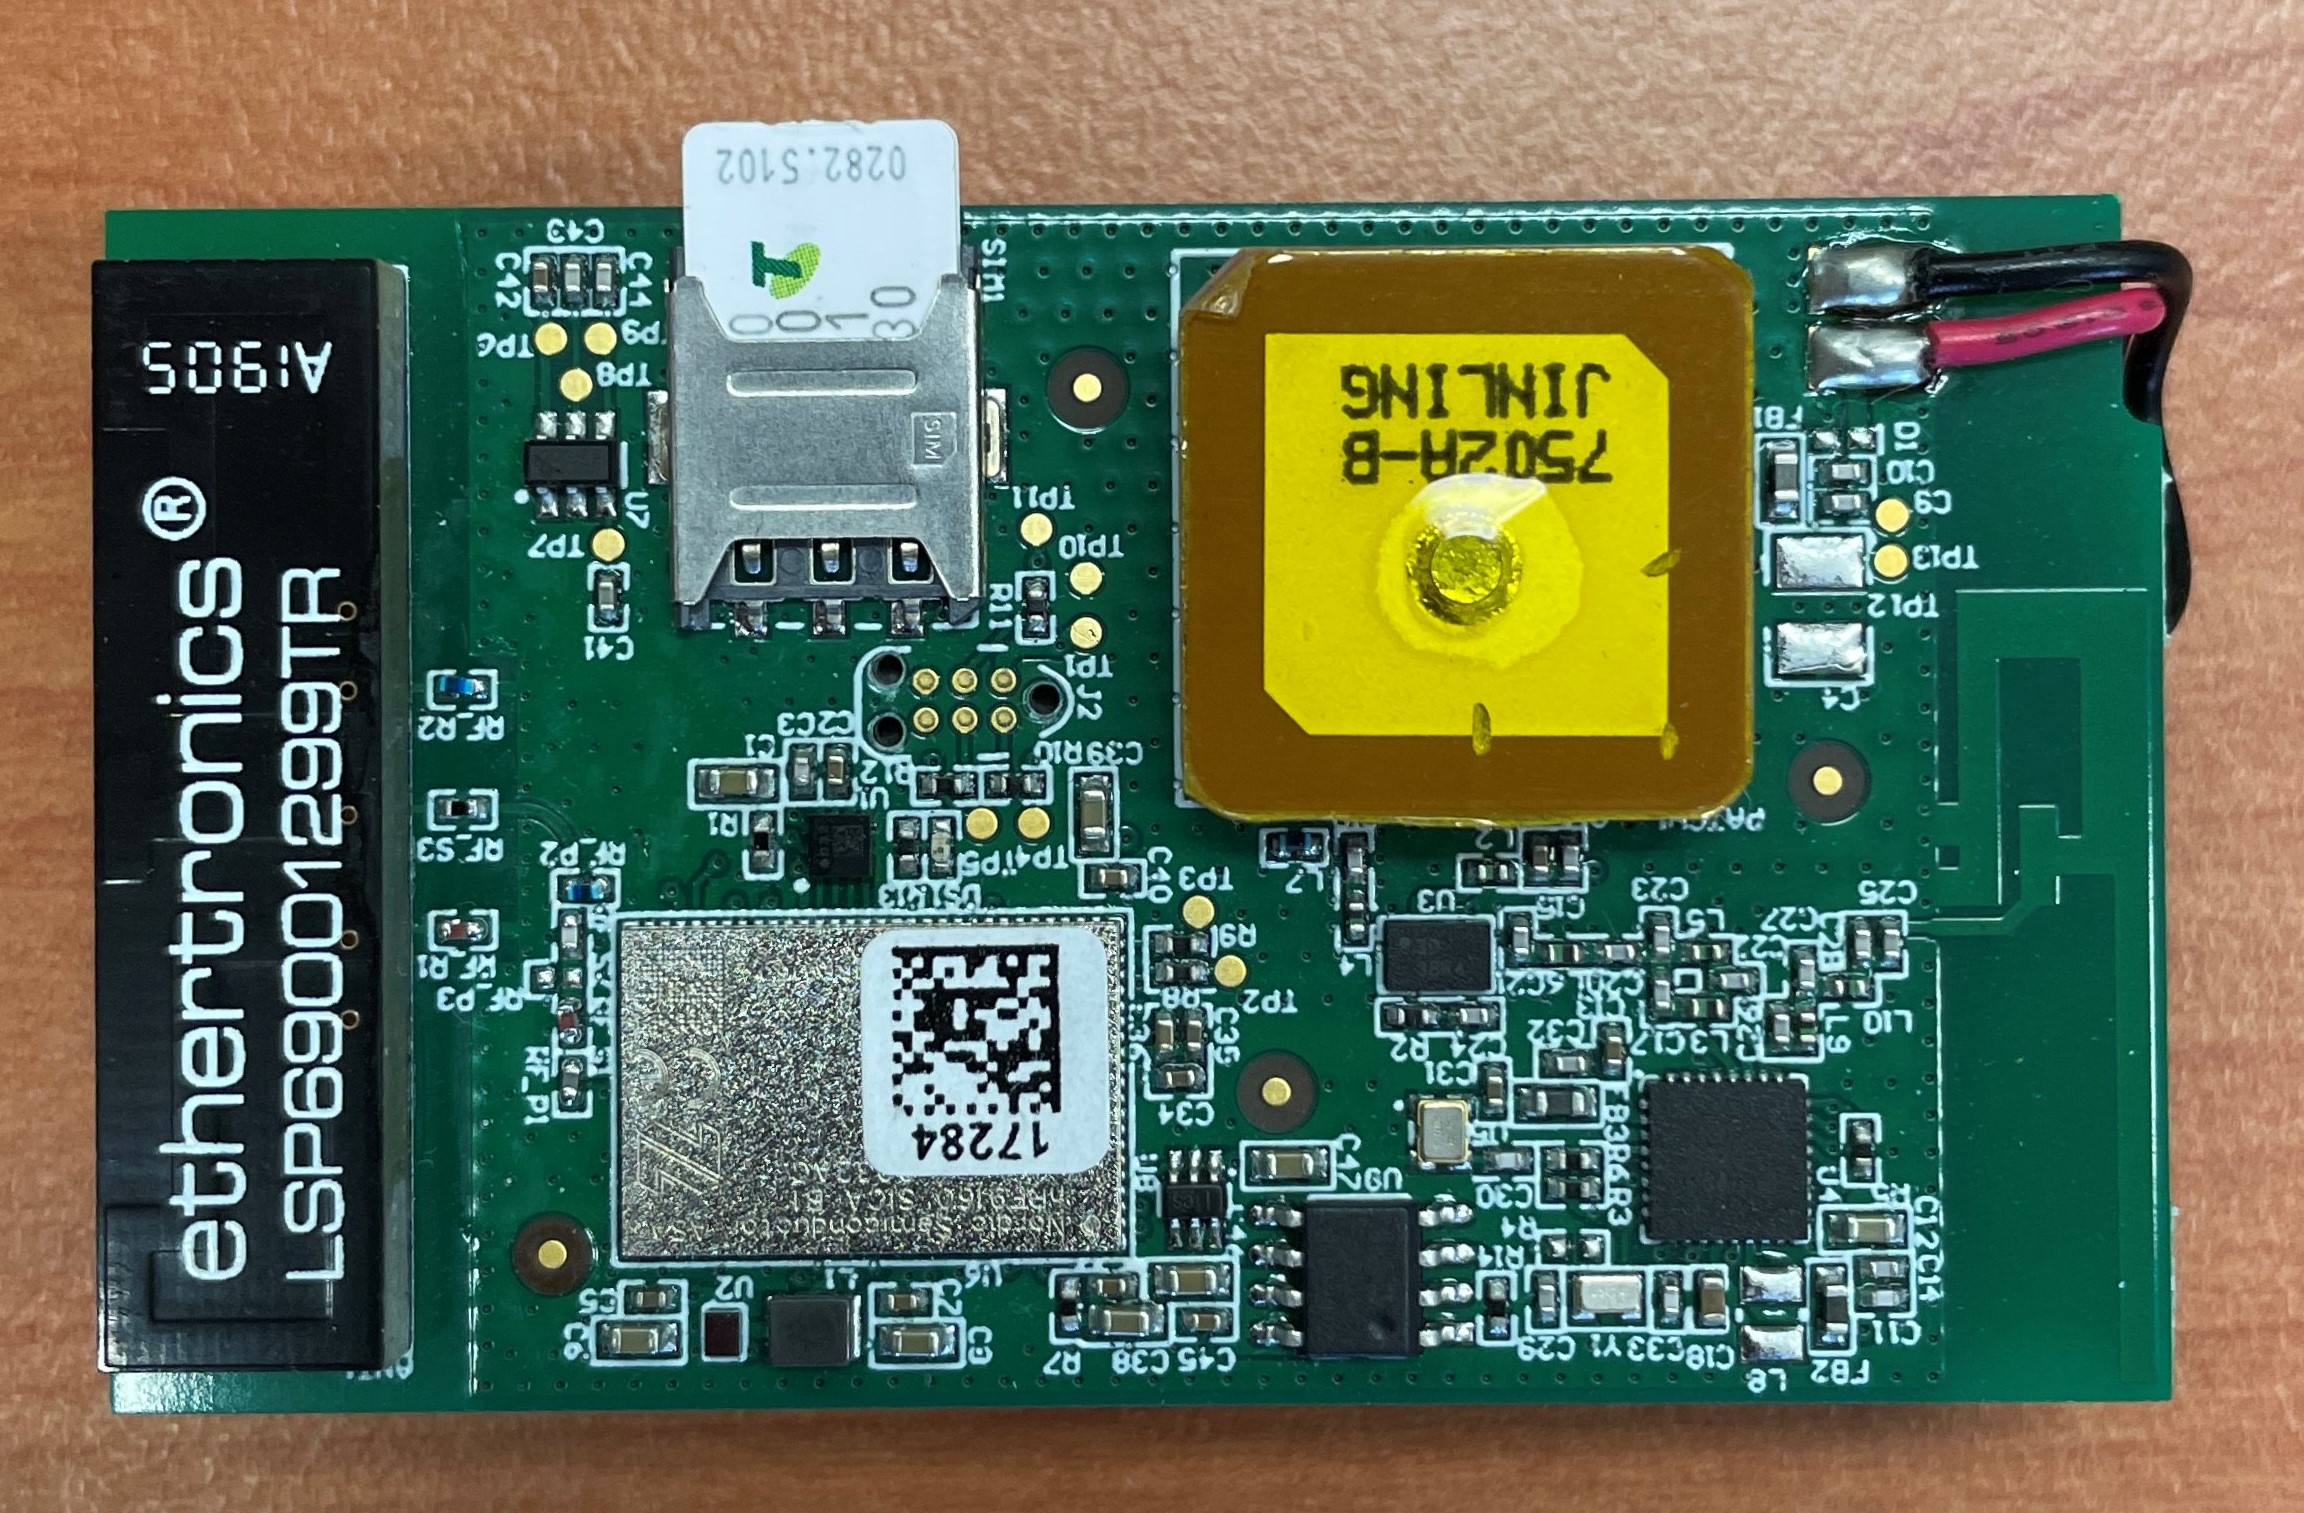
2. Insert SIM Card
The Yabby Edge uses a Nano (4FF) SIM Card.
The device operates on LTE-M or NB-IoT networks, and as such requires a specific SIM card from these networks.
Which SIM card to use?
For information on selecting a SIM card, see SIM Providers: LTE-M/Nb-IoT + Roaming, and Setup
Locate the silver SIM holder on the PCB. There is an image on the SIM holder which shows the SIM orientation
Slide the SIM into the holder with the keyed corner first and the SIM contacts orientated down to the main board
3. Insert Batteries
Battery Selection
The Yabby Edge requires 3 x AAA batteries. Selecting a suitable set of batteries is critical to the overall device performance.
Key Requirements:
- 3-5.5V Input Voltage Range
- LiFeS2 batteries are recommended for optimum performances, specifically Energizer Ultimate Lithium. These batteries
- Have good temperature tolerance (-20° -> +60°C operating range)
- Low rate of self discharge - so long shelf and service life.
- Readily available at supermarkets or hardware stores, and are user replaceable.
- Alkaline batteries can be used - they are often easy to find cheaply and easily off the shelf. However note:
- Lower cost Alkaline batteries often have very high self-discharge rates, and will be partly discharged already just from sitting on the shelf at the store
- Alkaline batteries often don't have the same temperate tolerance as LiFeS2 option
- We have found some Alkaline battery types prone to early, unexpected failure (i.e. halfway through their expected capacity
-
There are exceptions to the above however - high quality Alkaline batteries do exist! Just be careful in your selection
If in doubt, speak to our support team.
Insert the batteries, following the markings on the battery holder indicating the polarity. The springs are the negative terminals.
4. Getting Online
Once the batteries are inserted, the internal LED will come on and flash. The device will do the following:
- Connect to the server: If the SIM card works the device will connect to the OEM Server and attempt to download any firmware and parameter updates then fetch fresh GNSS aiding data.
- A location fix is attempted
- Device scans for GNSS and WiFi signals, and collects raw data.
- The raw data is sent to the Location Engine for processing
- Processed data from Location Engine is sent to various location providers to resolve the raw data into a position
- The resolved position is sent to the end server
- Reconnect to the server: The device will attempt to connect again to upload the result of the location scan.
If the device does not complete these steps in 10 minutes, it will go to sleep and try again on the next heartbeat or the next trip start.
We are online!
Once these steps are completed, if all has gone to plan, we will be able to see the device on the map on our tracking platform.
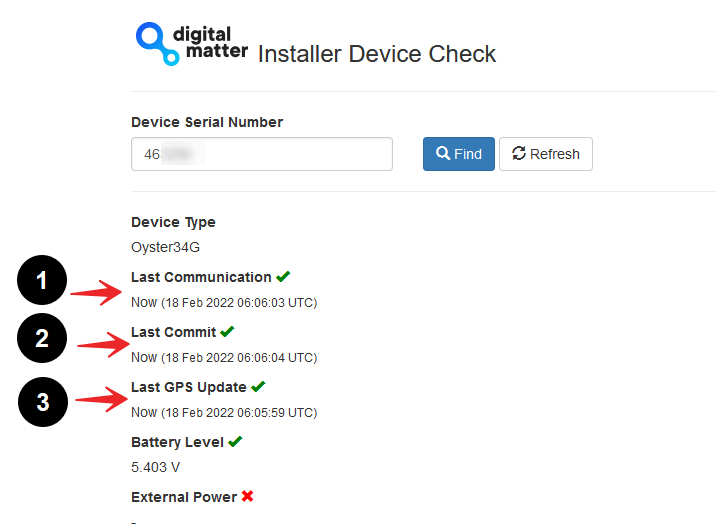
The OEM Installer Page
Some users/installers may not have access to our end tracking platform, so the OEM Installer page can be used. It allows for a quick device check without giving away any sensitive information. It's also a handy tool for those with OEM/TG access
Go to www.oemserver.com/installer and search for the serial number to confirm that it has
- Connected
- Committed
- Obtain a position
Troubleshooting
In the rare event the device does not connect, commit, or get a position. Troubleshooting steps are detailed below.
Device does not connect
- Check the LED is flashing, if the LED is not flashing, either:
- The batteries inserted are dead. Test with a battery tester to check, or try a fresh set
- The device may have an issue, in which case contact DM for RMA information
- The device has not properly reset. Remove batteries for 20 seconds, and reinsert.
- Confirm your SIM card is active
- It is worth trying a SIM card from another connected DM device if possible (as that SIM is proven working)
- Try a fresh set of batteries (they may have enough power to flash the LED but not enough to upload data)
- If it is your first time using a new type of SIM or network, you may need to apply certain network settings with a DMLink Cable.
Device does not Commit
Typically, this is due to the device not yet being configured on the end server. Make sure this has been done.
See Since Committed/Since Connected and Troubleshooting for troubleshooting steps.