Custom Map Overlays in TG
Set up Custom Map Overlays and host these in Telematics Guru

Written by Matthew Clark-Massera
Updated at July 10th, 2025
Table of Contents
Telematics Guru can support Custom Map Overlays.
Map overlays will be displayed on the following views:
- TG Web
- Live View
- Trip History Map View
- Asset Daily Coverage Map
- TG App
- Live View
- Overlays are disabled by default, and must be enabled on the Settings page within the app
Often users such as mine sites wish to be able to overlay aerial images, or more up-to-date maps onto a tracking platform.
Aerial images make locating devices and seeing the actual position relative to site features simple.
Often in newer areas, the Google Maps view will not update quickly enough for requirements so the option to overlay images is a key feature.
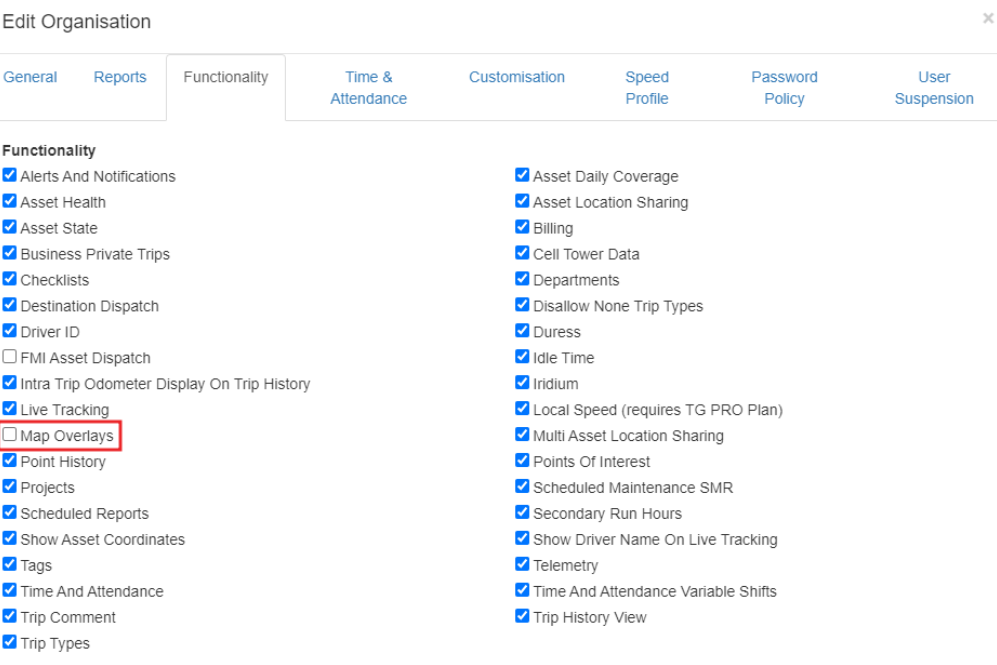
To use this feature, the Map Overlays functionality must be enabled for your organisation.
Config Overview
Tiled Map Format
In order to set up map overlays in Telematics Guru, you must first create your map files in Tiled Map Format.
To create the tiles you can use services such as Maptiler, QGIS or ArcGIS
Be sure to use the Web Mercator projection format.
The tiles are essentially the overlay image at various zoom levels - so when you zoom in/out of the map the overlay will scale accordingly and display correctly.
Maptiler
The following steps relate to Maptiler, which offers a free version suitable for TG overlay purposes.
- Download the desktop app for MapTiler.
- Create a free account.
- Upload the
overlay_map.pngfile in the upload box.
- Select Assign Location Visually (Georeferencer).

- Using ‘Side by Side’ mode, place the corresponding points by clicking on the point on the map and then the same spot on the image. Key reference points such as building corners are great for this.

- Under the Coordinates dropdown at the right, select Web Mercator (EPSG:3857) from the drop down.
- Select “Folder with tiles” as the output format, and confirm Web Mercator is selected.

- On the next page, no changes are required on the Output tile format.
- Tick the Non-commercial use checkbox and continue.
- Create a new folder and save.
- This is now ready for compressing.
Hosting
The Overlay files can be hosted in Telematics Guru.
Telematics Guru will pull the Tile Files from your uploaded folder and overlay them on the map.
Set Up:
To set up a map overlay:
- Go to Admin -> Map Overlays (the user account will need the Map Overlays permission - contact DM if you cannot access map overlays)
- Click New in the top right.
- On the General Tab, the following options are presented; mouse over the tooltip near each option for more information.
- Name
- Default Opacity
- Minimum Zoom (the free version of Maptiler is constrained to 19)
- Maximum Zoom (the free version of Maptiler is constrained to 23)
- Enter the coordindates for the boundaries. These details can found be found in the Maptiler export, in the metadata.json. Open this with a text editor. TG will only accept coordinates up to seven decimal places.
- North Boundary
- South Boundary
- East Boundary
- West Boundary
- Hidden by Default


- On the Upload Tab, select the Maptiler folder. Note the folder must be compressed / zipped.
- Ignore the Legacy Tab, unless you have an existing map overlay, or would intend to host publicly.
Overlays are added to each organisation. If you need the same overlay on multiple organisations, you must create it per organisation.
Troubleshooting
To troubleshoot a Map Overlay not loading
- Check the boundary cardinal points are set correctly and matches those in the metadata.json file.
- Edit the Map Overlay that is having issues and check the export format is correct - Web Mercator (EPSG:3857).
- If no issues are identified on steps 1 and 2, Contact Support.