Panic/Duress Alert on Telematics Guru

Written by Matthew Clark-Massera
Updated at October 17th, 2023
Table of Contents
This article explains how to setup the alert on TG.
Before you Start.
Remember to check that the internal back up battery is plugged in
Make sure the hardware is setup correctly. Please see the Install and Setup a Duress button guide
Simple Alert Steps
Step 1: Setup the IO Mapping
- Go to Assets->Manage Assets
- Click on the asset link to bring up the Edit Asset Dialog
- Go to the IO Mappings tab
- Scroll down to Digital Mappings.
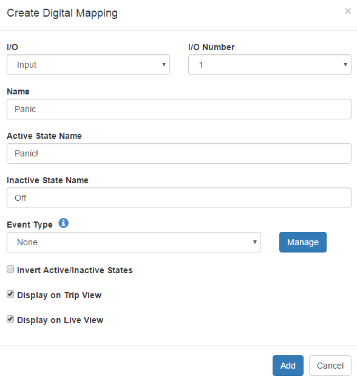
- Click "Add"
- Select I/O as Input.
- Choose the input number. If using the Dart, the pink wire is Digital Input #1
- Enter a name, like Panic
- Enter the Active and Inactive State Names. For example, "Panic!" and "Off".
- See below for Event Type selection.
- Leave invert unticked. Decide whether to display this on the live view.
- Click Add.
- Click Save
Step 2: Add the Alert
- Go to Admin -> Alerts
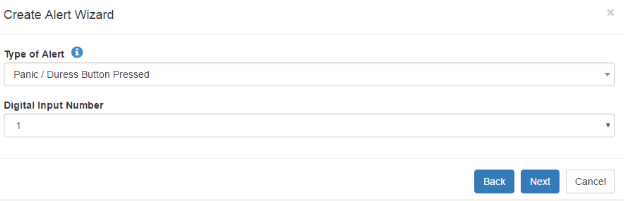
- Click New Alert Wizard
- Select type "Panic / Duress Button Pressed"
- Choose the input number you setup in step 1, usually input 1.
- Click next
- Select the assets you wish to apply the alert to. Click next
- Choose the addresses you wish to send the alert to. These are setup in the Admin -> Address Book. Click next
- Give the alert a useful name.
- Click save.
- If you want to do anything more advanced to the alert, click edit for that alert.
Step 3: Test!
Be sure to test this thoroughly!
Optional steps for the Special Duress Condition
The duress events allow the live screen to play a sound and notify users of a duress condition. This is only available on the live tracking screen, not elsewhere.
Step 1: Add the Duress Event
- Go to Admin -> Event Types
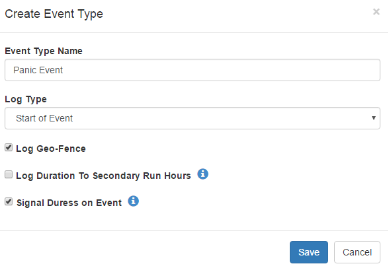
- Click New
- Add a name, such as "Panic"
- Choose No Logging, or Start of Event if you wish to report on the events later.
- Tick "Signal Duress on Event".
- Other tick box options are not necessary.
- Click save.
Step 2: Link the Duress Event to the IO
- Go to Assets->Manage Assets
- Click on the asset link to bring up the Edit Asset Dialog
- Go to the IO Mappings tab
- Scroll down to Digital Mappings.
- Find the Panic IO that was setup above.
- Under Event Type, choose your Duress event.
- Click Save
Step 3: Test!
- Test the panic button
- Ensure that the notification comes through to the Live screen. It will appear in the Inbox() section below. It will also play a sound.
Closing the Alert
When you attempt to clear the alert, a pop-up will appear confirming whether you want to add a note before closing the alert. This can be useful for ensuring the duress was not closed without being properly acknowledged, and that action was taken upon receiving the alert.
To view this note, you can go to Customs Events - Detail Report and add the column for Events Text under Advanced Options → Customise Report to view the note added for closing each duress event.
See Customize Reports for more information.