Teltonika Device Setup
Table of Contents
Telematics Guru supports reading data from Teltonika Devices
- Codes 8, 8E and 16 are supported, check with Teltonika which code your specific device uses
- Not all device types are tested. Test thoroughly before committing to a large deployment. The below device types have been reported working by our partners:
- FM1120
- FMC130
- FMC125
- FMB920
- Not all data fields are integrated
Configuration
In order to use a Teltonika device with Telematics Guru the following settings have to be adhered to.
- Record order has to be "oldest first".
- All records need to be set to "Low" priority. High priority records are ignored to avoid sequence number corruption.
- Data protocol should be TCP/IP. Not UDP.
- See the table below for URL and port details.
Ignition and trips are triggered on Input 1.
The following optional analogue values can be mapped, depending on device type.
For CAN values, it is also dependent on whether the particular Teltonika device used will be able to read them from a specific vehicle make/model.
URL and Port details
Devices should send their data to this location:
<device-region>.telematics.guru:8982| Region | Device URL |
|---|---|
| APAC01 | device-apac01.telematics.guru:8982 |
| APAC02 | device-apac02.telematics.guru:8982 |
| APAC03 | device-apac03.telematics.guru:8982 |
| APAC04 | device-apac04.telematics.guru:8982 |
| EMEA01 | device-emea01.telematics.guru:8982 |
| EMEA02 | device-emea02.telematics.guru:8982 |
| EMEA03 | device-emea03.telematics.guru:8982 |
| AMER01 | device-amer01.telematics.guru:8982 |
Based on which regional server your partner account is hosted you will need to use the related URL.
Avoid using the IP address if possible.
Adding the Device to Telematics Guru
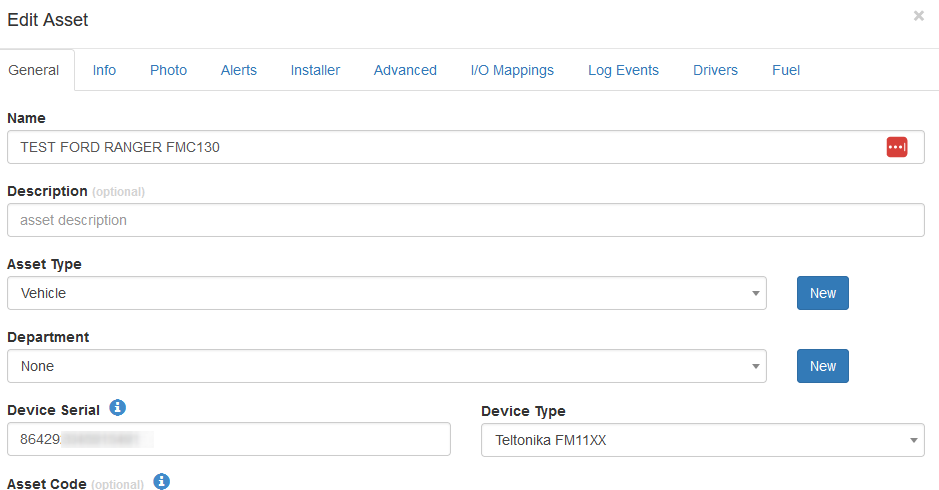
Use the IMEI as the device serial, and set the Device Type to Teltonika FM11XX.
If this device type does not appear, you may need to edit your Custom Device Names and enable this device type.

Custom I/O Configuration
Telematics Guru allows you to customise the mapping of Teltonika AVL IDs to certain digital inputs or analogue inputs. This allows for flexibility in your configuration of your assets, in that you can have almost any Teltonika AVL data appear on Telematics Guru (AVL data compatibility dependent).
Check Teltonika documentation for full detail on various data fields.
In order to use custom configurations, you must first go to Assets → Teltonika Assets:

If you cannot see this, make sure to Edit your Organisation and add the Teltonika Integration functionality.

This will bring you to a page wherein you can manage the configurations assigned to Teltonika assets.

Creating a New Configuration
To create a new custom configuration for your Teltonika assets, you will need to go to Manage Configurations on the Teltonika Assets page:

From here, you will be able to create a new configuration:

The create configuration menu allows you to select which AVL IDs you would like to have mapped to certain analogues:

Assigning a Configuration
After you have created your desired custom configurations, you can simply assign them by returning to the Teltonika assets page and selecting your asset(s) and selecting Assign Configuration:

By default, the Teltonika default configuration will be assigned, which is described in the following section of this article.
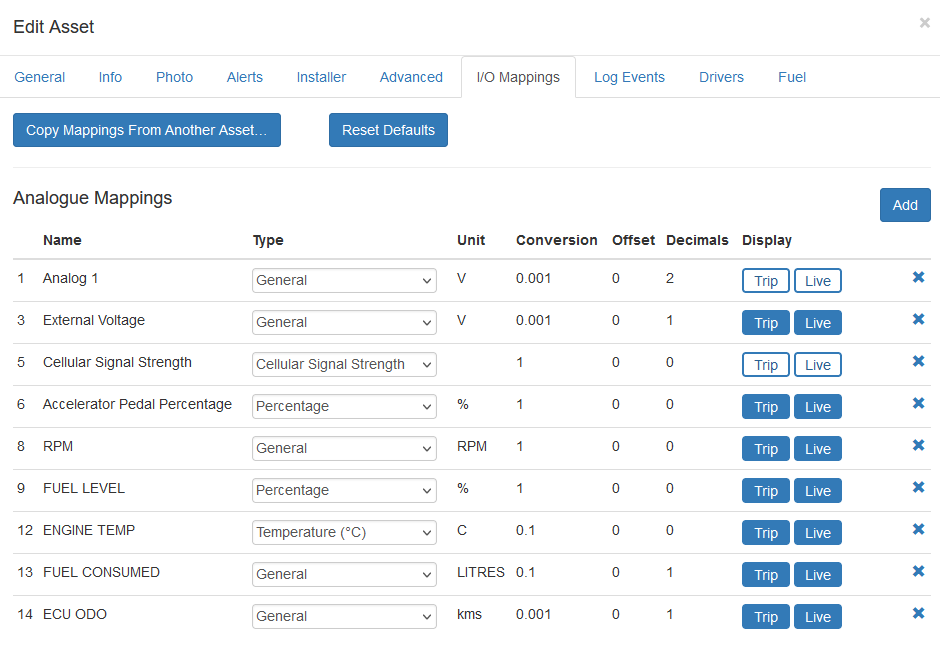
Please ensure that you set your I/O mappings on the necessary assets after these configurations are assigned, as this determines whether the newly assigned I/Os can be used for alerting:
You can bulk assign these I/O mappings to assets by using Set I/O mappings:

To track Odometer and Run Hours, the Input 1 Bit needs to be set to 0, as below.

Default Data Fields
The below fields are the Teltonika AVL IDs that are by default mapped to the mentioned analogues and digital inputs.
| Teltonika Description |
Teltonika Mapping / Property ID in AVL Packet |
Default TG Field/ TG Analog # |
| AVL Record Date | AVL Record Date | Date Time UTC |
| Altitude | GPS Element | Altitude |
| Satellites ≥ 3 | GPS Element | GPS Fix OK |
| Satellites ≥ 3 and Altitude > 0 | GPS Element | GPS Fix 3D |
| Speed | GPS Element | Speed km/h |
| Heading | GPS Element | Heading Degrees |
| Latitude | GPS Element | Latitude |
| Longitude | GPS Element | Longitude |
| PDOP | 181 | PDOP |
| Analog 1 | 9 | 1 * |
| Battery Voltage | 67 | 2 |
| External Voltage | 66 | 3 * |
| Dallas Temperature 1 | 72 | 4 |
| GSM Signal Strength | 21 | 5 * |
| BLE Temp 1 | 25 | 6 |
| BLE Temp 2 | 26 | 7 |
| LVCAN Engine RPM | 85 | 8 |
| LVCan fuel level, else LVCan fuel percentage, else BLE fuel level 1, in that order of mapping priority. | 84, 89 or 270 | 9 |
| Dallas Temperature 2 | 73 | 10 |
| LVC Engine Load Percentage | 114 | 11 |
| LVC Engine Temperature | 115 | 12 |
| 83 - Fuel Consumed or 107 - Fuel Consumed (counted) Whichever of the 2 is returned is mapped to A13 |
83 or 107 | 13 |
| Total Mileage | 87 | 14 |
| Run Hours | 102 | 15 |
| Dallas Temperature 3 | 74 | 16 |
| Dallas Temperature 4 | 75 | 17 |
| BLE Fuel Level Reading 2 | 273 | 18 |
| I-Button | 78 | Driver ID |
(Note: * Asset Mapping done by Default)
Ensure to configure the I/O mappings relevant to your specific device and/or vehicle make/model.

Digital Inputs
| Teltonika Input Name | Property ID in AVL Packet | Default Bit # |
| Ignition | 239 | 0 |
| Input 1 | 1 | 1 * |
| Input 2 | 2 | 2 * |
| Input 3 | 3 | 3 * |
| Immobiliser | 248 | 4 |
| Authorized Driving | 252 | 5 |
| 0 - None, 1 - LVCAN Fuel Level, 2 - LVCAN Fuel Percentage, 3 - Escort LLS Fuel Level 1 | 0, 1, 2 or 3 under Fuel Reading Type 1 and 2 Mappings | 8 |
| 9 | ||
| Movement Sensor | 240 | 25 |
| GPS Power | 69 | 26 * |
| Deep Sleep | 200 | 27 * |
(Note: Mapped by Default → *)
Outputs
| Teltonika Output Name | Bit # |
| Output 1 | 0 |
| Output 2 | 1 |
