Forward LoRaWAN (non-Edge) device data to Telematics Guru via TTN (v3)

Written by Matthew Clark-Massera
Updated at October 10th, 2024
Table of Contents
This guide covers how to configure TTN to forward Digital Matter LoRaWAN® device data to Telematics Guru.
NB: For DM 'Edge' devices like the Yabby Edge, there is a different process - see Setting up a Yabby Edge LoRaWAN Device via TTN (v3)
1. Add an HTTP Integration to Telematics Guru
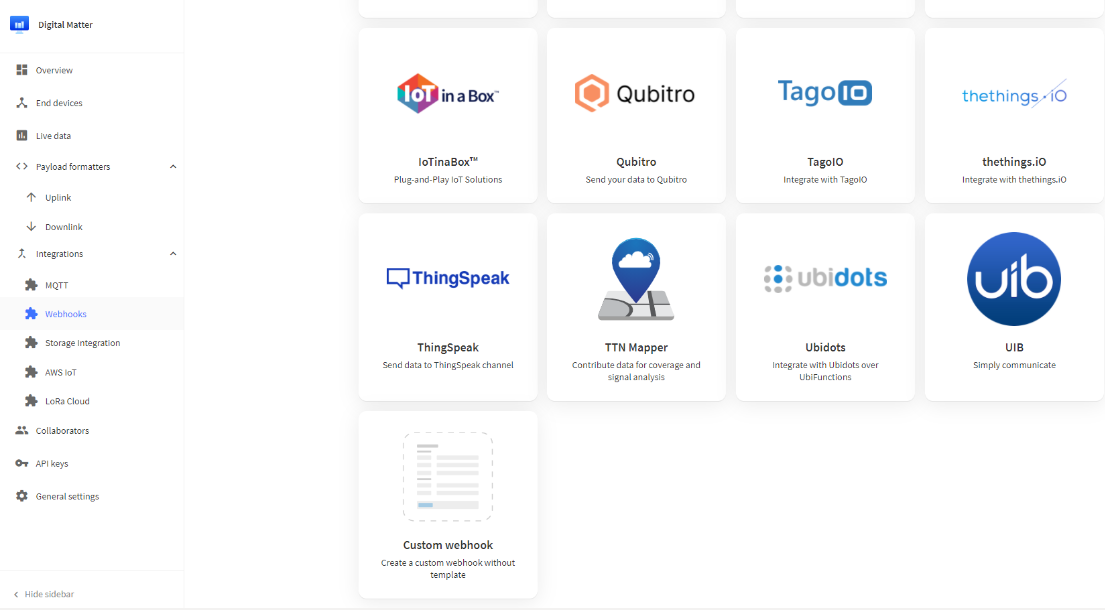
Select your application, then click Integrations, then Webhooks and Add webhook. Select Custom webhook:
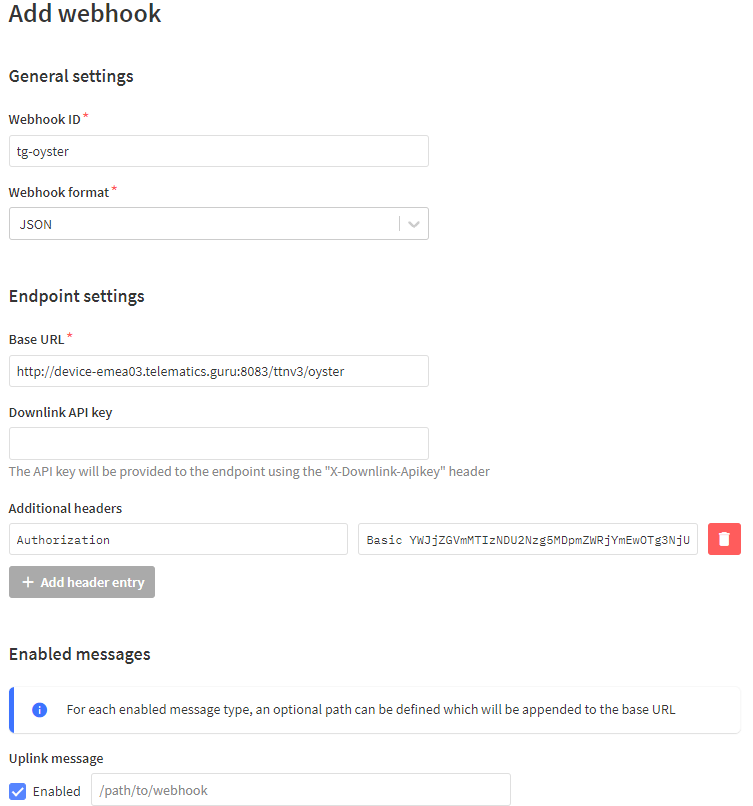
On the Custom webhook setup page, enter a Webhook ID and set the Webhook format to JSON. Enter the Base URL which is the Telematics Guru endpoint.
You will need to contact support@digitalmatter.com to obtain an authorization header for your existing Telematics Guru account.
Let's consider the webhook URL for the Oyster LoRaWAN, the URL would be:
http://<device-region>.telematics.guru:8083/ttnv3/oyster3
The device region in the URL is important to target the correct regional instance of Telematics Guru as well as the device type. Refer to this article for an explanation of the regions and the device specific URLs. A short summary, using an oyster device is:
Based on which regional server your partner account is hosted, you will need to use the related URL. If you are unsure of which server you are on, you can head to your TG login screen and it will be shown.
 The end of the URL dictates which device type. You will need to input oyster, yabby, guppy, or g62 depending on device type.
E.g. Yabby using the AMER01 server = http://device-amer01.telematics.guru:8083/ttnv3/yabby
The Authorization Header value should be set using a special username and password obtained from Telematics Guru. TG support will provide these details. The username and password should be combined in the format username:password, and then base64 encoded. For example: abcdef1234567890:fedcba0987654321abcdef1234567890 (username:password) base64 encodes to YWJjZGVmMTIzNDU2Nzg5MDpmZWRjYmEwOTg3NjU0MzIxYWJjZGVmMTIzNDU2Nzg5MA== and should be used in the Authorization Header value as:
Basic YWJjZGVmMTIzNDU2Nzg5MDpmZWRjYmEwOTg3NjU0MzIxYWJjZGVmMTIzNDU2Nzg5MA==The Downlink API key can be left blank. Finally, ensure the Uplink message box is checked, as this will forward all device uplink data to Telematics Guru. Select Add webhook to complete the configuration.
Once the integration is set up, your application will forward all of its decrypted data to Telematics Guru. If you create an asset in Telematics Guru that corresponds to one of your Oysters, it will be updated with the Oyster's position. Telematics Guru also allows you to generate configuration (downlink) messages to your Oyster, so that you can reconfigure it without using a configuration cable. Use Telematics Guru to Generate LoRaWAN® Downlinks
2. Create an asset on Telematics Guru
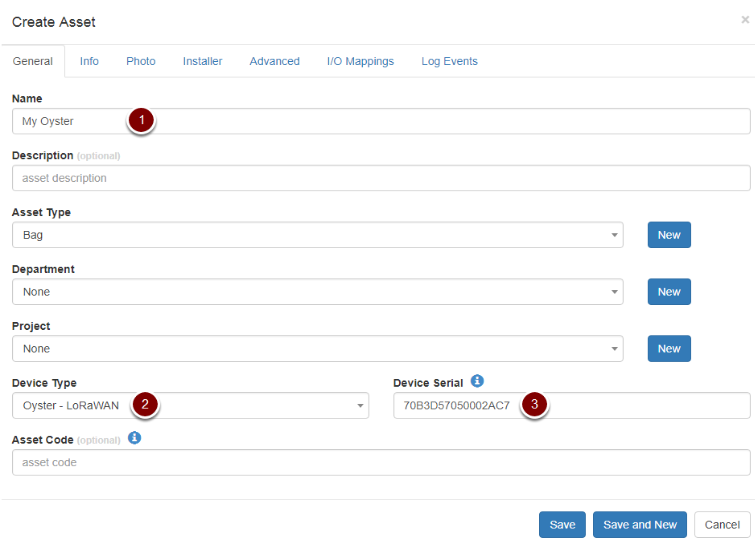
Log in to your Telematics Guru account, navigate to the Assets page, and click Create New Asset:

Now choose a name, select the correct Device Type, enter the DevEUI in the Device Serial field, and click Save:
If all of the previous steps have been followed correctly, new data points should start populating the Telemetry and IO Telemetry pages as soon as the Oyster gets its first GPS fix. The Oyster's location should also start updating on the live tracking page.