Forward Edge Device Data to my Endpoint (Cellular)

Written by Matthew Clark-Massera
Updated at May 3rd, 2024
Table of Contents
This article shows the steps to configure enriched 'Edge' device data (i.e. Yabby Edge Cellular) to be sent to your endpoint - via the Location Engine. Contact our support team for payload documentation. The only available format is HTTP JSON (no TCP option)
Edge devices 'scan' for GNSS, WiFi, and Cell tower information. This raw data is sent to the Location Engine, which performs a large number of functions to resolve the position. This data is then forwarded to the endpoint (i.e. your server).
This results in exceptionally long battery life - and the multiple positioning methods allow for locations to be obtained when GNSS is unavailable (i.e. indoors).
TABLE OF CONTENTS
- Location Engine Architecture
- 1. Set up a Forwarder
- 2. Set up a Connector
- 3. Set the Connector on your devices
- 4. 'Splitter' Forwarder - Send data to 2 Endpoints.
- Batch Mode
- Troubleshooting Forwarders
Location Engine Architecture
For an overview of the Location Engine - see The Location Engine - Key Concepts
Diagram of the moving parts:

To pass data onto the server, we must set up the Forwarder and Connector from within the OEM Server interface.
1. Set up a Forwarder
A 'forwarder' determines where the Location Engine should 'forward' data to. So this is where we enter our endpoint.
- Click on the Forwarder tab in On Device Manager.
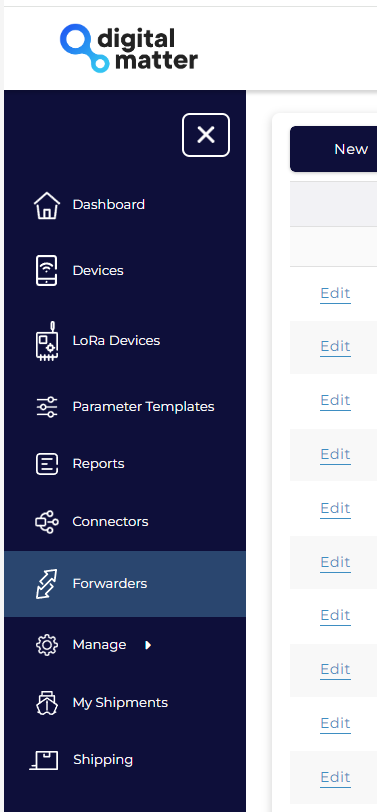
Your account will need the Forwarder Manager permission. If you cannot see this menu, contact our support team to have this enabled.
- Enter forwarder details
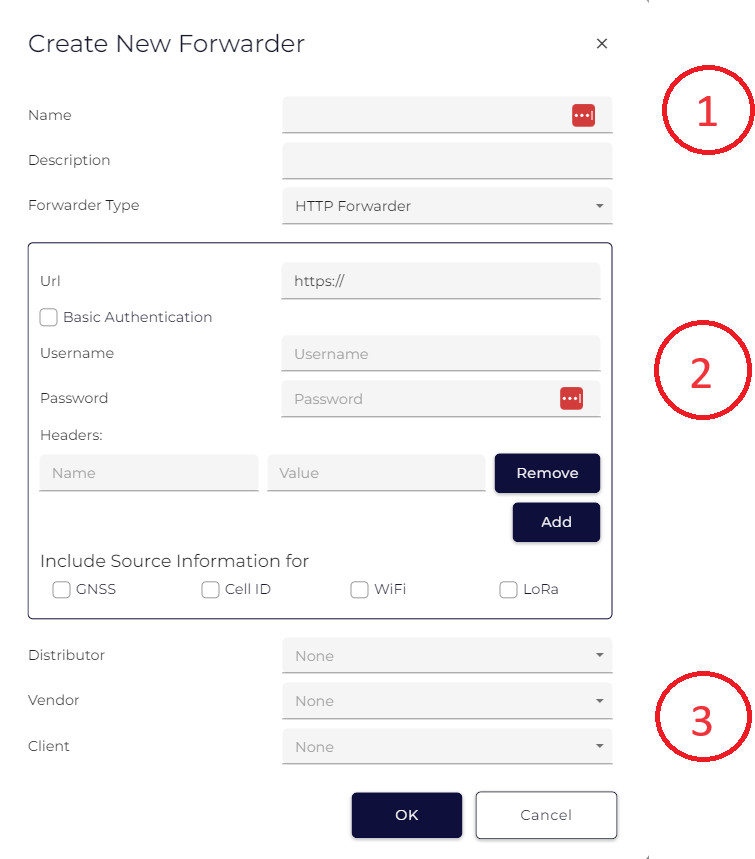
- Name - any meaningful name
- Description - any useful description
- Type - HTTP is the only type currently
- URL - your URL
- Options in Section 1 are required, Section 2 lets you configure headers to send as part of the HTTP Post.
- You will also need to set a Distributor, Vendor, and Client Group in Section 3
-
Selecting the 'Include Source Information' checkboxes within the 'Create New Forwarder' interface allows you to append additional data types to the primary location information being sent to your endpoint. When the 'Include Source Information' checkboxes are selected in the forwarder settings, the selected types of data are sent to the third-party server specified by the user, as well as to the location engine. This allows the customer to directly receive raw GNSS data, WiFi access points, cellular IDs, or LoRaWAN gateway information along with the standard location data for their own use or analysis.
The inclusion of source data enhances troubleshooting and provides essential information for tracking, particularly in theft scenarios or when facing location accuracy challenges.
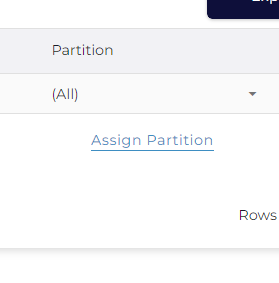
- Once complete, you will be taken to your list of forwarders. On the right-hand side of the page, click Assign Partition.
Each Forwarder is a separate queue - which keeps all messages separate - to ensure if one endpoint is unavailable other devices are unaffected. There is a charge per forwarder.
2. Set up a Connector
Connectors are used as they are consistent with other device types. More detail on creating connectors here: Create a Connector. For the Location Engine, we set up as follows:
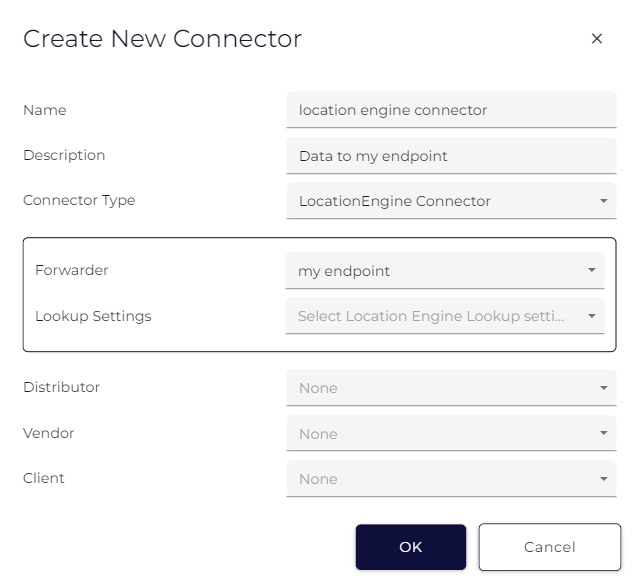
- Go to the Connectors tab - your account will need the Connection Manage permission - if you can't see the menu, contact support.
- Create a new Connector:
- Provide a useful name and description
- Location Engine Connector Type
- Select the forwarder that you created previously
- Select lookup settings Default Lookups. These settings use the following services in order
- GNSS Lookups (LE-GNSS)
- Google Wi-Fi Lookups (LE-WIFI-PREMIUM)
- LE-CELL-PRO cell fallback
The above settings should work for the majority of applications. To adjust - contact DM support and we can create a new set of Lookup Settings. There are other options available at different price points per Lookup - but the accuracy varies.
- Set your DVC Group.
3. Set the Connector on your devices
See link - Set the Connector
4. 'Splitter' Forwarder - Send data to 2 Endpoints.
For the traditional GPS devices, if the data needs to be sent to multiple endpoints, a Multi-Connector is set to the device. Logically, the same can be done for the Edge devices. However, the setup is slightly different. An HTTP JSON payload will be sent to both endpoints.
- Create 2 individual forwarders (for each endpoint)
- Go to the Forwarders tab in Device Manager
- Create two different forwarders as per the steps above. if you are using Telematics Guru as one endpoint, then you only need to create one forwarder. TG forwarder is already created by DM.
- Create the splitter forwarder
- Create a new forwarder as usual, but select Splitter Forwarder as the type.
- Assign your previously created forwarders as Forwarder1 and Forwarder 2.
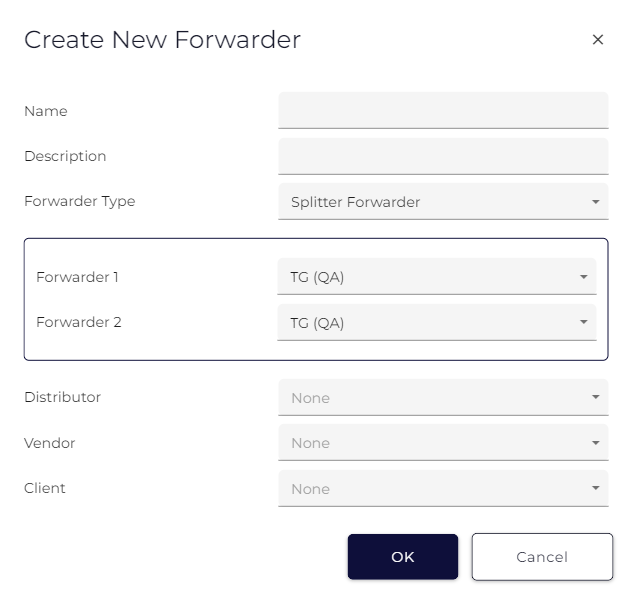
- Create a connector
- Create a LE Connector - and set your forwarder as the Splitter Forwarder just created.
- Create a LE Connector - and set your forwarder as the Splitter Forwarder just created.
- Set the Connector on your device.
Batch Mode
Batch Mode is a feature that allows for multiple records to be uploaded in a single HTTP call. Doing this allows the messages to be sent with less overall latency and higher throughput. When this is enabled, you will receive an array of messages. The number of messages sent in a single batch is variable and could be a single message as it depends on the rate that they are received. The messages are sent in the order that they are received so would usually come from multiple different devices. It is recommended to acknowledge the HTTP request with a 200 even if the device is not currently configured in your system.
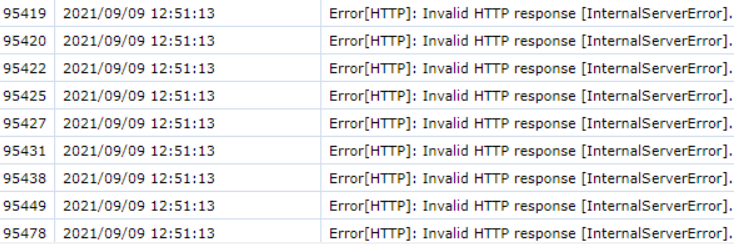
Troubleshooting Forwarders
Similar to viewing server logs, we can check the forwarder logs to identify the issues in receiving the data from the Location Engine to the end platform. Please note that forwarder logs can only be seen if data capture is on in order to view the forwarder logs. Please see here on how to turn on data capture.
To view the forwarder logs :
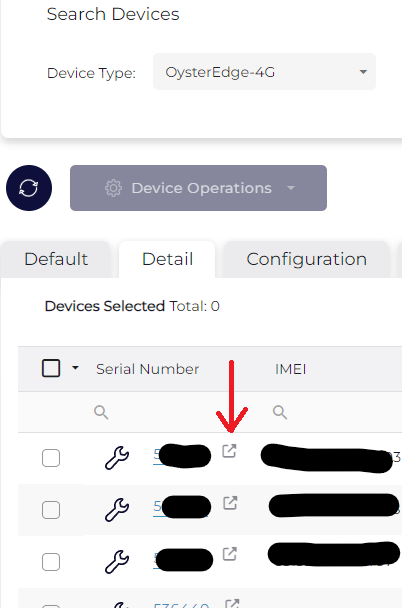
- Click on the device details button pointed out by the red arrow of the selected device. This will take you to the device details page.
- From the details page, select the "Forwarder Logs" option on the top bar

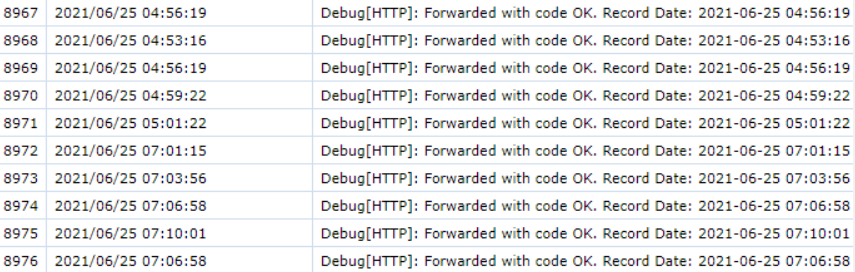
Once in the forwarder logs option, you can set the data and time range from which you want to see the forwarder logs.
The "now" option lets you see the logs from a past date to the current time.

Examples of how the forwarder logs will look are shown below. This means that the forwarder was able to successfully send data from the location engine to the end platform.
NB: Only errors are shown in the forwarder logs unless Data Capturing is turned on, in which case all logs will be kept (like the image below)
An example of a failed connection between the forwarder and the end platform could be as shown below..