Checklists in Telematics Guru
Table of Contents
The Telematics Guru App supports completing checklists. The app and TG system can be used to easily collect, store and review checklist data - replacing paper checklists. This saves effort and resources in collecting and filing paper checklists - a huge task for many businesses!
If you have not used the checklist functionality before, you might not be able to see some of the menus/options in this article. If so, please contact support and we can enable it for you.
Use Cases:
There are some obvious, and less obvious applications for this feature. This was originally designed with pre-start checks in mind, but if we think of this functionality as a generic 'data capturing' app - it can open up new possibilities.
Some interesting (and less interesting - but still extremely valuable!) applications we have seen:
- Pre-start checks
- checking tyre pressure, fuel, oil levels etc before driving a vehicle for the day
- On hire/off hire
- checking and logging any maintenance required, or damage as equipment is hired/returned from hire.
- Photos can be taken of panels to show damage present before a car is hired etc, all logged directly to TG
- Time and Attendance
- handle employee time sheets and logging on/off work, all through the app
- Run reports on which projects were worked on by employees in order to bill customers for work done
Requirements:
Download the App
Available on Android or iOs
- Android - Play Store Download - checklists require 1.9.3 and above
- iOS - App Store Download - checklists require 1.9.3 and above
White label apps are available, which is a custom version of the app with the partner's own logo, branding, and colour scheme. See Telematics Guru White Labelling. White labelling is a great differentiator and keeps your branding and messaging consistent.
Enable Checklists for your Organisation (or a customers organisation)
In order to assign these permissions, your account must have access. If you cannot see any of these options, contact support to have Checklists enabled for your account.
To enable checklists for any organisation:
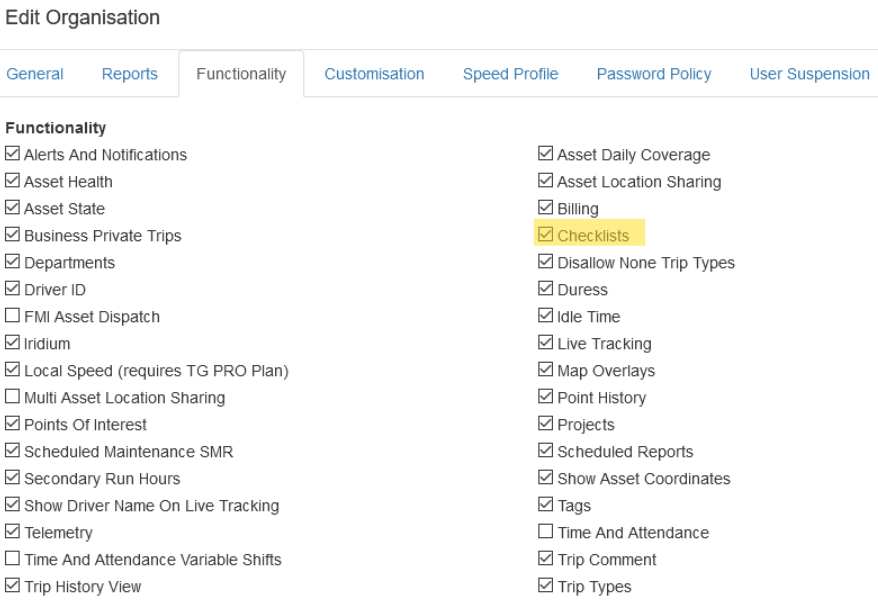
Add the Checklist Functionality to the organisation
Admin >> Organisation Manage >> Organisations.
Select your org and add the checklist functionality.
Add any required checklist reports to the organisation
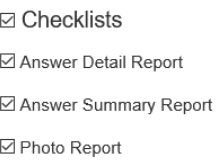
Switch to the Reports tab on the Edit Organisation dialogue and add the Checklist reports. These reports need to be added to the organisation before they can be assigned to users within that organisation.
Enable Checklists for any required user accounts.
Charges Apply!
Note that there is a charge per checklist-enabled user. If a user account has a checklist permission enabled at any time during the month, even if it is disabled again, at the end of that month a fee will be charged. See TG - Asset Billing, Admin and Billing Reports. To see a list of all user accounts being billed for (so you can on-bill customers), run the Partner Billing User Report from the Partner home organisation
Permissions for checklists are below - hover over any for a description.

Most staff completing checklists will need the Complete Checklists and View Checklists permissions.
Managers needing to review the answers and create checklists generally need all Checklist permissions.
Additionally, add the relevant checklist reports to the user account on the Reports tab.
About Checklists
Checklist Questions
Checklists comprise of a series of different questions presented to the app user. Question types are (with examples):
-
Yes/No
- Are you fit for work? Yes/No
-
Number (input a number as the answer)
- What is the odo reading of the vehicle?
- What is the current tyre pressure?
-
Text (Input up to 200 characters)
- Describe any damage you see
-
Photo - take a picture of something
- Take a picture of a run sheet or take a picture of some damage
- Take a photo of how you have secured the load
- Take a photo of the package as proof of delivery
-
Select from a list of options
- What type of job are you doing?
- Informational (no question - just if you want to display some instructions/info as part of the process)
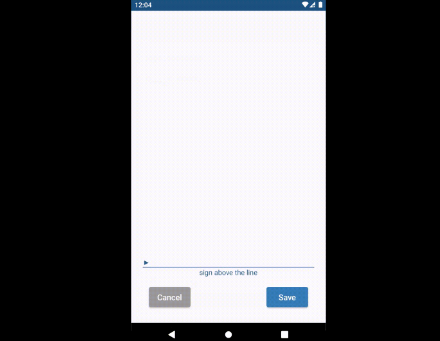
- Signature - so a user can sign to authorise something
- Log On/Log Off - for use with Time and Attendance
-
Date
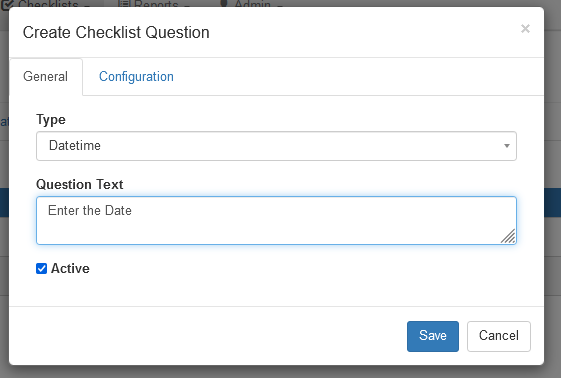
- By default, the submission time of the checklist is captured (when the user completes and hits submit). This question allows another date to be captured if a user is capturing a log of something that happened on a previous date.
Severity Levels
There are 'severity' levels based on answers.
- Attention
- Severe
- Critical
The severity level is used to flag certain answers - either for later review, or to provide immediate notifications to managers.
The Attention and Severe levels serve to categorise different answers - i.e. the tyres might need attention, or there is a severe issue.
If a question is answered with Criticalseverity - the checklist will immediately be stopped, and the users shown the Critical Message (i.e. stop and contact your supervisor immediately). In the context of a pre-start check, a critical answer is something that if answered in this way means we should immediately stop work and resolve the issue. e.g. "Are you wearing your seatbelt?" = No, when operating a vehicle means we should stop there and then.
Reviewing Checklists
Checklists may be reviewed by managers in the Telematics Guru Interface.
Offline Capability
There are scenarios where a user might need to complete a checklist while outside of mobile coverage. So this is catered for. No special setup is required, the device will handle this on its own as you go in/out of coverage. To summarise:
-
Requires Network Connectivity
- Downloading the app
- Downloading checklists to the device and storing them
- Changes to checklists + questions
- Uploading completed checklists
- Viewing Previous Checklist answers
- Viewing Linked documents
-
Can be done offline
- Completing checklists
So when a user logs in, all checklist for which they are allocated are downloaded to the device. Should they go out of coverage, they will still be able to complete these checklists, and the data is stored on the mobile device. When they return to coverage the data will be uploaded, and synced up.
If while out of coverage, a manager changes the checklist questions, this change will not make it through to the user and they will continue filling out the 'old' checklist until they return to coverage.
Creating a Checklist
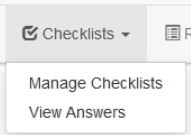
To create a checklist, select Checklists -> Manage Checklists, then Create New Checklist
You will be asked to fill in the following:
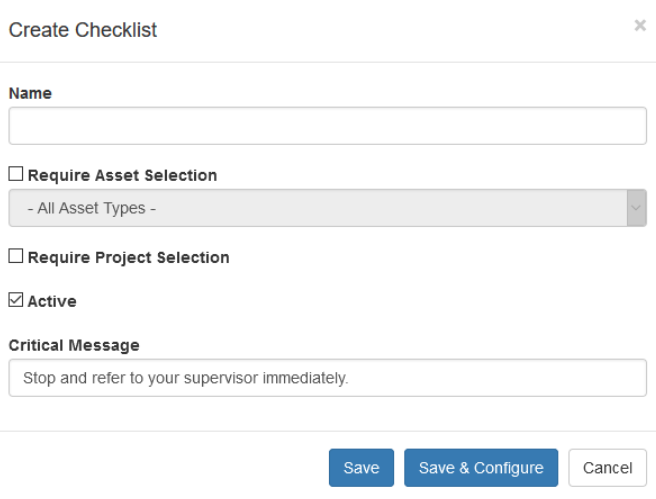
- Name: Give the checklist a name
- Require Asset/Project Selection - e.g. the checklist might apply to an excavator, before it is used. If we don't have projects enabled for the organisation the project option won't be available.
- Active - Checklists can be marked inactive when no longer used.
- Critical Message - this message is shown to the user if they answer any questions with a "Critical" answer. For example "Are there powerlines overhead?" = Yes - may mean we want to have the user stop immediately.
Once the details are entered we can hit Save & Configure to start configuring the questions.
Question Set Up
We can click the Add Question button to add a question.
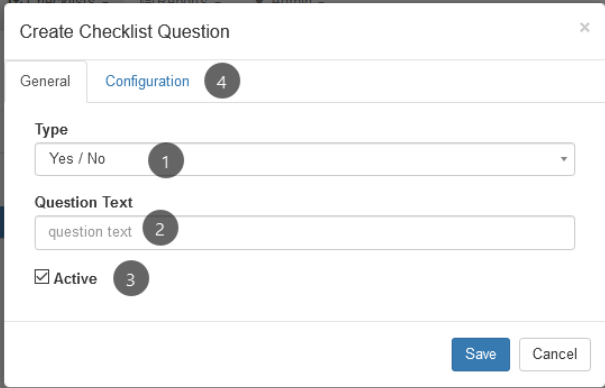
- Type - Select from the question types described earlier
- Question Text - this is what the actual question is e.g. "Are you fit for work?"
- Active - We can uncheck this to remove/'delete' and unused question
- Configuration - Further question configuration - which is specific to the type, continued below.
Yes/No Configuration
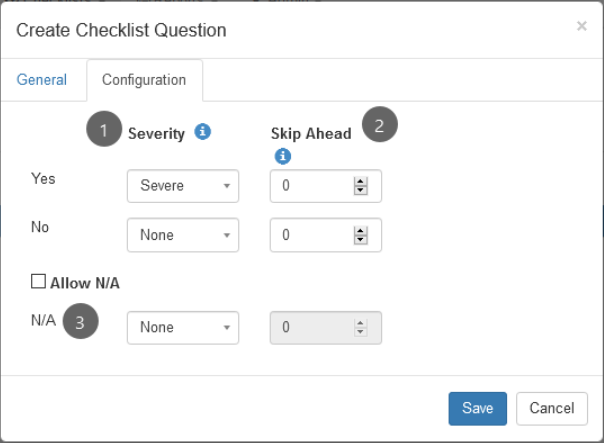
-
Severity
i.e. in the above if the question is answered "Yes" - it will be flagged as severe - and potentially trigger notifications if we set this up. -
Skip Ahead
This gives us the option to skip following questions. For example, a question might be - "Do you have any passengers?" - Y/N - if we answer Yes, we continue to the next question that might be "How many?" or "What are their names?". But if we answer No - we can skip these. -
Allow N/A
Whether N/A is a valid answer - severity and skips apply as before if enabled.
Informational Configuration
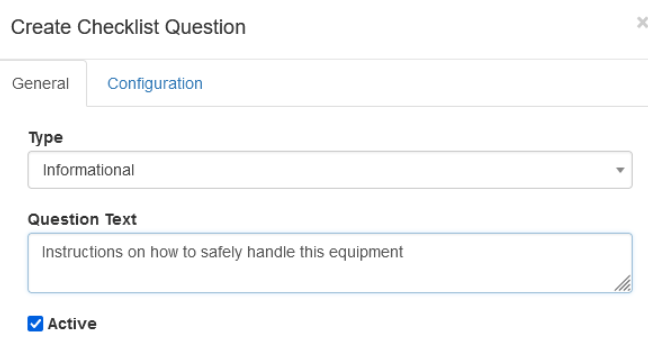
The Informational 'question' type does not require an answer. Instead it's just used if we want to provide information/instructions as part of the checklist.
Log On/Log Off Configuration
Log On/Log Off questions are for use with Time and Attendance. When this question type is answered, the checklist timestamp is taken as the time the user (driver) has logged on or off. Time and attendance allows managers to keep track of work hours, and approve + generate timesheets.
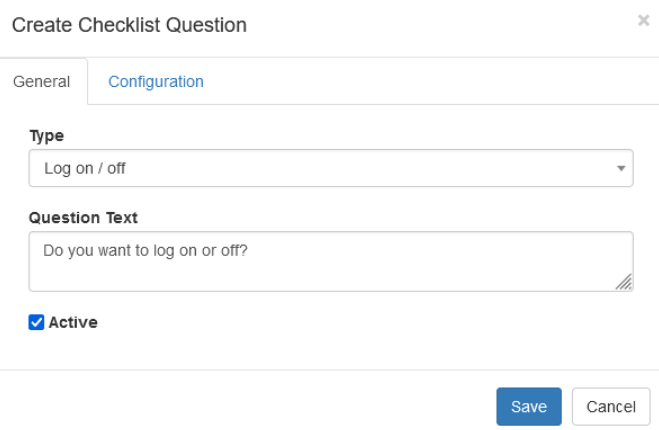
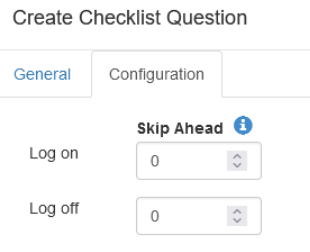
We can set skip aheads. For example when logging on for the day we may need to conduct a pre-start. But when logging off we simply need to log off and then the checklist is completed.
Number Configuration
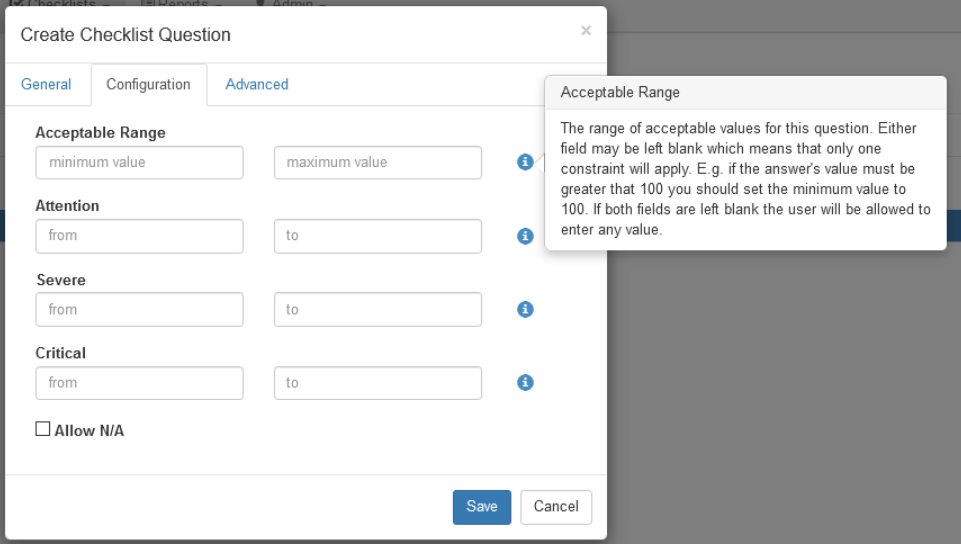
This allows us to set ranges. Hover over the information icon for more detail
-
Acceptable Range
Range of values that will be accepted. -
Attention, Severe, Critical
We can set ranges of values that flag as Attention, Severe, or Critical. To set 'above 100' for example, we can just put 100 in the "From" column, and leave "To" blank. If there is any overlap, the highest severity will be logged.
The Advanced tab allows us to add a 'tag' to the answer for advanced functionality.
Photo Configuration
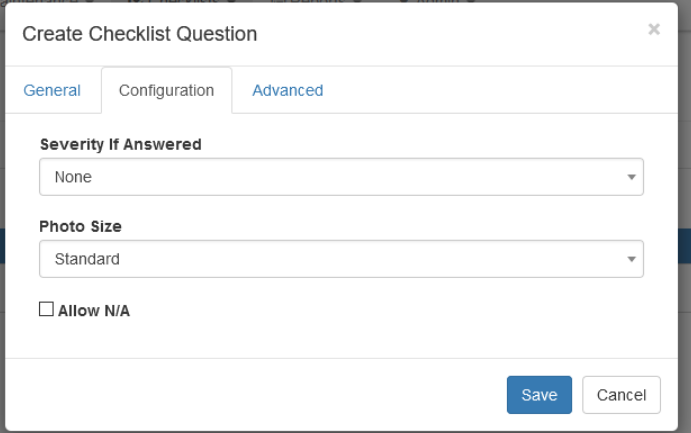
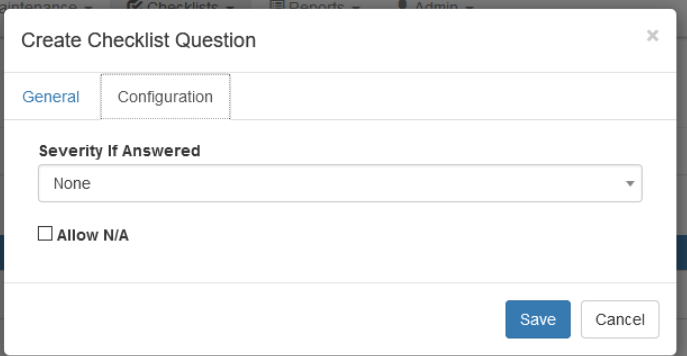
Set the severity if a photo is taken, the size (standard or large) and if N/A is allowed to skip the photo.
Selection List Configuration
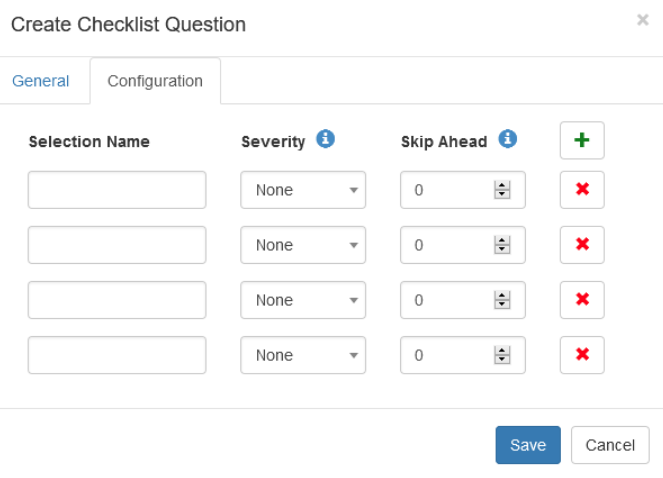
Here we can add different drop-down selections, plus assign a severity and skip ahead value to each one.
Text Configuration
Assign a severity if we enter an answer, and whether N/A is allowed.
Signature Configuration
Date Configuration
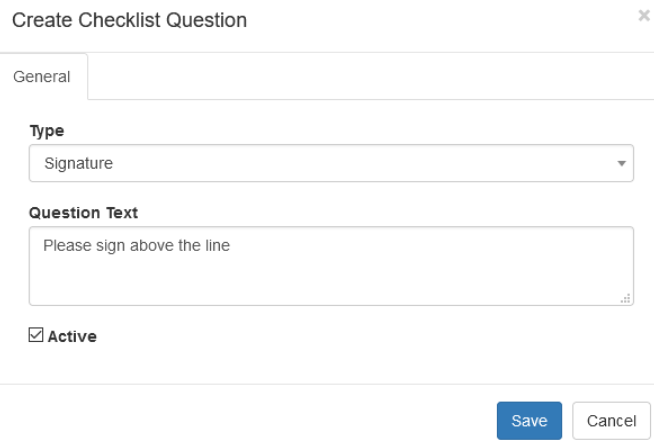
Select the signature question type and enter a message instructing the user to sign.
Assigning Users
Once the checklist is complete - we can assign the users that should be able to fill out the checklist on the Users Tab.
Simply check the users that need to be able to complete this checklist - it will appear for them when they log into the app in their list of checklists.
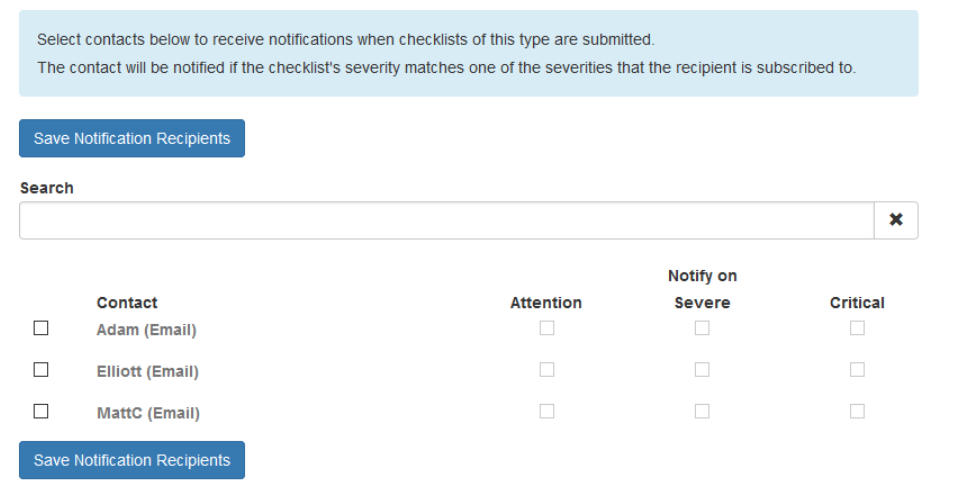
On the Notifications Tab - we can assign users to receive notifications if a checklist is completed and one of the answers has the relevant severity
Editing Checklists and Questions
Caution should be used when editing checklists. Editing has been catered for to allow some edits to be made when first setting up a checklist - since it is likely some small errors will be corrected or the checklist tweaked slightly. However substantial edits, after a large amount of checklist data has been collected may lead to confusing results, or issues with uploading checklists. For example if we edit a question and change the question text - all old answers given against the original text might be completely incorrect!
In general remember:
- To 'delete' a question, we should mark it as inactive and drag it to the bottom of the list
- Take care in re-ordering questions, as any skips will be affected
- When making dramatic edits, it is often better to simply create a new list, and deactivate the old one
Copying Checklists
Checklists can be copied within an individual organisation, or to another organisation. This simplifies repeating set-up steps when multiple similar checklists may be set up.
To copy a checklist:
- Go to Checklist -> Manage Checklist
- With the gear icon (settings) - select to copy the checklist. Copy Herecopies the checklist to the current organisation. Copy to organisation copies to another organisation. The list of organisations shown is just the list the user has access to.
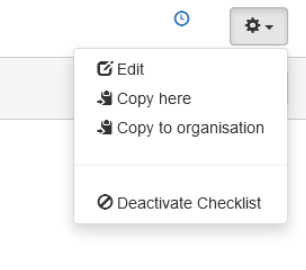
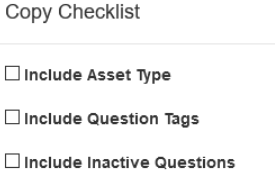
When copying within the same organisation, you are presented with this dialogue:
-
Include Asset Type will copy across the 'require asset selection' setting.

- Include question tags copies any question tags configured
- Include inactive copies deactivated questions as well, if there are any
When copying to another organisation, you get the same options. How it works is slightly different. If you select Include Asset Type, or Include Question Tags the asset type or tags will be created if they don't already exist in the new organisation.
Video Examples
Tips/Troubleshooting
Checklists/Changes not displaying
To ensure the best app performance, not all app data is retrieved every app load. Some data (e.g. the organisation list, and list of checklists) are only retrieved when the user logs in, switches organisation, or launches the app. As this data usually changes very rarely - loading them every single time only servers to use lots of mobile data, and slow everything down!
However the result of this might mean that while testing it may seem that your changes made on the website aren't propagating through to the app as you make them.
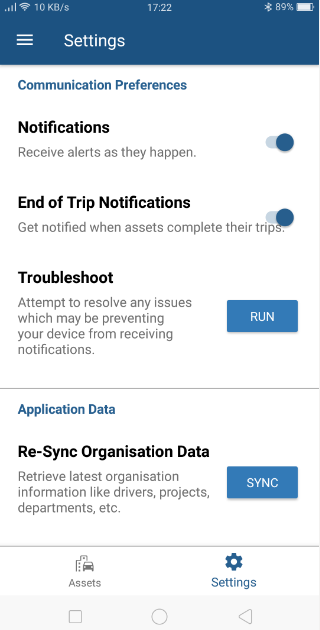
To solve, resync this data using the Re-Sync Organisation Data button on the settings tab of the app.
Viewing/Resolving Completed Checklists
Viewing Completed Checklists on Web
Navigating to Checklists -> View Answers displays the following checklist screen:
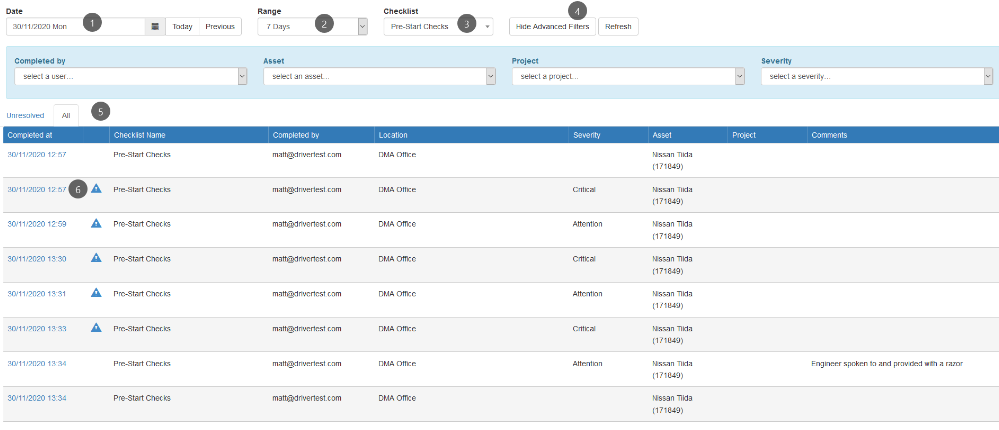
We have a few filters and options to change the view:
- Select the date
- Select the date range, 1 day, 7 days, or 1 month worth of checklists. Range starts from the date selected in (1)
- Select the checklist
- Shows/hides the filters in the blue rectangle.
- View all, or just 'unresolved' checklists
- This icon flags the checklist has a severity (Attention, Severe, or Critical) The checklist's severity is the highest severity of all answers given.
Resolving Checklists on Web
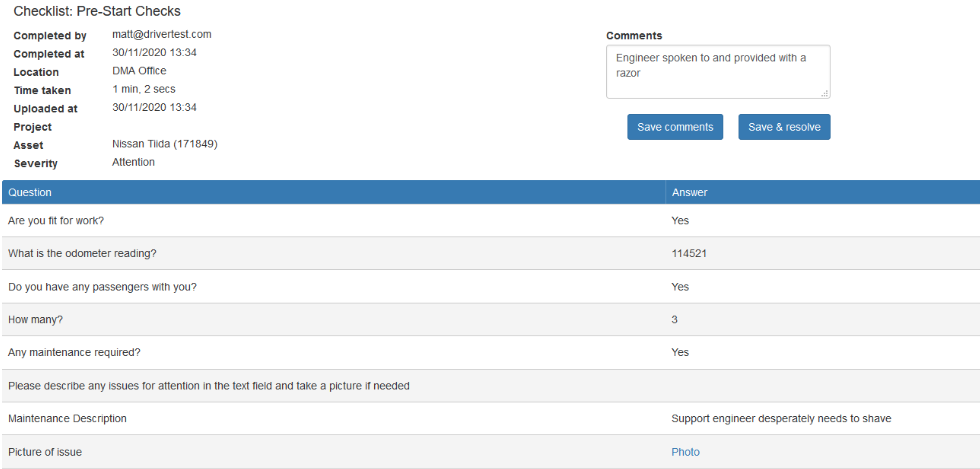
Clicking on the blue 'Completed At' date allows us to view and resolve any issue raised via a checklist. To 'resolve' the checklist in TG - we simply add a comment and click save and resolve. Any other actions - scheduling maintenance, calling staff, booking repairs etc - must be handled outside of this
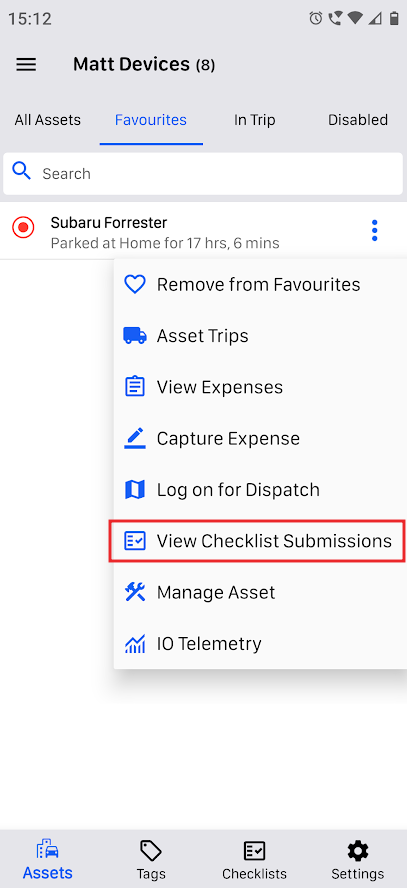
Viewing Completed Checklists on Mobile
The last 5 checklists completed against an asset can be viewed on mobile (data connection required). To view, click the 3 dot menu next to the asset. This is useful to spot check a pre-start has been completed on a vehicle - or for a driver to view history from the last few days.
Previous submissions against a Checklist can be viewed by clicking on the 3 dot menu next to a checklist
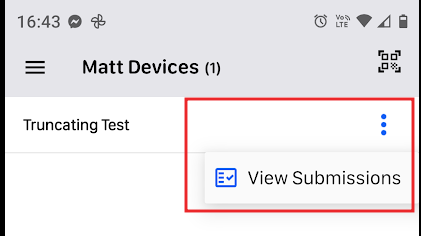
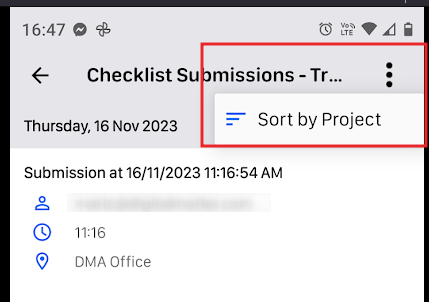
The submissions are then displayed in date order (most recent first). They can instead by grouped by project. This can allow project/site managers to view submissions against the projects they manage easily.
Checklist Reports
We have 4 Checklist reports.
- Answer Summary Report - This is simply a list of all checklists, their severity, along with who resolved them and the comment. Great for tracking the number of issues being raised, and for compliance.
- Answer Detail Report - This is simply all checklist answers for a certain checklist in a CSV grid - so that we can view all answers at once.
- Answer Detail Report PDF - PDF answer export. Appears similar to the View Answers page on the website. Photos
- Photo Report - a way to download all images taken for checklists. We may be using the photos for storing images of receipts, delivery dockets, manifests etc. So this is how we access these records.
- Partner Billing User Report - Shows all users with checklist permissions enabled that are billed for.
