How To Guide: Geo-Fences

Written by Matthew Clark-Massera
Updated at October 27th, 2025
Table of Contents
What Are Geo-Fences?
Geo-Fences are a designated area that you can define on the map to monitor asset interactions. Examples of interactions Telematics Guru provides reports for are asset time spent inside/outside, distance or hours travelled, and lists of interactions within a given timeframe. You can also use Geo-Fences to manually set speed limits for areas, and update location-based data to a custom string. Geofences are generally defined on Telematics Guru, meaning that the device itself has no knowledge when it is reporting from within a Geo-Fence, but certain Digital Matter devices do support Geo-Fence Downloads to Device to enable dynamic device functions based on the device's own knowledge of its location.
Setting up a Geo-Fence
Creating a Geo-Fence from the Live View or Trip History View
To set up a Geo-Fence from the Live View or Trip History View, right-click to display the menu options of Create Geo-Fence Here or Hide Geo-Fences
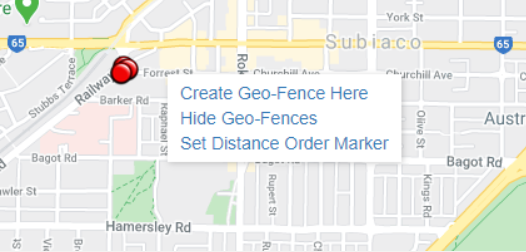
This link then opens up to the main Geo-Fence screen with the desired area zoomed to fit
Creating a Geo-Fence through the Admin Menu
- From the Main Menu, click on the Geo-Fences Icon
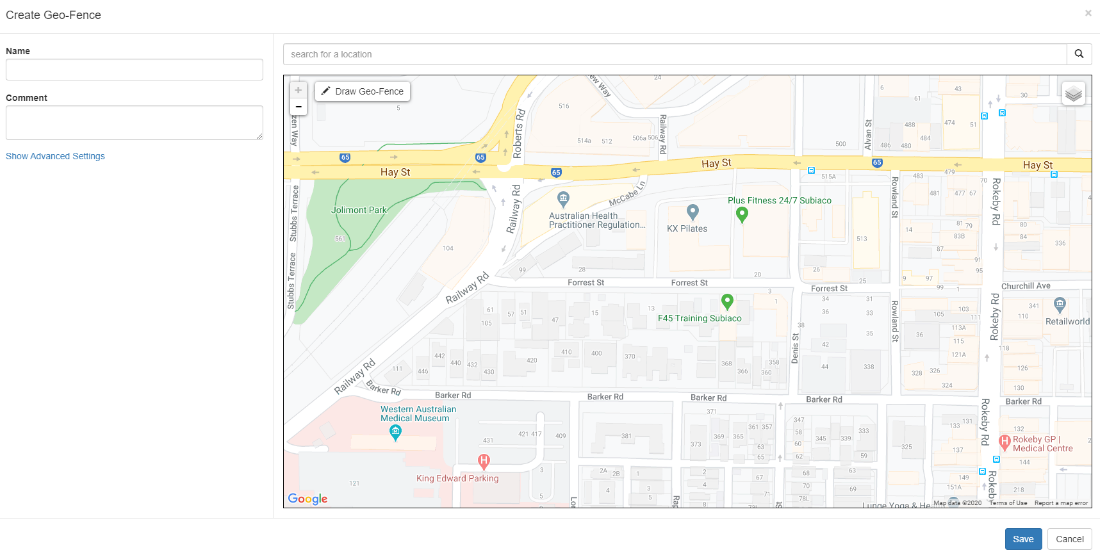
- Click "New Geo-Fence"
- You can type an address into the "search for location" bar and hit enter to be taken to that location on the map
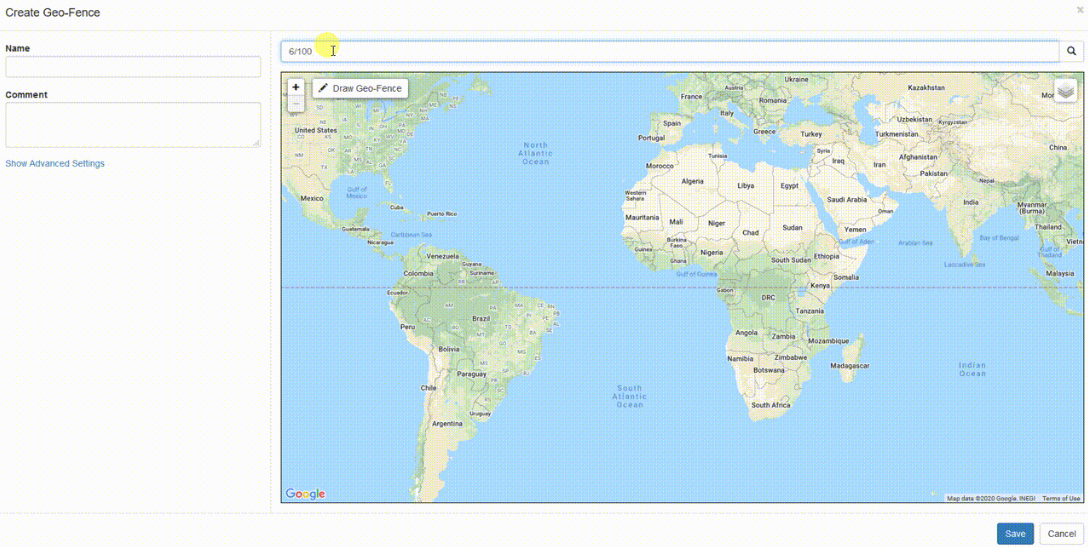
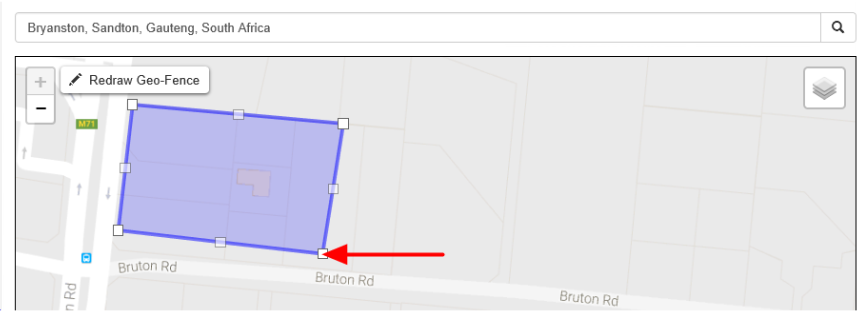
You can now adjust the zoom level using the plus(+) and (-) functions on the bottom right corner of the map, and once you see the area that you wish to create a zone for, use your cursor to click points outlining the shape, ensuring that your last point meets the first point you created, as show below: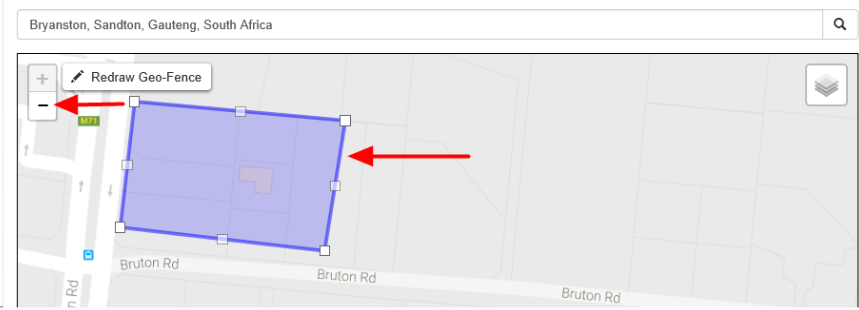
Once you have clicked on your starting point the Geo-Fence shape will appear and you can adjust the shape by dragging any of the nodes shown by the arrows below:
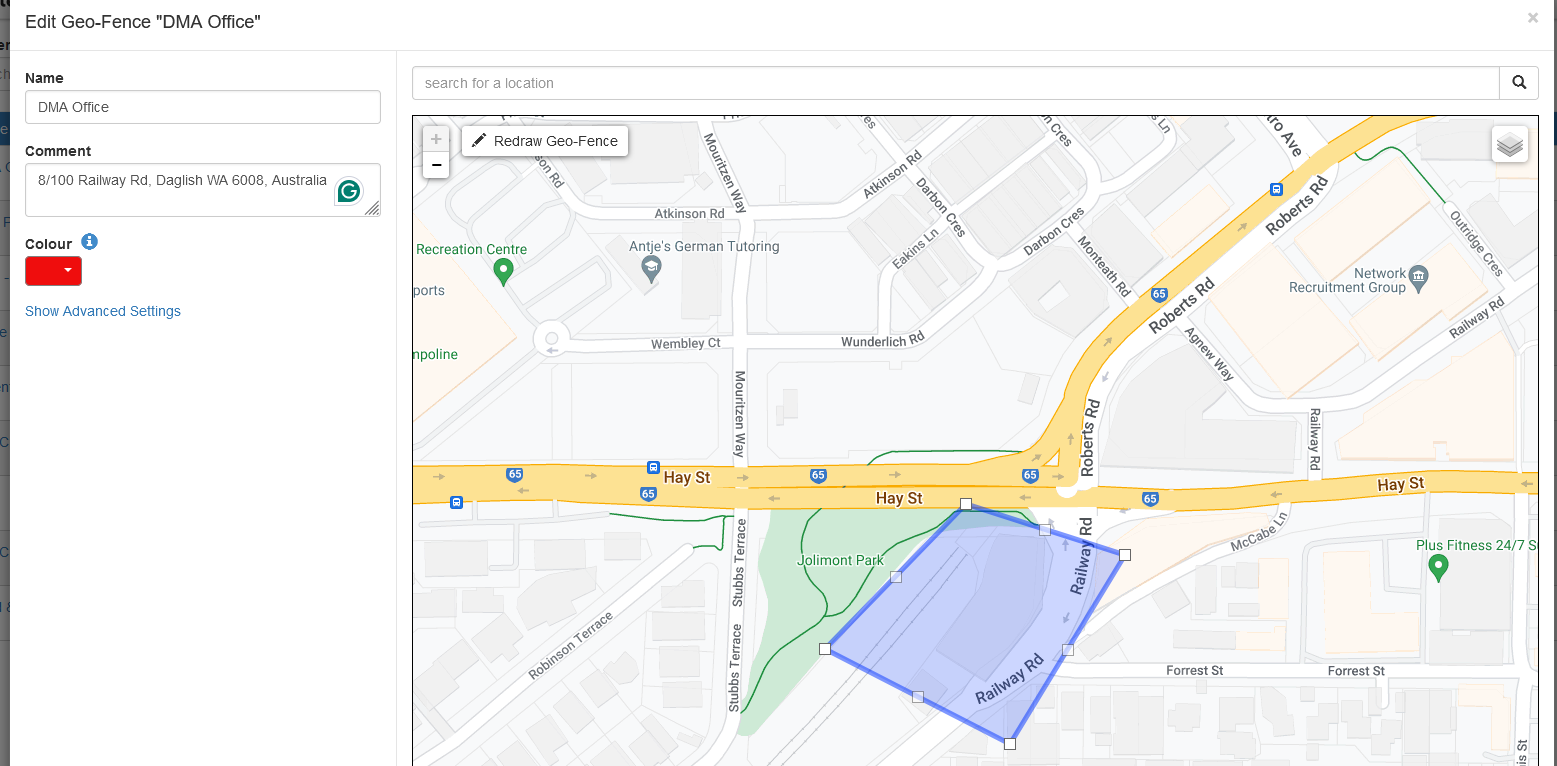
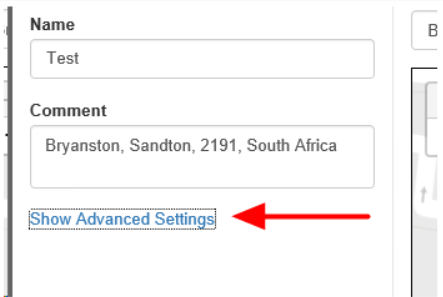
Lastly, name your Geo-Fence and then click save, now the name given to your Geo-Fence will appear in all of your trip history and reports.
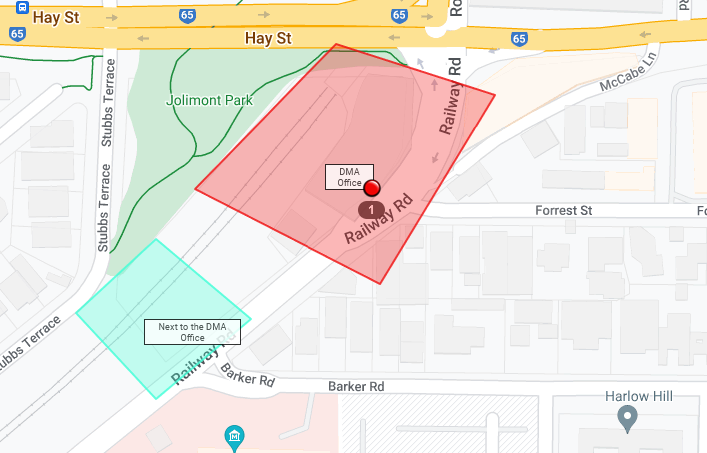
Assign a Colour
Various colours can be assigned when creating or editing a Geo-Fence.
This allows for easy reference on the map for various location types.
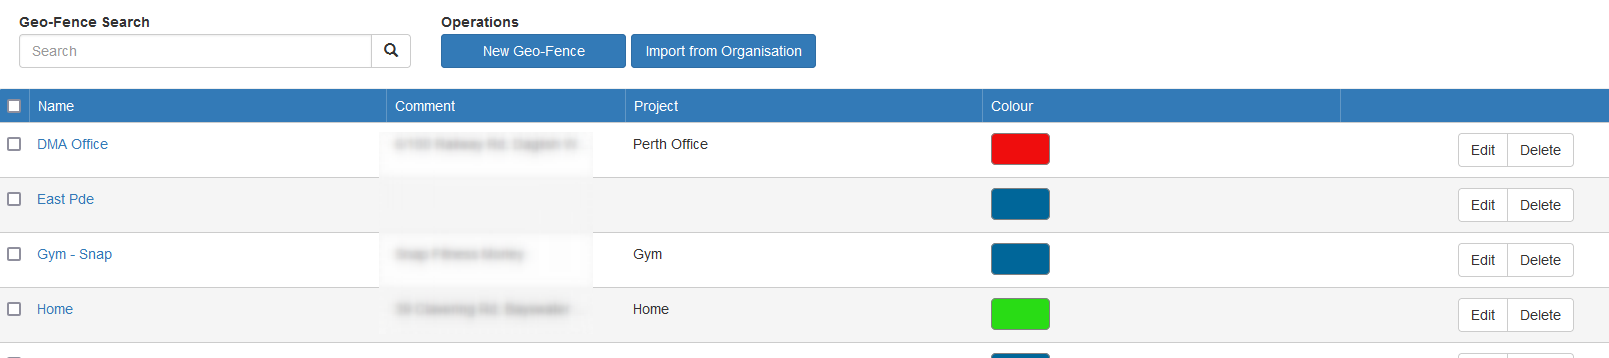
Editing a Geo-Fence
Geo-Fences can be edited from the dedicated Geo-Fence management page found in the Admin menu dropdown at the top of the page, or by clicking on the Geo-Fence on the Live View. Doing so will bring up the same window that was used to create the Geo-Fence, and edits can be applied by clicking the Save button in the bottom-right-hand corner. Deleting a Geofence is also possible from the Live View and the Geo-Fence management page.


Advanced Settings
For advanced functionality click to Show Advanced Settings
These are the advanced settings:
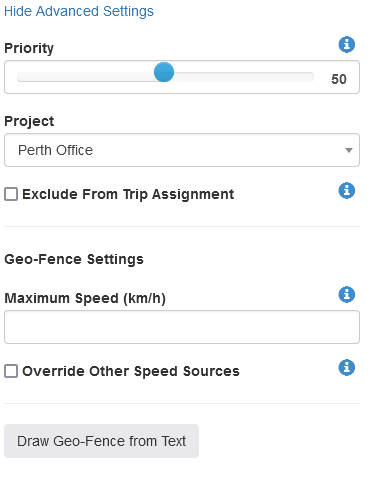
- Priority: If any Geo-Fences overlap, we need to pick which one we are in. Geo Fences with a Higher priority are shown preference over those with a Lower priority. Where two Geo-Fences overlap with the same priority, the fence with the smallest area will be shown preference. In general, this can be left untouched.
- Project: A Geo-Fence can be given a project to easily categorise them - and we can alert on entries/exits to all Geo-Fences in a project, rather than selecting every Geo-Fence individually. See Alerting Based on Project below.
- Exclude from trip assignment: If selected the Geo-Fence will only be used for setting up location based alerts. It will not be used when looking up trip start and end locations. I.e. on the live view and trip list, it won't show as "Driving from Geo-Fence X" - and instead show the street address. In general, leave this unticked unless you have an unusually large Geo-Fence.
- Maximum Speed for Geo-Fence. Speed limits can come from multiple sources. See Speed Monitoring in Telematics Guru for details.
- Override Other Speed Sources: This feature can override bad local speed records. This is useful if TomTom has incorrect speed data for an area. If that is the case, tick the "Override Other Speed Sources" checkbox. This will cause the TG speed monitoring to ignore the local looked up speed
Tracking Asset Activity in Geo-Fences (Time on Site)
The Telematics Guru "post-processing" system analyses asset activity after the trip and can provide some advanced statistics.
- Number of visits to the Geo-Fence.
- Time spent in the Geo-Fence.
- Time of entry/exit
- Distance travelled in the Geo-Fence.
NB: The accuracy of these statistics depends on the update rate on battery powered devices. If we only update every 4hrs, the device will not record exactly when it entered the Geo-Fence for example.
This is useful to determine the time an asset spends on site.
TG will record stats for the asset in the selected Geo-Fences. This information is available in 2 reports:
-
Asset Geo-Fence History Summary: provides a summary of Geo-Fence activity. Expect 1 line per Asset and Geo-Fence combination, summarising the information over a period.
- Asset Geo-Fence History Detail: provides a more detailed view of Geo-Fence activity, itemising each visit to the Geo-Fence and providing statistics about the visit.

Point Based Asset Tracking
Devices configured for periodic, point-based location reporting are currently incompatible with geofence detection. To enable geofence functionality, please update your device to use movement and trip-based reporting.
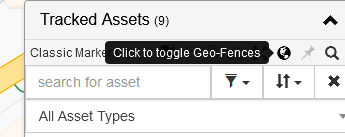
Toggle Show/Hide Geo-Fences on the Live and History Views
On the Live View and Trip History Map View, click the globe icon to display Geo-Fences on the map alongside your assets live location or previous trip history.
Setting Up a Geo-Fence Alert
A Geo-Fence alert is one of the pre-set up alerts so creating one is super simple. On the top menu bar, click on Admin >> Alerts and then select "New Alert Wizard" and you'll see this screen.
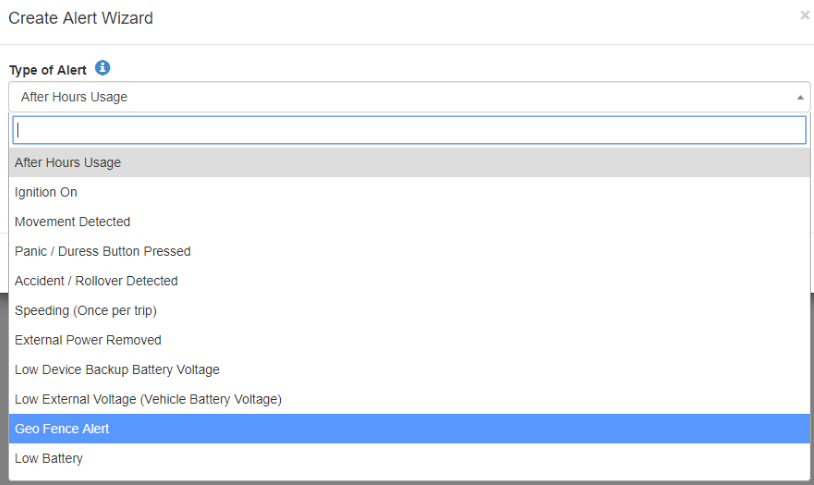
- Step one is selecting the Geo-Fence alert from the drop down menu
- Select your Geo-Fence Name under the left box and choose either to send the alert when an asset enters or leaves the Geo-Fence, click Next
- Select the Asset(s) that the alert will apply to, click Next
- Nominate the destination contact for the Alert
- Name your Geo-Fence, Click Save
Alerting based on a group of Geo-Fences
When you assign the conditions in the Alert, you can assign a Project group of Geo-Fences instead of multiple individual Geo-Fences.
This scenario could be useful if you have multiple sites with assets travelling between them, or having assets that you want an alert on when any of them leave one of the sites. It greatly simplifies needing to select potentially hundreds of Geo-Fences for an alert.

To assign the Geo-Fences to a project, select the project from the dropdown in admin -> Geo-Fences -> edit -> advanced options
- To create a project, go to Admin -> Projects
More complex Geo-Fence Alerts
We can also make use of the New Alert (Advanced) function to build more complex Geo-Fence alerts.
There are 5 conditions to alert on as shown. We will discuss the last in the next section.
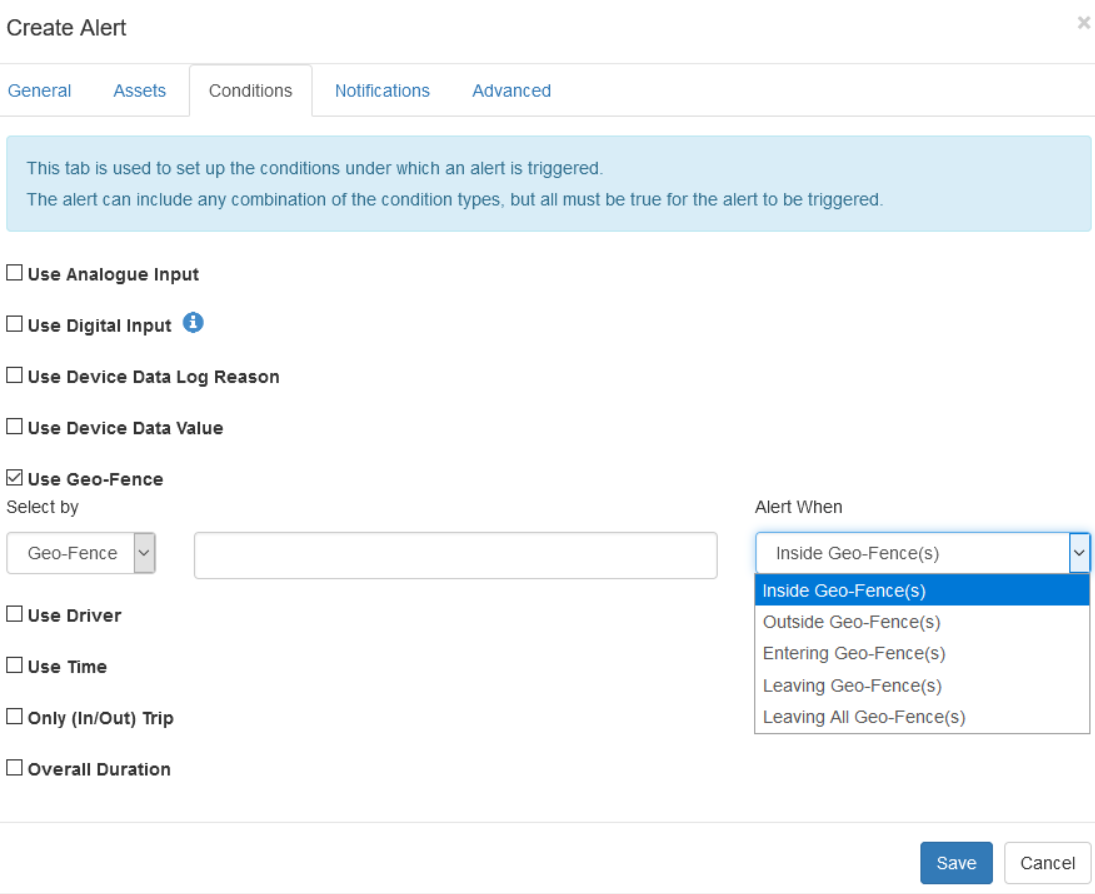
They are subtly different. ALL Telematics Guru alerts keep track of the alert 'state' - so it is important to note for example, using the "Inside Geo-Fence(s)" option will not generate an alert on every single log that an asset is inside the Geo-Fence. It will send only 1 when it first enters. The asset will need to leave and then re-enter to generate a second.
So when used in isolation, this has the exact same behaviour as the "Entering Geo-Fence(s)" option. The difference comes when we combine multiple alert conditions. E.g.
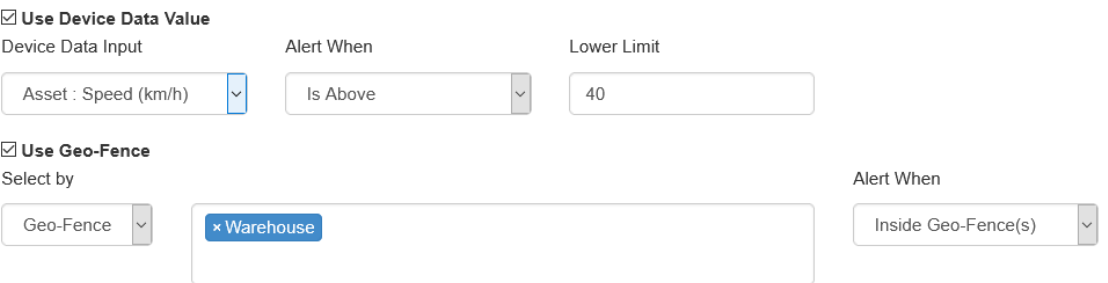
The above would alert whenever the speed goes above 40km/h and we are inside the Geo-Fence. We'd get a subsequent alert if the speed temporarily dipped back below 40, then above again.
If instead we were to change to "Entering Geo-Fence(s)" option - we'd only get an alert if we were doing above 40km/h at the time we crossed the Geo-Fence boundary - which typically wouldn't be something we'd be interested in, we want to know all speeding events inside the Geo-Fence like the image.
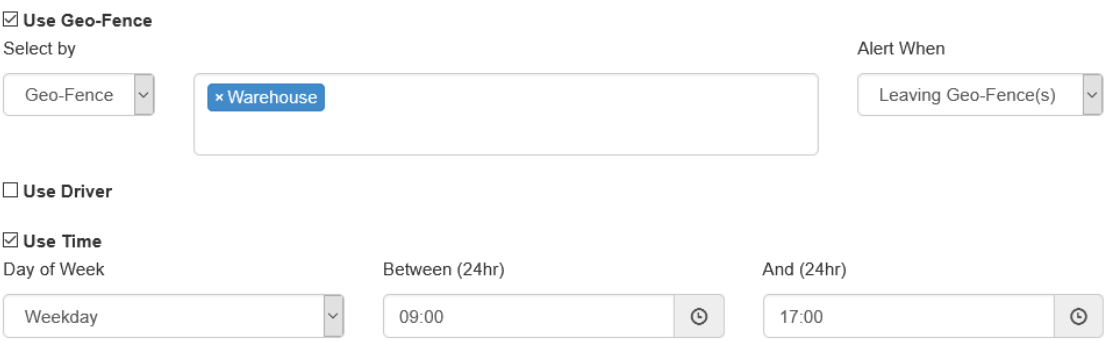
To further illustrate the concept, the below would alert if an asset leaves a Geo-Fence during the specified time.
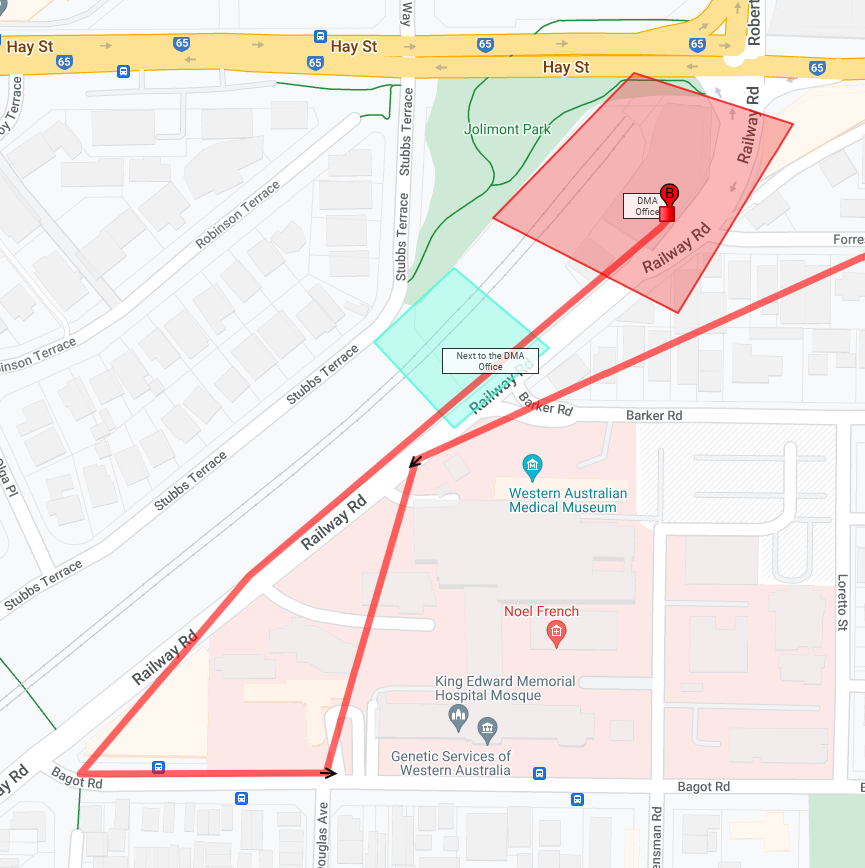
Route Tracking Alerts - Alert when Leaving All Geo-Fences
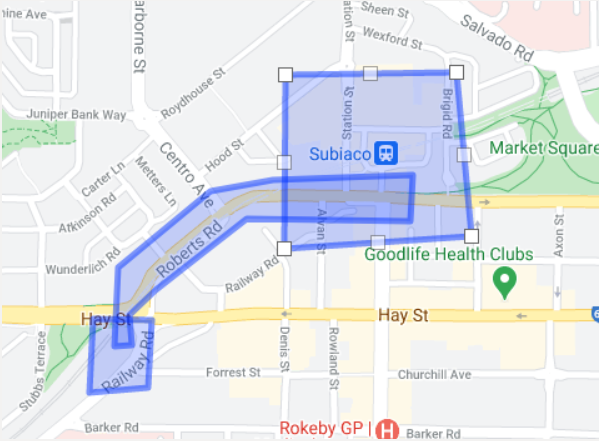
This condition can be used to send an alert if an asset deviates from a pre-determined route. Future improvements to this functionality are planned. To set up, we simply create our Geo-Fences (i.e. multiple along a route) - and add them to the alert with this condition. Then the alert will treat them all as one large Geo-Fence, only sending an alert if we leave all of them.
For example, we have drawn the following 3 Geo-Fences - DMA Office, Path To Station, and Train Station. These mark out each location and the route between the two.
Then we can create our alert, which will alert should we leave all 3 Geo-Fences.

Alternatively, we could add all the Geo-Fences to a project to make setting up the alert a bit simpler (particularly if we had many Geo-Fences and routes)

Finally, we may want to select Exclude From Trip Assignment for some of the Geo-Fences along the route - if we don't want to see these names in our reports all the time, and would prefer street addresses.
FAQS
When you have one Geo-Fence inside another, which takes priority?
Geo Fences with a Higher priority are shown preference over those with a Lower priority. Where two Geo-Fences overlap with the same priority, the fence with the smallest area will be shown preference.
If I set a project when an asset enters a specific area, how do I change it back to the initial project once it leaves?
If you set a Geo-Fence to assign an asset to a project when entering a Geo-Fence, you can have a larger Geo-Fence around it to re-assign the initial project when it departs the inner-Geo-Fence.

How big can my Geofences be?
The main limitation on the size of a geofence is its complexity as measured by number of discrete points. The maximum number of Geofence points possible is 250.