Asset Expense Tracking - Getting Started

Written by Matthew Clark-Massera
Updated at November 19th, 2026
Asset Expense Tracking - Getting Started
Use asset expense tracking in the Telematics Guru web app to record costs against an asset, capture quantities such as fuel and oil volumes, and report on spending. Expenses can also reference drivers, projects and departments where the organisation functionality permits.
Before You Begin
You need expense permissions to access Assets > Manage Expenses. Your permission determines which expenses you can view and manage.
| Permission | Access |
|---|---|
| Expense Capture | Capture expenses and view, edit or delete expenses you captured yourself. |
| Expense Manager | Capture expenses and view, edit or delete expenses captured by any user. Create and edit expense types. |
Set Up Expense Types
With the Expense Manager permission, go to Admin > Asset Expense Types to create or edit an expense type. Choose the subtype according to what you are recording.
| Expense | Subtype | Volume capture |
|---|---|---|
| Fuel, such as Diesel or Petrol | Fuel | Always captures volume. |
| Oil, brake fluid or another non-fuel expense measured by volume | Normal | Select Capture volume. |
| An expense that does not require a quantity | Normal | Leave Capture volume cleared. |
Create a Fuel Expense Type
- Go to Admin > Asset Expense Types and create or edit an expense type.
- Enter a name, such as Diesel or Petrol, and select Fuel under Subtype.
- Select Save. Fuel types always capture volume, so there is no separate Capture volume checkbox to enable.

Create an Oil or Other Volume-Based Expense Type
- Go to Admin > Asset Expense Types and create or edit an expense type.
- Enter a name, such as Oil, and select Normal under Subtype.
- Select Capture volume, then select Save.

The example above uses Brake Fluid. Use the same settings for Oil.
Existing Types and New Organisations
Existing expense types start as Normal with volume capture off. Review your existing fuel and oil types before recording volumes. New organisations come with Diesel and Petrol configured as Fuel types.
Turning off Capture volume for an expense type preserves volumes already recorded.
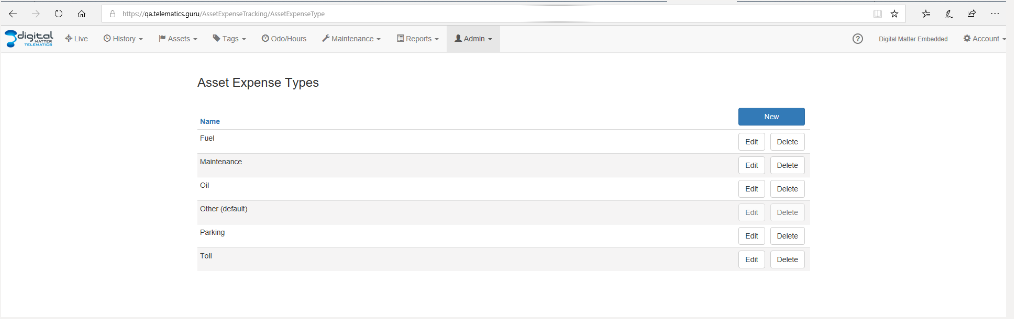
Expense Type List
The existing expense-type list example is shown below. Use the subtype and volume settings described above when configuring fuel or oil.
Set an Asset's Fuel Type
- Go to Assets > Manage Assets and create or edit the asset.
- Open the Fuel tab and select the asset's Fuel Type.
- Select Save.
The selected fuel type filters the fuel expense types offered for that asset. For example, a Diesel asset offers Diesel and all Normal expense types, including Oil. Leave the fuel type unset, shown as None in the selector, to offer all of the organisation's fuel expense types.

Fuel Tab Missing?
On some battery-powered device type assets, the Trip Based checkbox on I/O Mappings controls whether the Fuel tab appears in Edit Asset. The tab is shown when checked and hidden when unchecked. Not all device types expose this checkbox.
Capture an Asset Expense
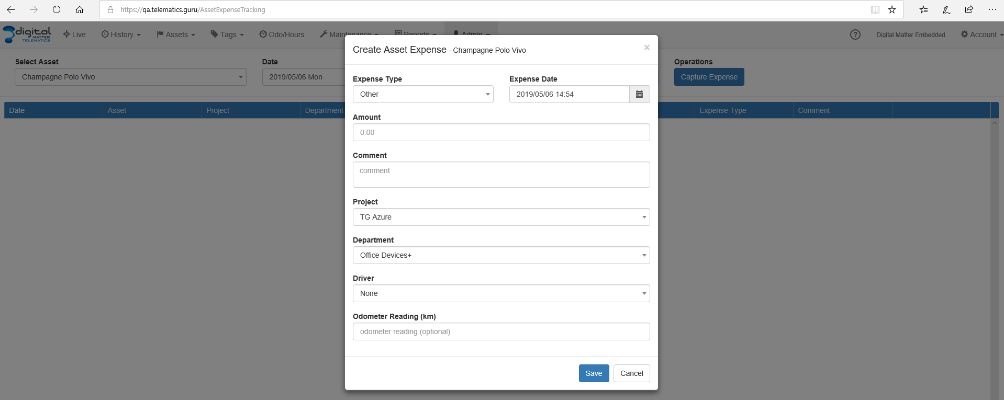
- Go to Assets > Manage Expenses and select Capture Expenses.
- Select the asset and expense type, then enter the expense date.
- Enter the amount paid in Cost.
- If the selected expense type captures volume, enter the quantity in Volume. The field uses your account's fuel units, configured under Manage Account.
- Assign a project, department or driver where required and supported by the organisation functionality, then save the expense.
Cost and volume are separate values. For example, if you paid 100 for 50 litres of fuel, enter 100 in Cost and 50 in Volume, with your account's fuel units set to litres.
The original capture-screen example below predates the separate cost and volume fields. Follow the field descriptions above for fuel and oil entries.
Use the Web App for Volume Capture
Volume capture is available in the Telematics Guru web app. Mobile volume capture is not yet available.
View Asset Expenses
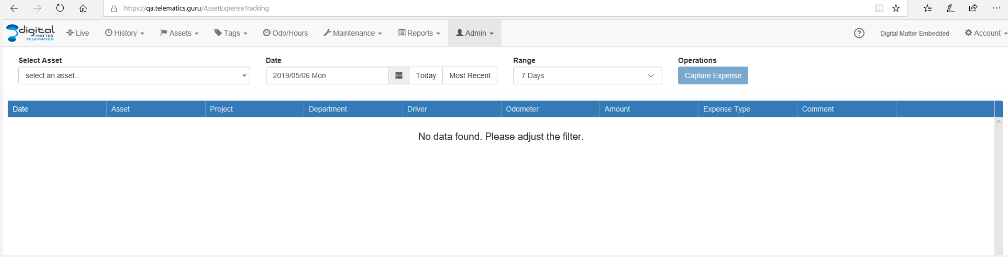
- Go to Assets > Manage Expenses.
- Select one asset. This view displays expenses for one asset at a time.
- Select the date and range. For example, a seven-day range shows the previous seven days, including the selected date.
The expense date belongs to the expense itself. The date it was captured is logged separately and can be viewed in the report.
Report on Asset Expenses
Use the expense reports to review recorded costs and volumes.
| Report | Use |
|---|---|
| Expense List Report | List expenses across the organisation for a date range, including the volume recorded against each expense. |
| Expense Summary Report | Summarise expenses by asset and expense type, with volume totals alongside costs. |
Both reports can also be scheduled.

Deleting Assets and Linked Records
Deleting an asset also removes its assigned expenses.
When deleting a project, department or driver, a dialog asks whether to keep or delete the associated expenses. If you keep them, their comments are amended with information about the deletion. You need the appropriate permission to delete assets, projects, departments or drivers.
Next Steps
Record an expense, check its cost and volume in the Expense List Report, then use the Expense Summary Report to review totals. For sensor-based fuel monitoring and estimated consumption, see Fuel Monitoring in Telematics Guru.
