Asset State Configuration

Written by Matthew Clark-Massera
Updated at March 31st, 2026
Table of Contents
Asset State Configurations in Telematics Guru
Asset State Configurations let you show different asset colours in the Live View and Trip History Map View based on combinations of digital input states. They also record those state changes in the asset timeline, event log, and Asset State reports.
This is useful when you want to see more than just whether an asset is online. For example, you might want to know whether a vehicle engine is on, whether a pump is running, or whether a safety switch is active.
Why use Asset States?
Asset States help turn raw digital input data into something easier to understand at a glance. Instead of checking each input one by one, you can use colours and named states to quickly identify what an asset is doing.
How Asset States Work
An Asset State is created from one or more digital inputs. A digital input is a device input that reports whether something is active or inactive, such as ignition, a pump, a door switch, or a Power Take Off (PTO).
Each combination of inputs can be given a state name and a colour. That colour is then shown against the asset in supported views.
Example: Pump and Engine Combos
In the example below, one input represents ignition and another represents a pump. By combining them, you can tell whether the engine is on, whether the pump is on, or whether both are running together.
| State Name | Colour if Conditions are True | Ignition (Digital Input 0) |
Pump (Digital Input 1) |
|---|---|---|---|
| Pump and Engine Off | Blue | Off | Off |
| Engine On Only | Purple | On | Off |
| Pump On Only | Green | Off | On |
| Engine and Pump On | Red | On | On |
In this example, the “Pump On Only” state could highlight an undesirable condition, because the pump is running while the engine is off.
Common Use Cases
-
Pump monitoring - See whether a pump is running, and whether it is running with or without ignition.
-
PTO monitoring - Identify when PTO equipment is active and distinguish it from normal driving.
-
Safety workflows - Show different states when a safety switch, beacon, or auxiliary system is active.
-
Operational reporting - Record how long an asset spends in a particular state for reporting and analysis.
Before You Begin
Before setting up Asset States, make sure the required digital inputs are already configured on the device and mapped correctly in Telematics Guru.
Terms used in this article
-
Digital input - A device input that reports an active or inactive condition, such as ignition, door open, or pump on.
-
I/O mapping - The place where you label an input in Telematics Guru and choose how it is displayed.
-
Asset State Configuration - The rules that combine one or more inputs into named states with colours and optional logging.
Requirements
-
Asset State functionality must be enabled for the organisation in Admin > Organisation > Functionality.
-
The user configuring Asset States must have permission for Asset State Configuration Manager under the Admin Manager permissions area.
-
The asset must already have its relevant digital inputs available in OEM/Device Manager and mapped in Telematics Guru.
Set up the digital inputs first
If the inputs are not already configured on the device, start with the guide for setting up a Digital Input.
Set-Up Process
Step 1: Check the feature is enabled
In Telematics Guru, go to Admin > Organisation > Functionality and confirm that Asset State is enabled for the organisation.
Also confirm that the user account doing the configuration has the required permission.
Step 2: Map the inputs on the asset
For each asset, go to Assets > Manage Assets > Edit > I/O Mappings. Add the digital input, give it a clear name, and define the active and inactive state labels.
You can also choose whether the input should be shown in Trip and Live views.
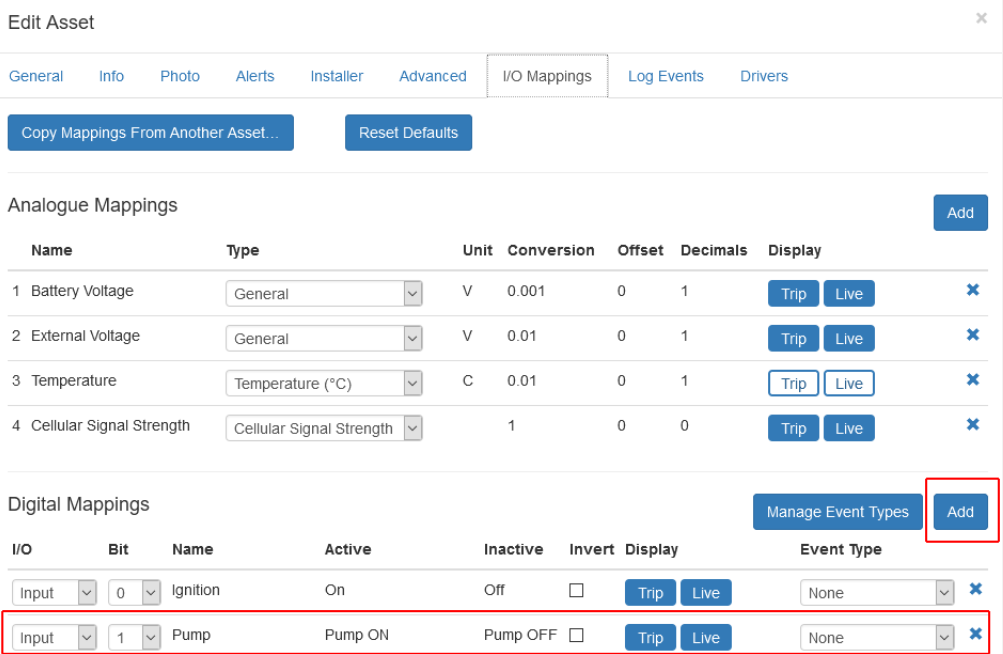
Clear names are important here. For example, “Pump”, “Ignition”, or “Safety Switch” will make the Asset State configuration easier to understand later.
Step 3: Create the Asset State Configuration
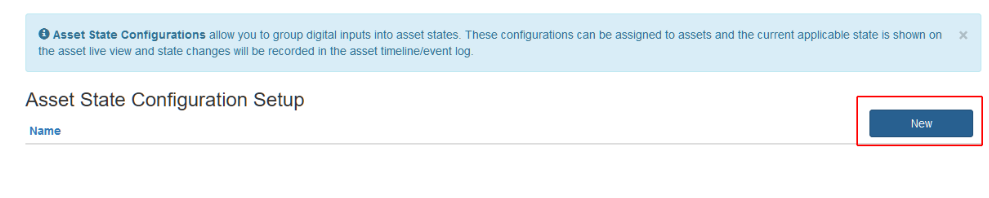
Go to Admin > Asset State Configuration > New.
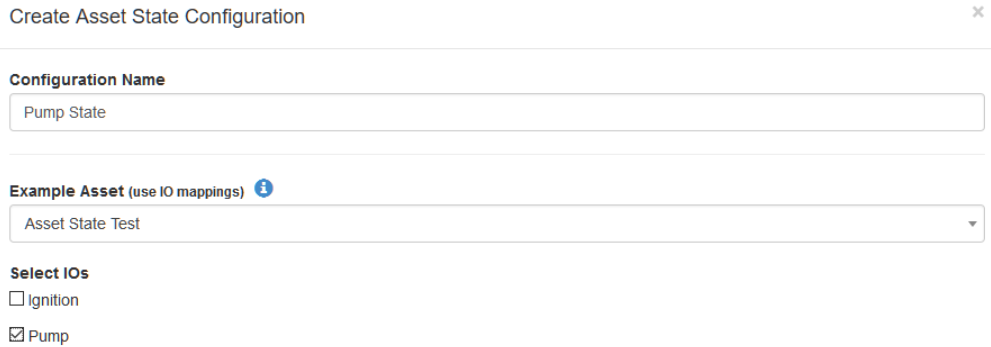
Enter a name for the configuration, then select the asset you want to use while building it. Telematics Guru will display that asset’s available inputs and outputs.
Select the inputs you want to use in the configuration.
Step 4: Define the states and colours
Create the combinations of conditions you want to track, then assign each one a state name and colour.
In the engine and pump example, the four possible states cover all normal and abnormal combinations.
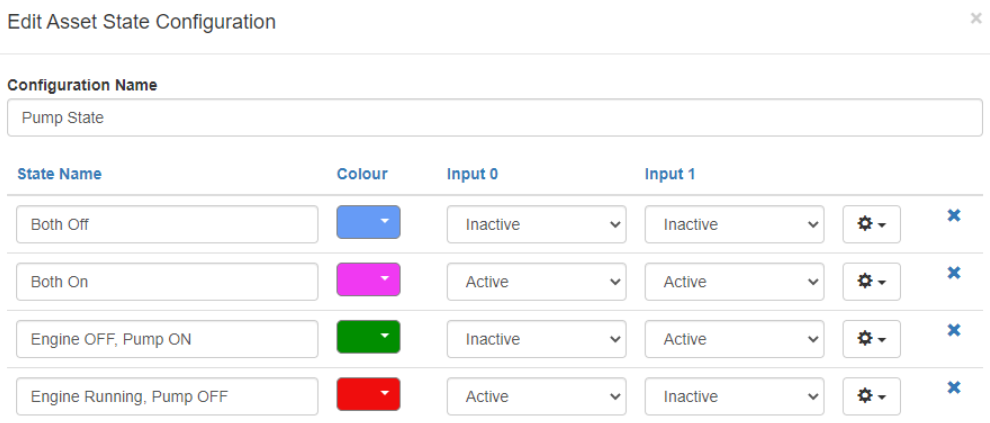
Choose names that describe the real-world condition, not just the raw input state. For example, “Engine and Pump On” is easier to understand than “Input 0 On and Input 1 On”.
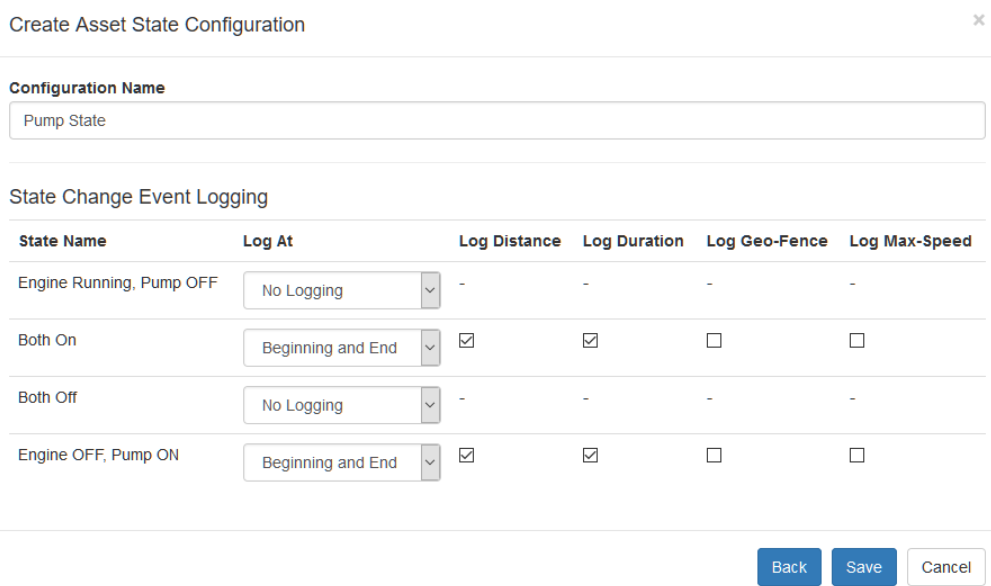
Step 5: Enable logging if required
Decide whether each state should be logged. This controls what is recorded for reports such as Asset State Detail and Asset State Summary.
For example, if you need to report on how long a pump was running, make sure the relevant pump states have logging enabled.
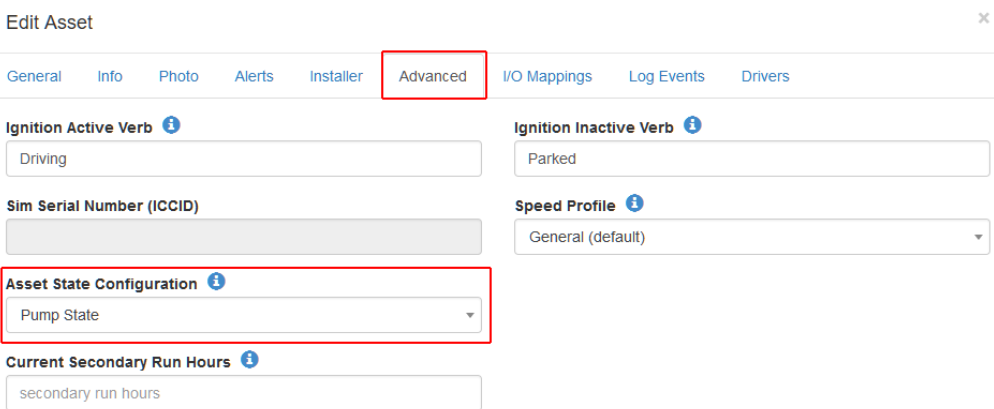
Step 6: Apply the configuration to assets
After saving the configuration, apply it to each required asset in Assets > Manage Assets > Edit > Advanced.
Select the Asset State Configuration you created.
Viewing Asset States
Once the configuration is active, switch to the Asset State view in the Live Viewer to see assets displayed using their configured colours.
This gives you a quick visual summary of what each asset is doing without opening each one individually.

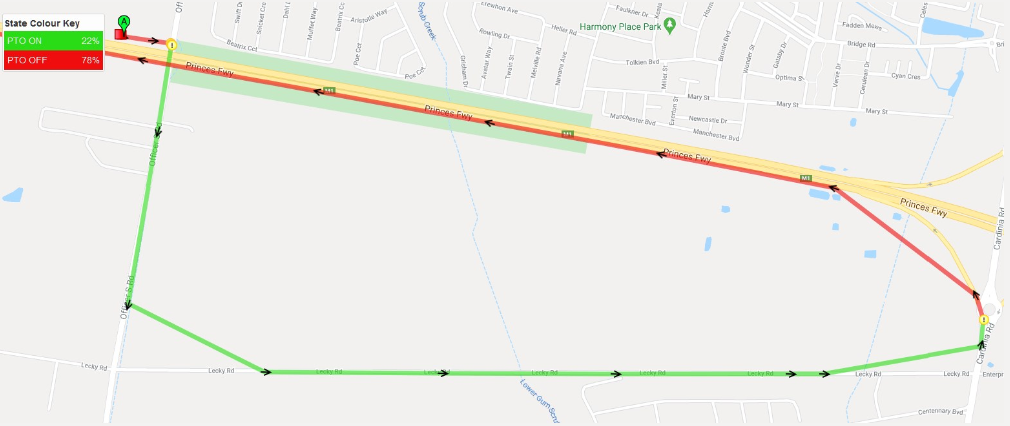
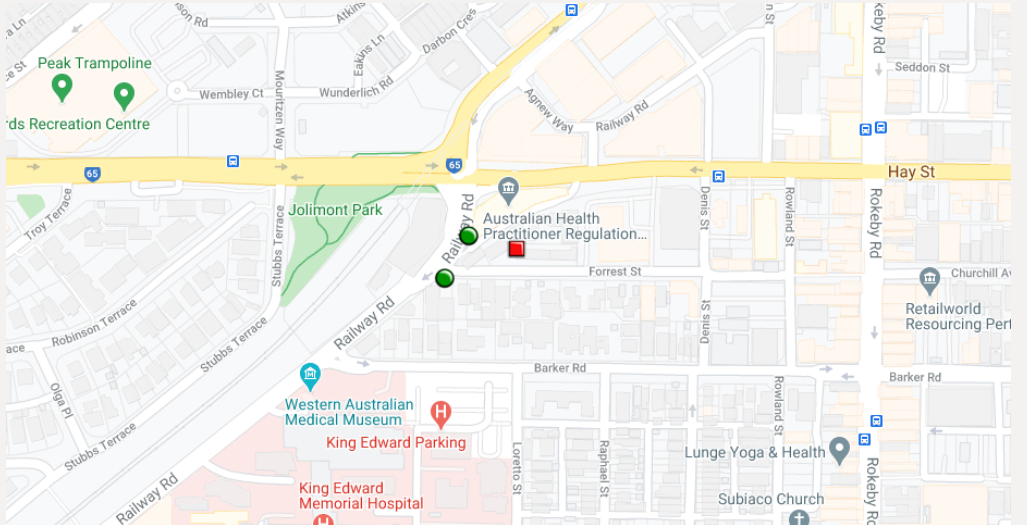
These configurations can produce a map view like the example below.
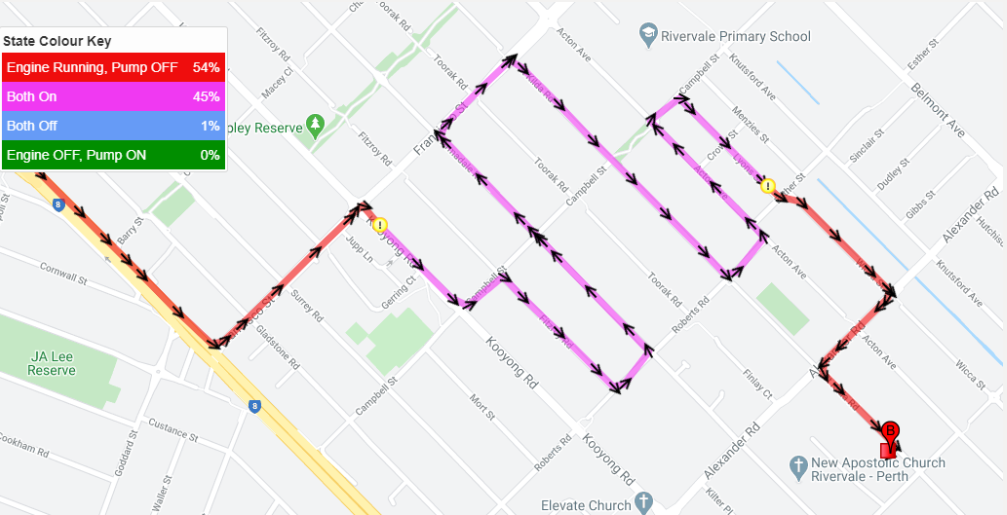
When multiple assets are in different states, they will appear with different colours in the Live View.
Alerts and Reporting
Asset States can also support alerting and reporting workflows.
-
Alerts - You can set up alerts to notify users when a digital input becomes active or inactive, depending on your use case.
-
Reports - Logged states can be used in Asset State Detail and Asset State Summary reports to measure time spent in each condition.
-
Mobile notifications - If alerts are configured, users can also receive push notifications in the Telematics Guru mobile app.
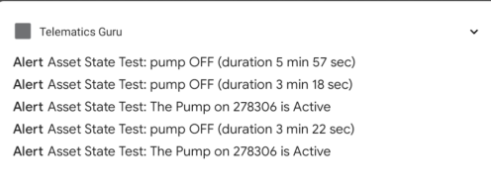
Example of an alert reporting on the duration of a pump digital input being on:
Tips for a Clean Set-Up
-
Use clear input names so the configuration is easy to build and maintain.
-
Think in real operating states rather than just on and off values.
-
Log only the states you need to report on so your reporting stays focused.
-
Test with one asset first before applying the configuration more broadly.
Next Steps
If you have not yet configured the required device inputs, start with setting up a Digital Input. If you want to notify users when a state-related input changes, you can also set up alerts.
Once your inputs, Asset States, and logging are in place, you can use Live View, History View, and Asset State reports to monitor how your assets are operating.