Sentrius BT610 Tags in Telematics Guru
Table of Contents
Our BLE gateway devices can be set to scan for all tags within range and keep a list in memory. This list is uploaded to the server periodically. Tags are then displayed on the Tag Map in Telematics Guru. This flexible format means when any gateway sees a tag in its vicinity, we can receive a new tag update.
For many applications, like simply reporting the analog values of a specific tag in a vehicle - the gateway and tag may always stay within range. The gateway and tag are both permanently located/mounted in the truck. In this case, we can instead map 2 x Sentrius BT610 tags to device analogues. This limits the device to reading from only 2 tags at a time but brings other benefits.
Supported Devices:
- Oyster Edge
- Firmware 1.11+, BLE FW 2.1+
Analog Mapping vs ‘Tag Lists’
Benefits
- No TG-TAG fees per tag
- Tag analog values are written to gateway device analog meaning:
- Values appear in Live-view Popup

- Asset Health Tracking can be utilised
- Alerts can be configured on tag values.
- Values appear in Live-view Popup
Drawbacks
If ‘mapped’ the tag and gateway are mapped one-to-one. So a gateway can only read the specific 1 or 2 tags mapped in parameters.
Setup
Sentrius Tag Setup
We must first configure the Sentrius Tags. Consult Sentrius documentation for full details on this process, this is an overview of the steps (see video below).
Under the Bluetooth settings of the tag, LE Coded should be disabled for it to be detected by the Oyster Edge.
Ideally, a Network ID should be configured (in app) with the same ID used in the system parameters (see dropdown below for Oyster Edge system parameters); the default setting is zero on the tag and system parameters so it will work without configuration, but this limits the user to one tag (if two tags with the same network ID are found, they will overwrite each other).
Gateway Setup
Oyster Edge
For battery powered gateways, BLE scanning is disabled by default, until we setup a scan period.
To configure an ELA tag scanning,
1. Update the device to the latest firmware
Ensure the device is running on the latest Firmware
2. Update Bluetooth FW
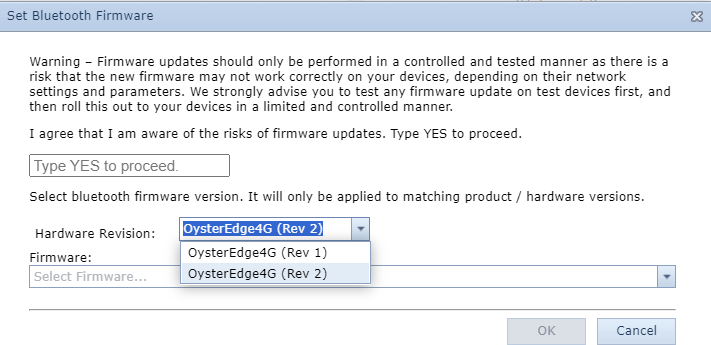
Update the Bluetooth FW from Device operations > Set Bluetooth Firmware. 
The value after the decimal point under the "Product" field will tell what Bluetooth FW to set. The Oyster Edge currently has two hardware versions.

3. Configure Parameters
3.1 Set the device scan period
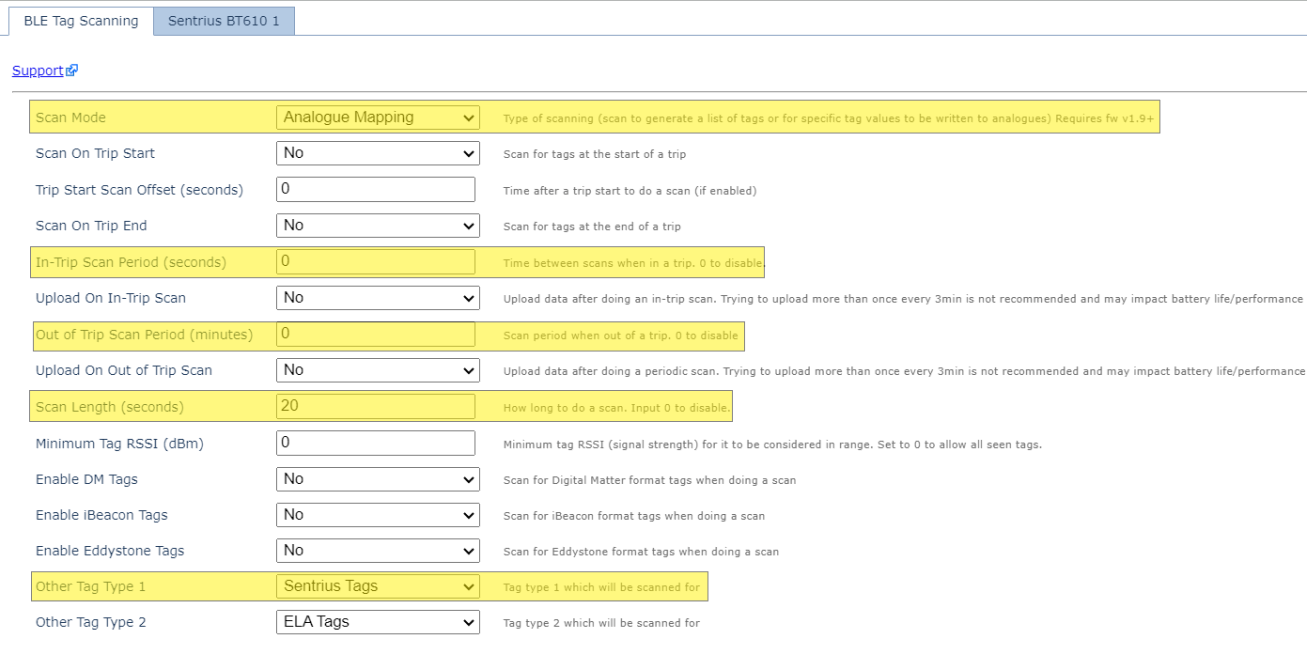
To enable Bluetooth scanning, simply set the In Trip/Out of Trip a scanning period to a value other than 0. This will affect the battery life of the device, so how often the device needs to look for a tag will need to be carefully selected

- Set the Scan Mode to Analogue Mapping - This will write the tag value to specific analogues
-
The Sentrius app allows for specifying advertising interval and duration. The scan period set on the Oyster Edge should equal 4x the larger value of these two (the app will instruct the user that the duration should equal 4x the interval; so scan time should be at least 4x duration. Digital Matter testing and example above used interval of 1000ms, 4000ms duration (setting in the Sentrius app), so the scan time of 20s was applied.
-
Set the Tag Type to Sentrius Tags
3.2. Configure Sentrius Tag Mapping Parameters

- Enter the Network ID of the tag - ID written to Sentrius tag via the Sentrius app
- Set an Analogue inputs to which the values should be mapped (please note analog 7-11 should not be used - existing mappings that will overwrite the mV value).
TG Setup/Reports
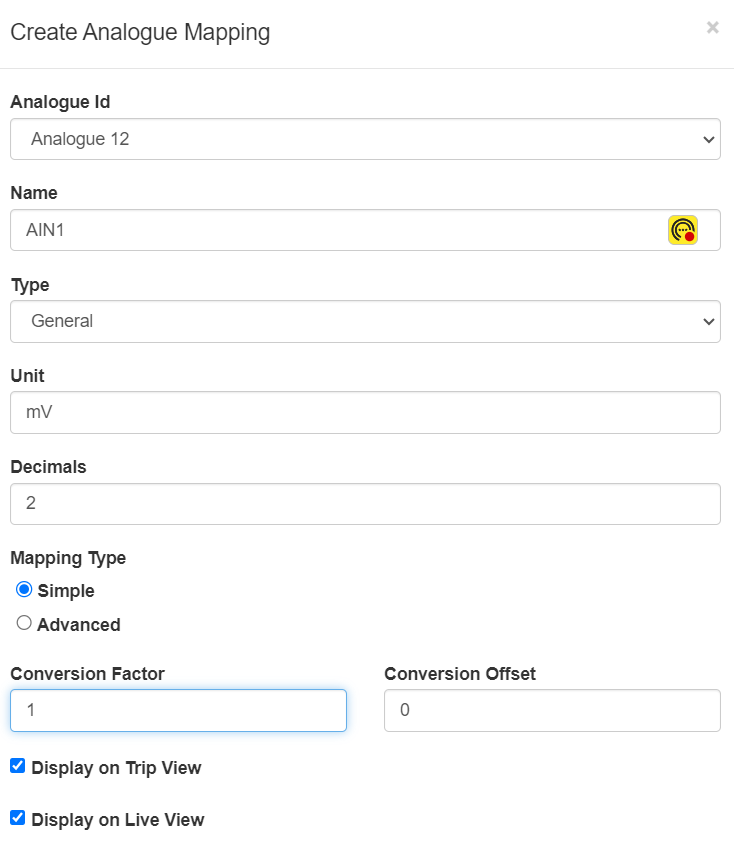
Create Analogue Mapping in TG
Create an I/O mapping in TG, the same as you set your Analogue Mappings in device parameters. The conversion factor is 0.01. This tells TG the data coming in via the mapped Analog values is the Sentrius Tag's mV value.

Alerts
More detail on alerts - Getting Started - Alerts
We can then alert on the analogue to which we have mapped the mV.

