Hawk - Configure MLX90640 Infrared Camera

Written by Cameron Everett
Updated at November 20th, 2024
Table of Contents
Note about the Bluetooth+ IO Card
The Bluetooth+ IO card has a significant amount of memory reserved for Bluetooth tags.
Unfortunately, due to the high memory requirements of the MLX90640, it cannot be used with the Bluetooth+ IO card.
Physically configure the Hawk and camera
-
Install the Agtech1 card.
-
Install the latest main board FW (v1.3 or later) via OEM Device Manager.
-
Install the latest Agtech1 I/O card FW (v1.8 or later) via OEM Device Manager.
- Install the camera wires to the appropriate I/Os as illustrated below:
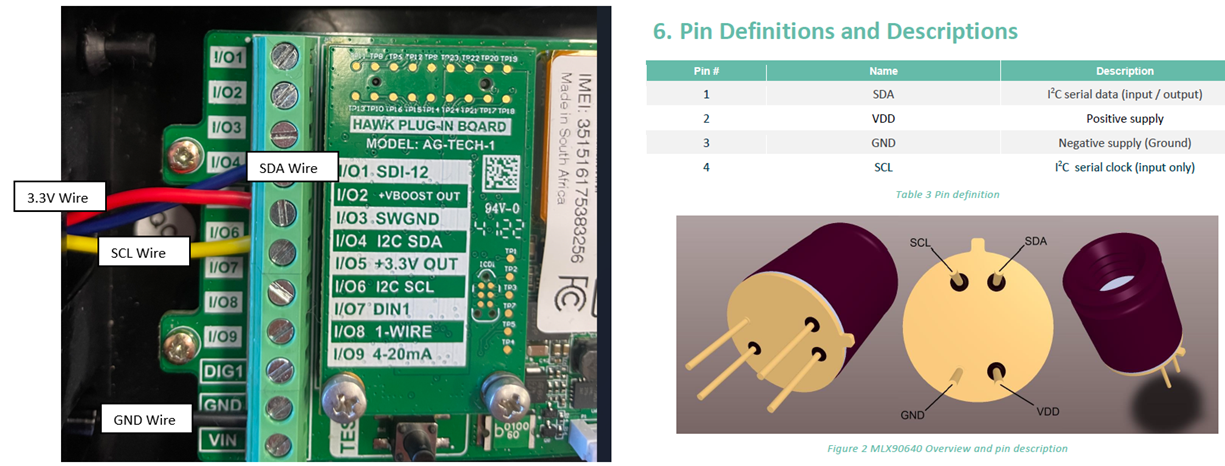
Note: As with the Eagle, for low noise performance this sensor requires a 100nF and a 10uF decoupling capacitor to be added to the sensor pins. See this article for details. Without these capacitors, noise of ±2°C is expected.
Configure Systems Parameters in Device Manager
-
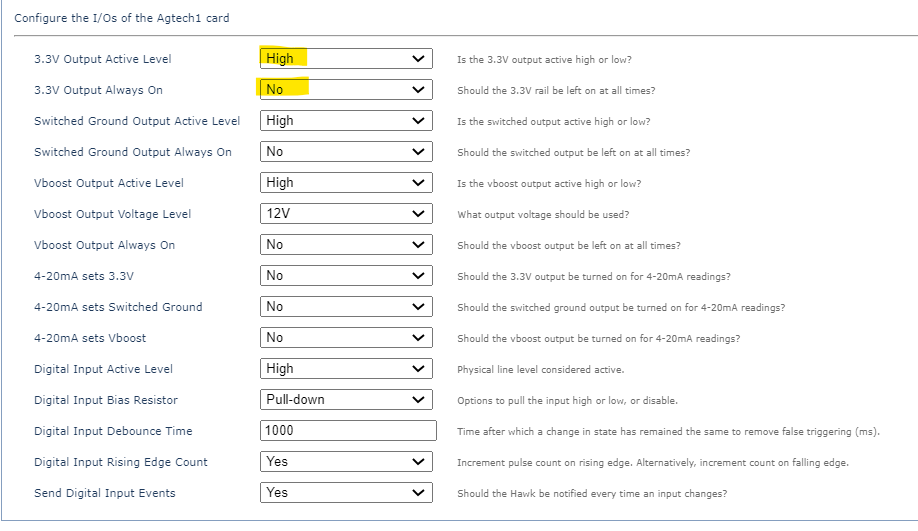
Navigate to the Agtech1 tab and configure the parameters shown below.
- Navigate to the I2C Action 1 tab, and configure the following parameters in yellow:

-
Navigate to the Task 1 tab, and configure the following parameters in yellow:
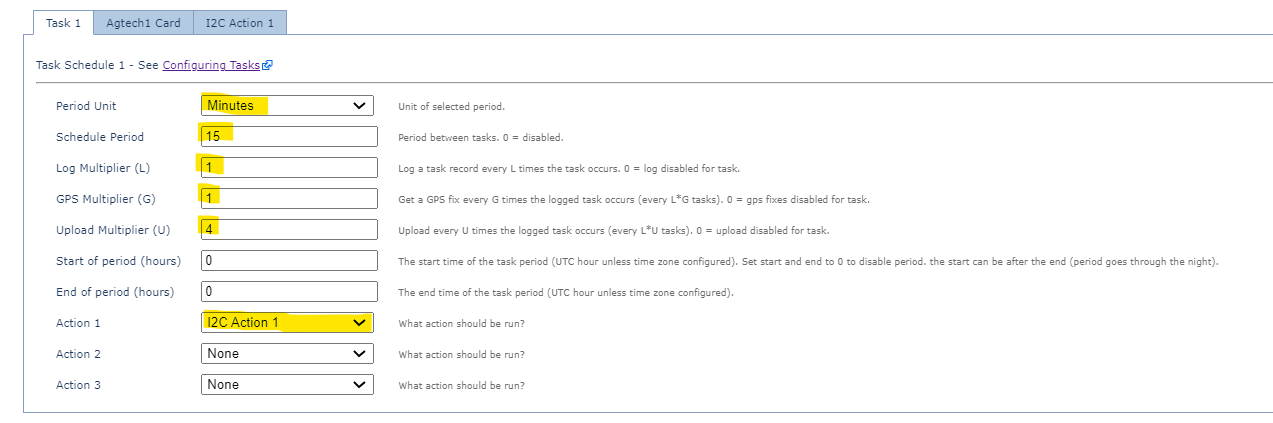
- Hit the update button to save the settings. The Hawk should now be configured to work with the MLX90640.
Device Manager Logs
Please note that due to the size of the payload, it is truncated in the device manager logs.
If you see “truncated” at the end of the log, it likely means that the Hawk has successfully read the sensor but can't display the whole payload.