Inactivity Monitoring/Timer - Battery Powered Devices
Table of Contents
Applies to:
| Device | Firmware |
|---|---|
| Barra Edge | All versions |
| Barra GPS | All versions |
| Barra Recovery | All versions |
| Yabby Edge and Yabby3 | All versions |
| Oyster Edge, Oyster3 4G, Oyster3 Bluetooth and Oyster3 Global | All versions |
| Remora3 4G and Remora3 Global | All versions |
| Manta Fusion, Manta Fusion Global, Manta GPS CATMNB | All versions |
The Inactivity Timer is a simple timer that starts when a device ends it's trip. Once the configured time period has elapsed, a specified digital input is set to '1' - and the device can be set to upload immediately if required.
Some applications include:
- As an operations tool, to track churn, demurrage, or otherwise underutilised assets.
- For example, an inactivity timer could be set up to alert when an asset has been sitting in a location too long - e.g. a bin out on hire for 7 days has been on location for 10.
- When used in livestock tracking applications, it can indicate if an animal may be unwell if they have not moved for an extended time.
Trip Based Tracking required
Configure your device for Trips! Given that 'inactivity' is simply defined as not being in trip - it follows that your device must be set up to track trips. It cannot be set up for periodic (heartbeats only) tracking.
Setting up the Inactivity Timer
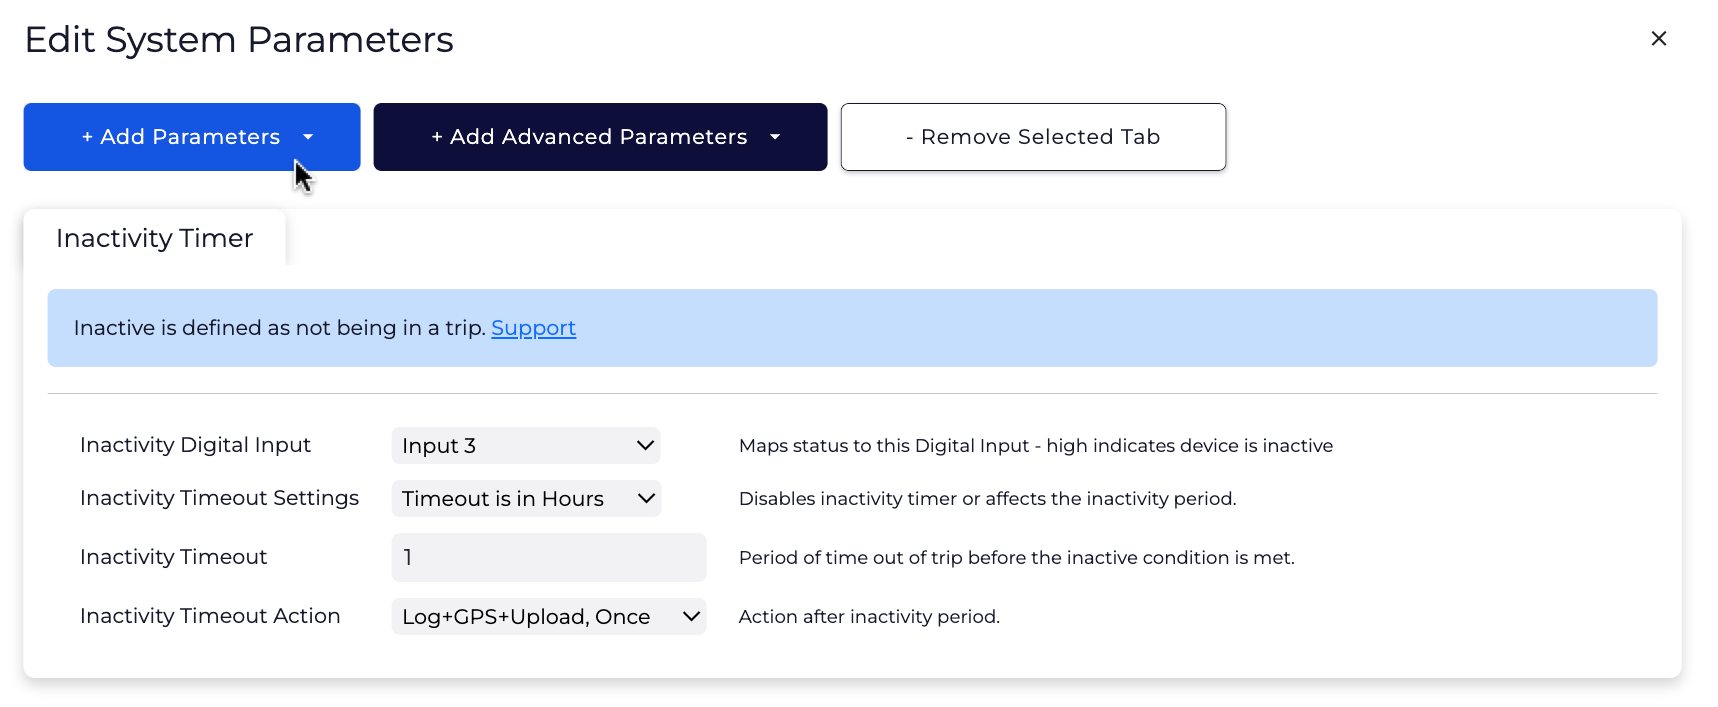
Set up the Inactivity Timer in Device Manager by going to Edit System Parameters > + Add Parameters > Inactivity Monitor.
For Example, the settings pictured below will set Digital Input 3 to Active/High and upload to the server when the Device has not moved for 1 hour.
Alerts in 3rd Party Platforms
When the inactivity timer elapses, if set to Log, a record will be created with Log Reason 9 = Digital Input Changed - and the configured input will be changed (i.e. 3 in the above case). Alerts can then be based on the status of this input.
Alerts in TG
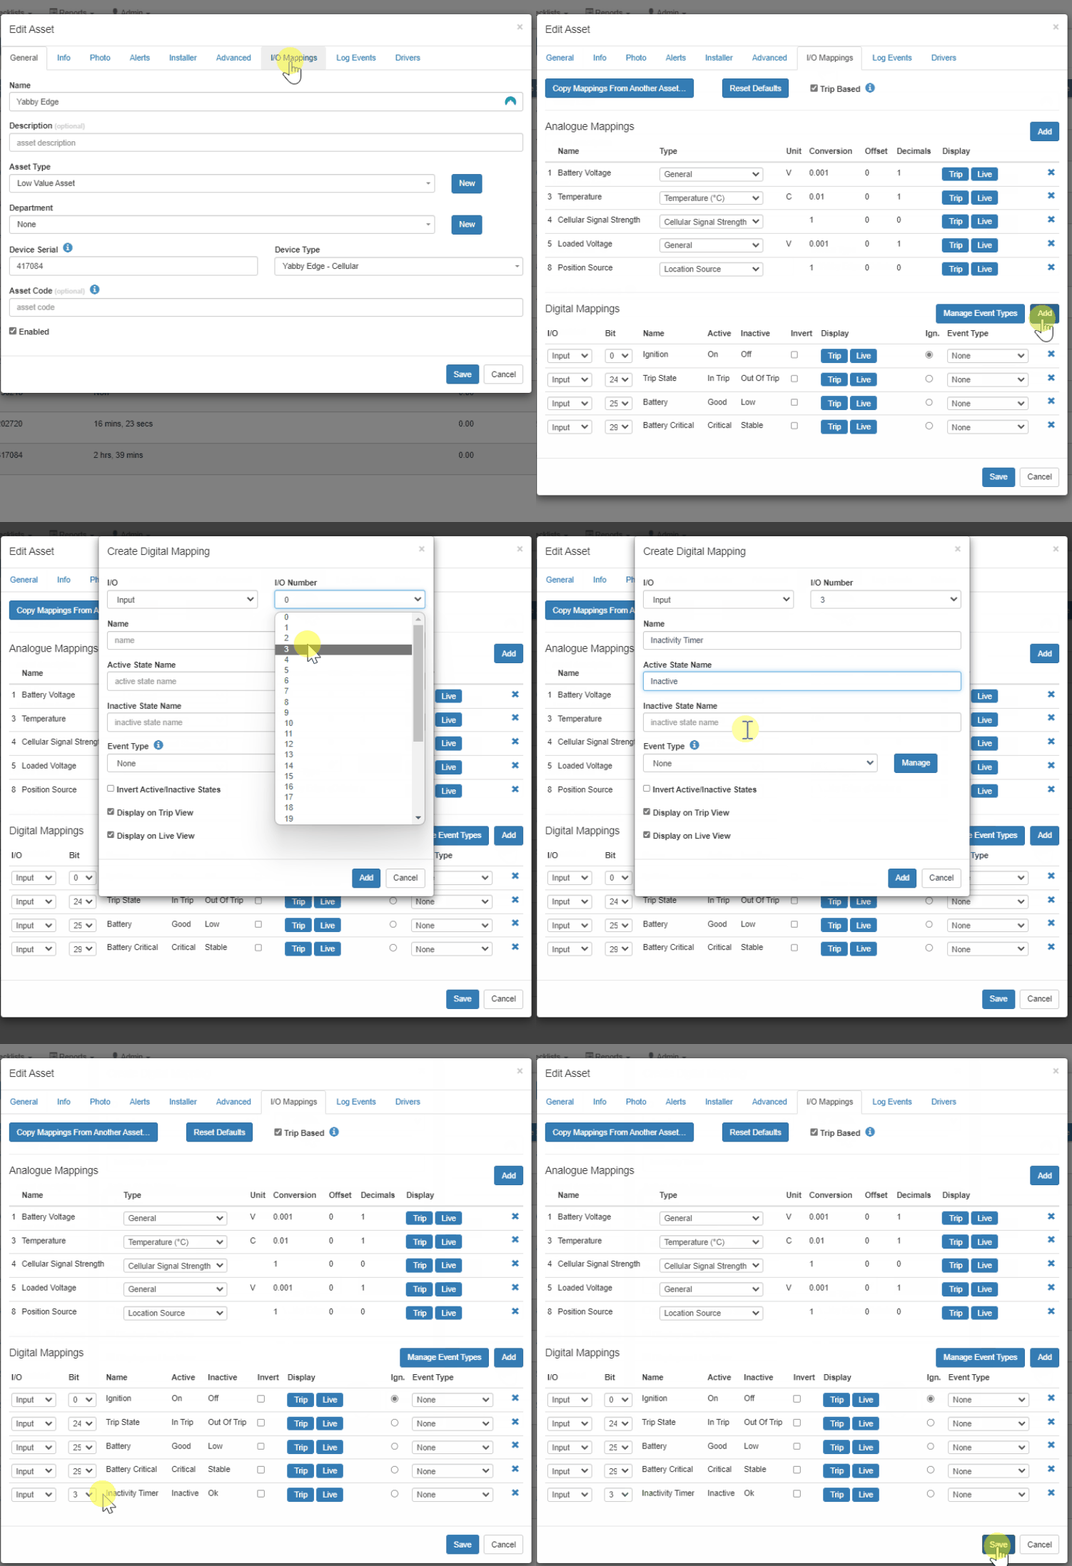
Create an I/O Mapping
In Telematics Guru, you then need to set up the Digital Input on the Asset.
1. Navigate to Assets > Manage Assets,
2. Select the Asset you're applying the input to
3. Click the 'Set I/O Mappings' button.
4. Click the 'Add' Digital Input as shown below.
5. Fill out the details required for the Digital Input, using semantic naming where appropriate and click 'Add'
Usages for Inactivity Timer in Telematics Guru
- Using an Alert to notify when the Digital Input is activated (i.e. device has been inactive for too long)
- Using Asset State changes to show on Live Map when Assets are 'Inactive'
- Using a custom report to detail how long Assets have been inactive at locations.
1. Using an Alert to notify when Digital input is activated
Navigate to Admin -> Alerts and select New Alert (Advanced)

Under General, Set up your notification message and then assign the Assets you've set up on OEM Server.
In the Conditions tab: Tick the Use Digital Input box and choose the Digital input you selected in OEM Server & Alert when Active.
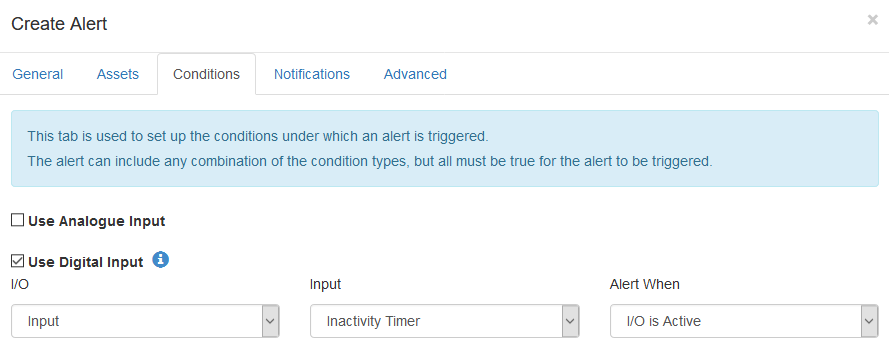
You can then select the users you wish to send the alert to in Notifications and whether you want to send a End condition alert in the Advanced tab.
2. Using Asset State changes to show on Live Map when Assets are 'Inactive'
Asset State Configurations allow you to group digital inputs into asset states. E.g. if one or a number of inputs are on/off or any combination, we are in State X, another combination we are State Y.
These configurations can be assigned to assets and the current applicable state is shown on the asset live view and state changes will be recorded in the asset timeline/event log.
You can also generate reports based on the time spent in different 'asset states'
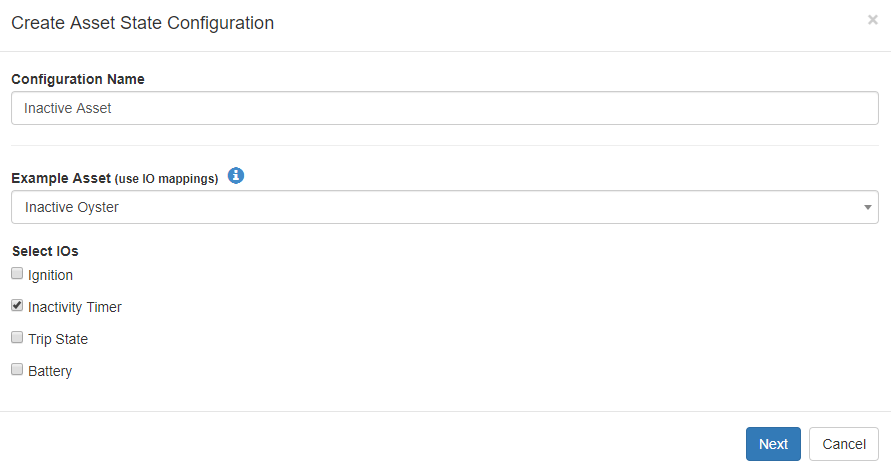
Navigate to Admin > Asset State Configuration and click the New button to create your Asset State. Name your Asset state semantically so you can know what it refers to from reports and the Asset Timeline and then select the asset you've previously set up.
The I/Os displayed are all available Digital Inputs on the selected device, if you do not see the Digital Input you want for the Inactivity time, please read the previous stage on how to set up your Asset on Telematics Guru.
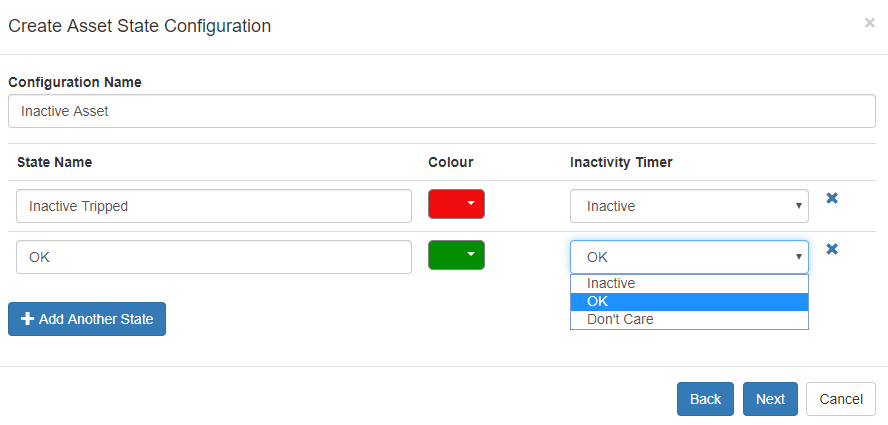
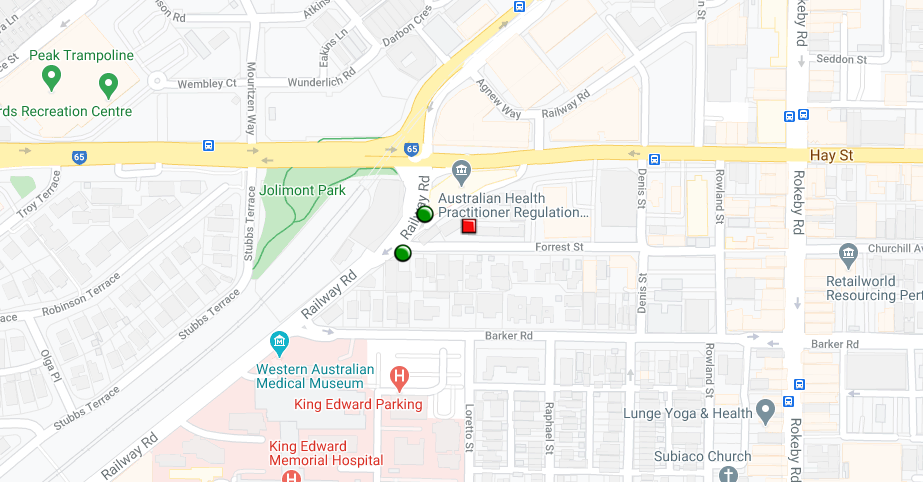
Once you've selected the Digital I/Os that you're creating the asset state on, click Next On this screen you can name the different states and set the colours to change as to the state of the input/output. The example below shows the Asset as red when Digital input 2 is active (Inactivity Timer's conditions in OEM Server have been met) and Green when it has not been triggered.
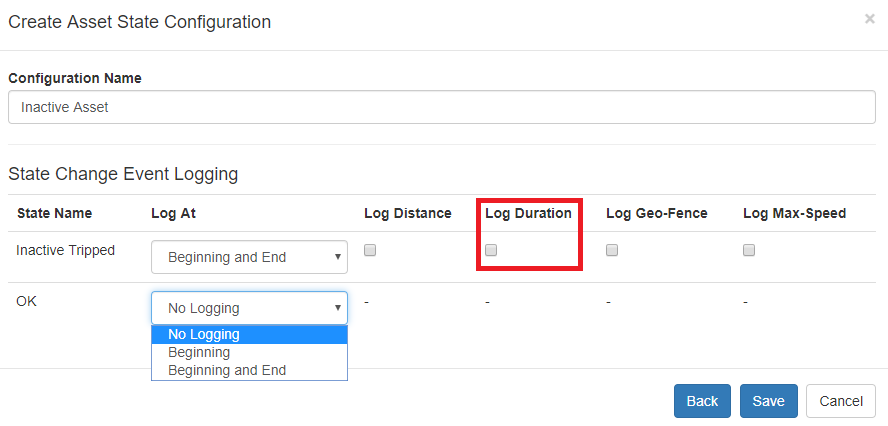
The Logging options are displayed on the next screen, you can choose between Logging of Distance, Duration, Geo-Fences or Speeds during different states.
For the Inactivity timer, we are going to select to create logs for the beginning and end of changing to the state of 'Inactive Tripped' and select to record the Duration.
The other logging options do not make sense to track since the asset is not moving if it is inactive.
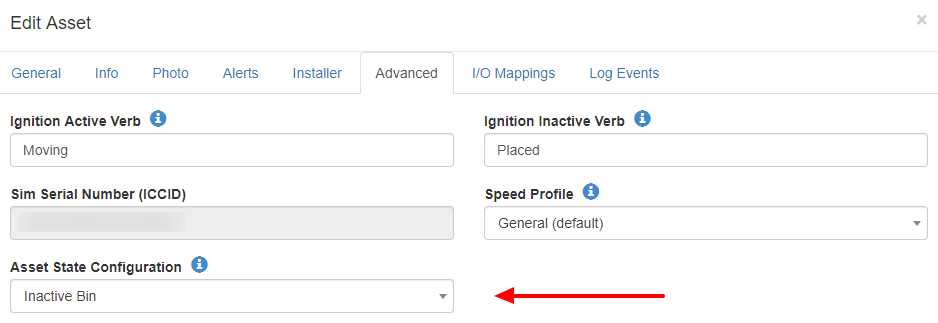
Now all that is left to do is to assign the Asset state to the Asset.
In Assets > Manage Assets select the Asset you've created the state for and navigate to the Advanced tab. Under Asset State Configuration change the drop down menu to reflect the state you've configured.
Viewing Assets State Changes on the Live View
| In the Live map, the Asset list on the right-hand side of the screen shows a few different options. To show Asset State changes on the live map, you simple need to change the drop down menu from Classic Colours, to Asset States. | 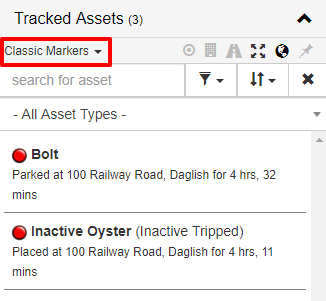 |
3. Using a Customised Asset List Report
Using a customised version of the Asset list report details the assets by Asset Type and generates how long the asset has been inactive at a specific location. see Example below, where a tracker has been Parked at DMA Head Office for 3 hours 54 minutes. This does not require the inactivity timer to be set up. However we must be set up to track trips.
The location time is simply:
Current Time - End Time of the last trip
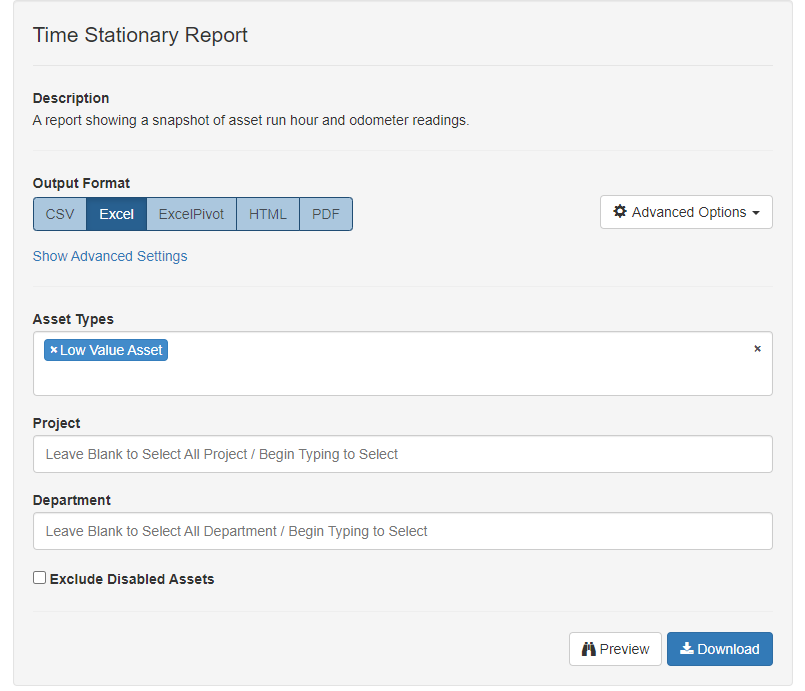

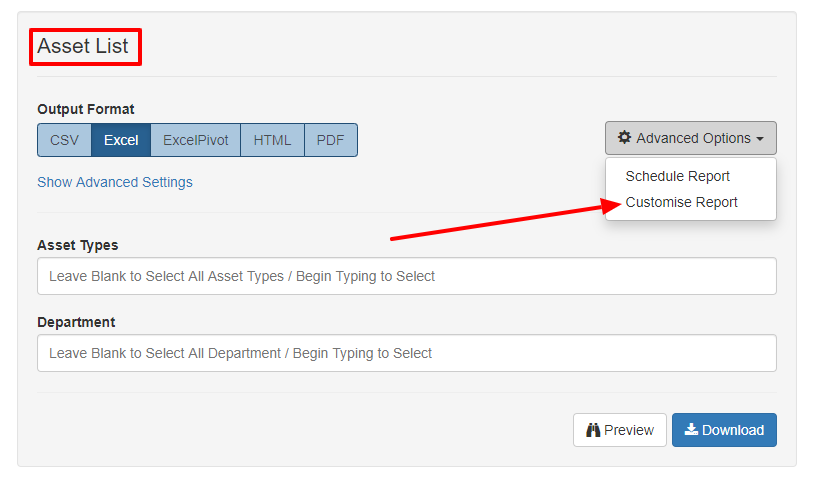
Step 1. Navigate to Reports > Asset List, click on the Advanced Options Cog and select Customise report .You can name your custom report, and then select Next to proceed to Step 2.
Step 2. There are a lot of options to select in the custom Asset List, the minimal amount of information to make the report make sense, are the following options. The order that they appear in the list are the order left to right that they will print.
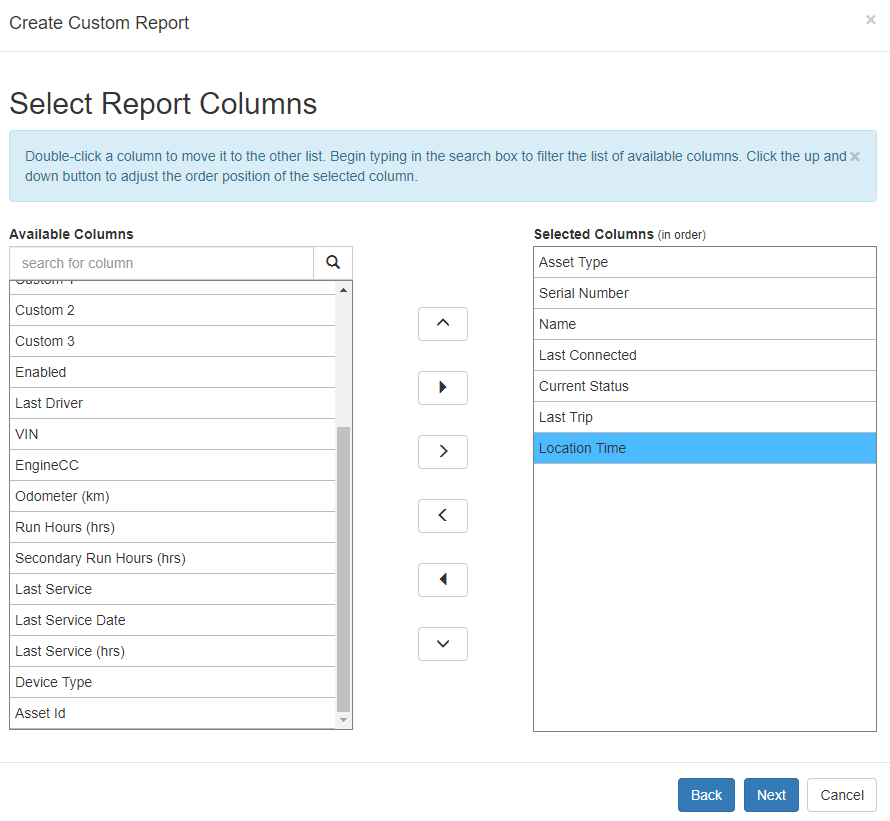
Step 3. The next few sections will give you the options of grouping the report in different ways. To get a feel of this, feel free to play around with different options and see how the report prints.
Since the report prints by Asset Type, when you set up your assets, (Assets > Manage Assets > Edit Asset) you will have to assign an 'Asset Type' to each device.
