3-Wire Install - [Dart3]

Written by Matthew Clark-Massera
Updated at August 26th, 2025
Table of Contents
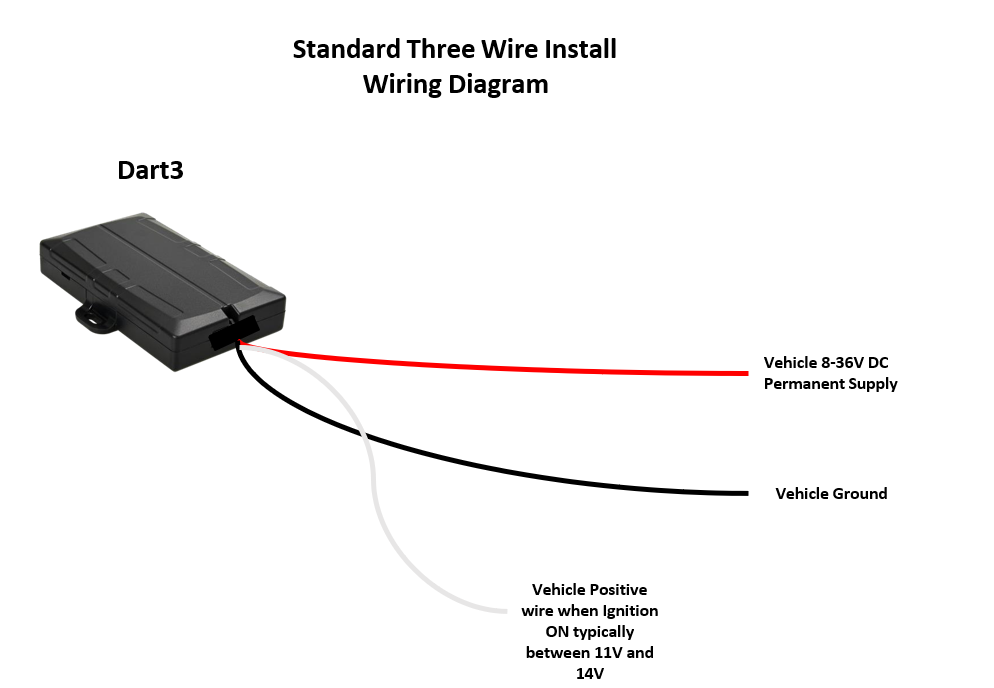
The Dart3 is supplied with a 12-wire harness. The harness contains pins for various I/Os. For many installs, where we simply are looking for 'standard' vehicle tracking, we only need to connect 3-wires.
For quick plug-and-play installs, there are additional Dart3 harness options (OBDII harness, Cig Lighter harness) - or the Bolt2 is a good option. The benefit of a 3-wire 'hard-wired' install is that the device can't be easily dislodged/removed.
Wiring Description:
- Connect Red (Pin 1) on the Dart3 harness to the vehicle battery (8-36V).
- Connect Black (Pin 3 - or any black wire on the harness) to chassis ground
- Connect White (Pin 8) - to an ignition source.
Notes:
- The White ignition input will register as 'on' when > 2.2V is applied to this line.
- Ensure the Red wire is connected to a constant source. Sometimes it may be wired to a point which only provides power when the ignition is on.
Testing: OEM Installer Page
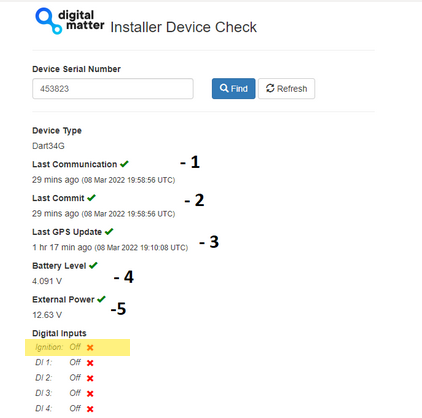
The OEM Installer page (oemserver.com/installer) is designed to verify than an installation has been done correctly. We will be using it going forward in this document. The Function of this page is generic across all devices. It is not password protected, and as such is designed to not give any sensitive information away.
Note the page does not auto-refresh.
For full details, see How to Use The Installer Page
Process/Things to Check
Enter the device serial number, click Find
- Check the device has connected recently
- Check the Last Commit Time is the same as the Last Communication time (or within a couple of minutes) - if the device has not committed recently, all following data will be out of date (commit = successful data upload)
- Check the device has got a recent GPS fix
- Check the internal battery is OK
- Check the power is what you expect - with the ignition on, and ignition off (make sure to refresh after toggling) - this confirms the power source is constant.
- Check the Ignition toggles correctly when you turn ignition off/on in vehicle.