Connecting to Telematics Guru over Hiber Mission Control

Written by Matthew Clark-Massera
Updated at July 13th, 2023
Table of Contents
Hiber provides the world’s first infrastructure-independent global LPWAN for high-density LPWAN sensor setups, as well as time-sensitive applications that require real-time monitoring in rural areas.
Hiber provides an end to end solution for asset tracking, cattle tracking and bulk storage monitoring applications. This is achieved by combining the Hiber Via satellite gateway and Hiber Mission Control, with Digital Matter devices and Telematics Guru.
Hiberband Via gateway creates a private LoRaWAN network, without having to rely on local infrastructure for power and connectivity. The Via gateway can be powered by renewable energy sources such as solar, wind or water, and connectivity can be provided through satellite. This allows you to install the Via gateway anywhere, and connect up to 500 LoRa devices simultaneously. Data form the Hiberband Via gateway is synchronised automatically with Hiber Mission Control, and can be viewed in Telematics Guru.
Hiber connect anything, anywhere to anyone.
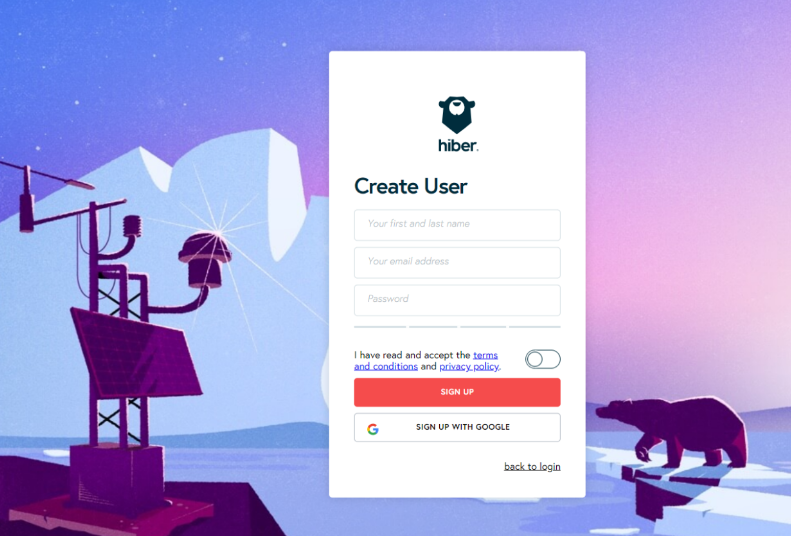
1. Create a User
After becoming a Hiber customer, Hiber support will send you an Authentication token to use when creating an account in Hiber Mission Control. Browse to the Hiber Mission Control, and click on “Create User”. Follow the prompts and complete the email verification step.
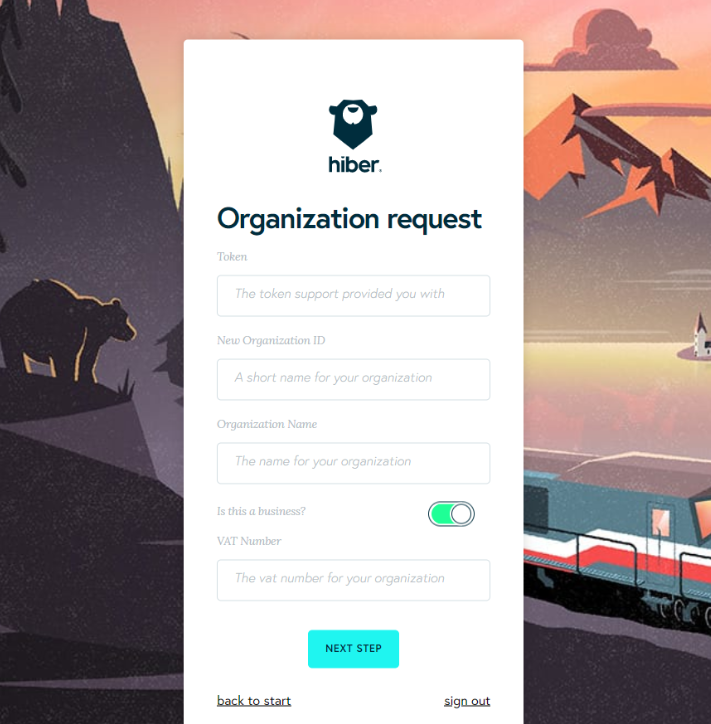
2. Create a new Organisation
You are required to have a valid token for this step. Please contact support@hiber.global to acquire a valid token. Follow the prompts and fill in your organisation and contact information.
3. Setup Hiberband Via gateway.
To connect Digital Matter devices to Hiber Via gateway, you will first need to setup the Hiberband Via gateway according to Hiber Via quick start guide. Acquire a quick start guide by contacting support@hiber.global.
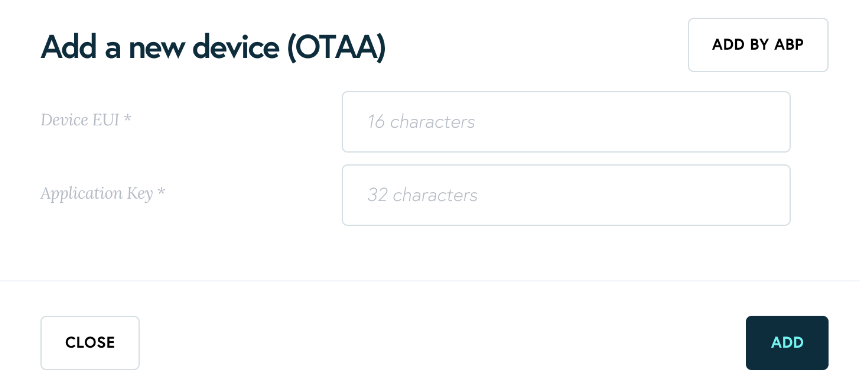
4. Provision your Digital Matter devices on Hiberband Via gateway.
Connect to your Hiberband Via gateway over WiFi with your phone/laptop; please refer to the quick start guide for more details.
In the Hiberband Via UI click “ADD NEW DEVICES” to create a new device. Depending on the device profile, choose OTAA or ABP activation. Follow the interface instructions.
When the Digital Matter device has successfully connected to the gateway, you will be able to see the device details (ID, messages, Message Last Received, Message Last Sent, Created).
5. Modems (Devices)
On Hiber Mission Control, your devices can be seen under Modems. These are automatically created after provisioning your devices on the Hiberband Via gateway.
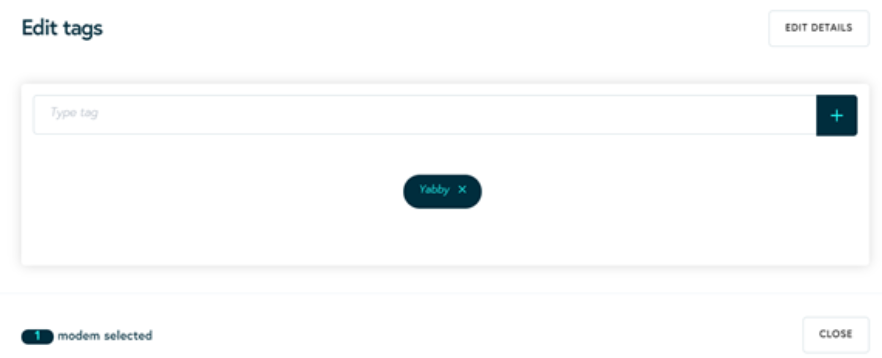
6. Add a Tag
Tags are used in Hiber Mission Control to organise device groups and assign integrations. Navigate to modems, select a modem (device) or several devices and select “Edit tag”. You can create a new tag by clicking on “+”.
7. Create a Webhook
Browse to Developer Tools and select “Create Webhook”.
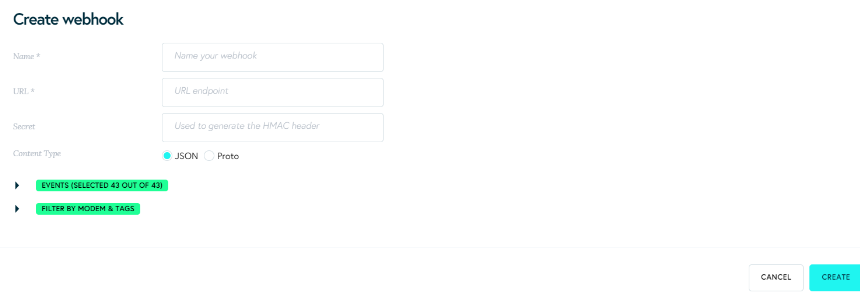
Based on which regional server your partner account is hosted, you will need to use the related URL for the endpoint. The URL also dictates which device type you have. You will need to input oyster, yabby, G62 or guppy depending on the device type. The username should be obtained from Telematics Guru. TG support will provide these details. This username will replace “xxx”
| Region | Device URL |
|---|---|
| APAC01 | http://device-apac01.telematics.guru:8083/hiber/oyster?username=xxx |
| APAC02 | http://device-apac02.telematics.guru:8083/hiber/oyster?username=xxx |
| APAC03 | http://device-apac03.telematics.guru:8083/hiber/oyster?username=xxx |
| APAC04 | http://device-apac04.telematics.guru:8083/hiber/oyster?username=xxx |
| EMEA01 | http://device-emea01.telematics.guru:8083/hiber/oyster?username=xxx |
| EMEA02 | http://device-emea02.telematics.guru:8083/hiber/oyster?username=xxx |
| EMEA03 | http://device-emea03.telematics.guru:8083/hiber/oyster?username=xxx |
| EMEA04 | http://device-emea04.telematics.guru:8083/hiber/oyster?username=xxx |
| AMER01 | http://device-amer01.telematics.guru:8083/hiber/oyster?username=xxx |
| AMER02 | http://device-amer02.telematics.guru:8083/hiber/oyster?username=xxx |
The Authorization Field noted as Secret should be set using a special HMAC key obtained from Telematics Guru. TG support will provide these details.
Click on “Filter by Modem & Tags” and select the same tag created for that specific device type. Multiple devices are tagged with a device type in Mission Control, and the tag is associated with a webhook.
8. Create an asset on Telematics Guru
Log in to your Telematics Guru account, navigate to the Assets page, and click Create New Asset: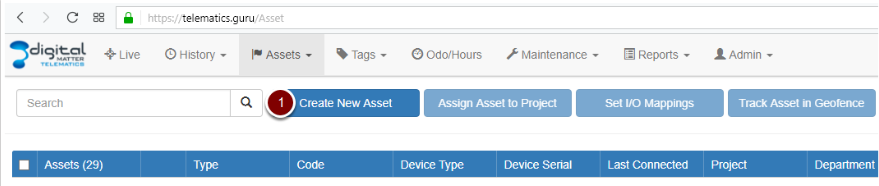
Now choose a name, select the correct Device Type, enter the DevEUI in the Device Serial field, and click Save:
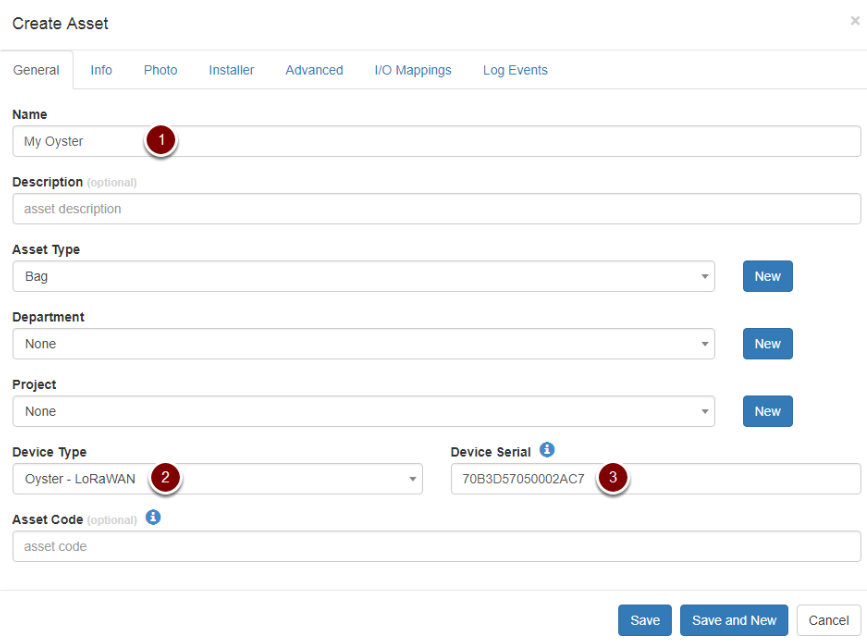
If all of the previous steps have been followed correctly, new data points should start populating in the Telemetry and IO Telemetry pages as soon as the Oyster gets its first GPS fix. The Oyster's location should also start updating on the live tracking page.