Creating Connectors
How to Direct your Device Data to an IoT Software Platform

Written by Jake Tannenbaum
Updated at June 10th, 2024
Table of Contents
What is a Connector?
A Connector specifies where Device Manager should direct device telemetry data. Device Manager can direct your data to a variety of front-end IoT software platforms (for example: Telematics Guru). There are TCP or HTTP options available, and for full details, see Choosing an Integration Strategy.
Some 'advanced' connector setups must be configured by the Digital Matter support team - but the majority can be easily configured and managed on your own!
Creating a Connector
To see the Connectors menu option and create your own Connectors, your Device Manager user profile requires the Connection Manage permission. If you can't access any of the steps/pages shown, contact your account administrator or Digital Matter Support.
- Navigate to the Connectors section from the left-hand menu.
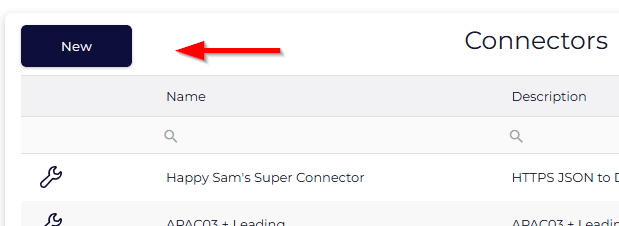
- Click on the New button in the top left corner of the Connector Grid.
- Within the Create New Connector popup that appears, provide a name and description.
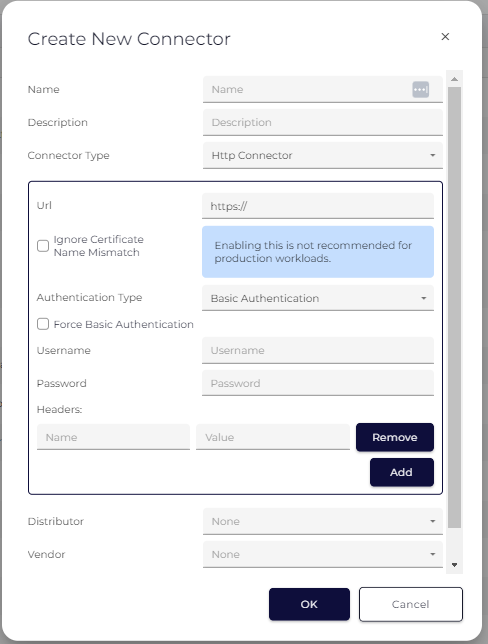
- Enabling the Ignore Certificate Name Mismatch checkbox allows you to ignore certificate issues when running your Connector. This is not recommended as a production-grade connector, but can save you time when performing tests or setup checks.
- Use the dropdown to select your Connector Type. To make an informed decision as to which connector is best for you, please review Choosing an Integration Strategy. As the authentication requirements differ for each connector, please review the section relevant for your chosen Connector Type before proceeding.
-
HTTP/S Connector - requires an endpoint Url, an optionally Authentication Type and/or Headers.
-
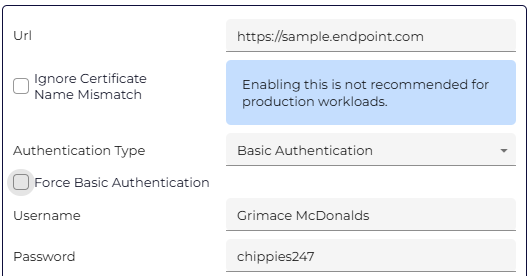
Url - provide the endpoint that will receive the data.
-
Authentication Type:
-
Basic Authentication
-
Force Basic Authentication - this checkbox is unticked by default, ignore unless instructed to enable this by a Digital Matter representative.
-
Username and Password - these will be sent in the header of the POST.
-
Force Basic Authentication - this checkbox is unticked by default, ignore unless instructed to enable this by a Digital Matter representative.
-
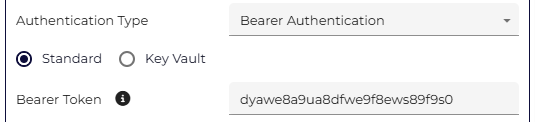
Bearer Token
-
Standard - Add your bearer token into the space provided. The standard Bearer Token is stored as an HTTP/S Header.
-
Key Vault - click the Key Vault radio button, and then click on Retrieve Bearer Token.
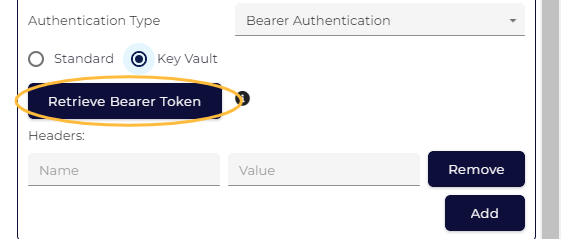
Provide the URL and credentials for the endpoint where the Bearer Token will be requested. The token will not be visible, and if the credentials change, you will need to manually update them. The Key Vault Bearer Token is retrieved from an endpoint using Basic Authentication and will not be visible to the user.
-
Standard - Add your bearer token into the space provided. The standard Bearer Token is stored as an HTTP/S Header.
-
Custom Authentication - please contact Digital Matter support if you have custom authentication requirements for your Connector.
-
Basic Authentication
-
Headers - you may add a maximum of 5 headers. Please review our article on HTTPS Connectors to learn about headers and dynamic fields.
-
Url - provide the endpoint that will receive the data.
-
Flexi TCP Connector - requires a hostname and a port.
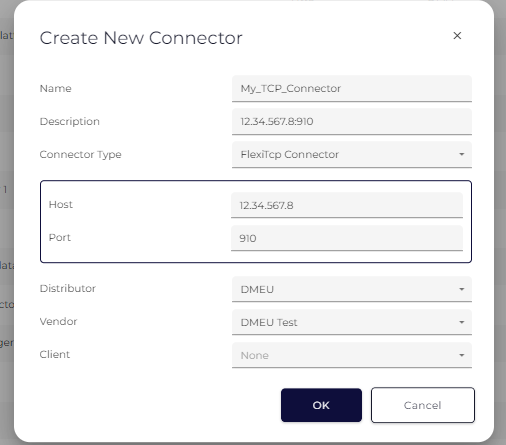
Simply enter a name and your IP:Port, along with the group the connector should appear for.
It is often useful to set the description as the actual endpoint address - for handy reference in the grid of connectors if you have multiple - but you can enter whatever you wish.
-
Multi Connector - allows you to send data to two endpoints at once. Create your two endpoints as individual connectors first, and then 'join' them by creating a new, third Connector set with the Multi Connector type. This is typically used by Telematics Guru resellers that also want to send data to their own servers as well. Available options for joining will appear when you click on the dropdown menu.

- Location Engine Connector - information about how to create and use a Location Engine Connector can be found in Configuring Forwarders.
-
HTTP/S Connector - requires an endpoint Url, an optionally Authentication Type and/or Headers.
How Do I Modify a Connector?
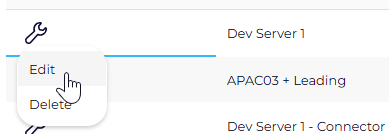
Use the contextual editing wrench against your chosen Connector in the left-hand side of the Connector Grid.
What's Next?
Now that you understand how to create a Connector, we recommend giving it a try and then setting your new connector against a device as outlined in Setting Connectors.