Managing Users in Device Manager
How to Edit or Remove Access from Existing Users in Device Manager
Table of Contents
User Management in Device Manager
Device Manager contains a dedicated User Management section and suite of tools designed to help administrators control access and delegate responsibilities when using the system. This includes the ability to disable departing team members, update or correct contact details, change permissions levels, and export lists.
For information about creating a new user, please see Creating New Users in Device Manager - Digital Matter.
The User Management Section
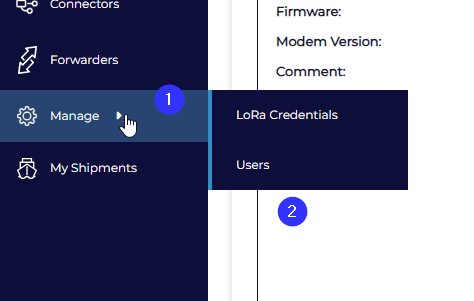
If your user profile was created or amended to include the with the User Manager permission, you will gain access to the Management menu item in the left-hand menu and then the Users option in the sub-menu.

From there, you will be presented with the User Management Grid, which shows all of the users you have available to you and allows for searching or filtering upon the following fields:
| Column Header | Type | Purpose |
|---|---|---|
| string | Emails serve as a username within the system and also the main method of contact | |
| Distributor | string | Only available to Digital Matter system administrators - allows us to see what region each user is under. |
| Vendor | string | Only available to users without a Vendor set against their user profile. Allows for Digital Matter administrators to determine which vendor group a user belongs to. |
| Client | string | Only available to users without a Client designation - allows for searching and filtering by specific client. A user with a Client in this field can only see devices in the Device Group for this Client and users that are also set to this Client |
| Name | string | The given name or first name of a particular user. |
| Surname | string | The surname or last name of a particular user. |
| Mobile | string | The mobile number associated with a user profile. |
| Last Login Date (UTC) | datetime | The last time that the user successfully logged in. This is not in your local timezone. |
| Enabled | bool | Determines whether a user can log-in or not. Enabled means that they are live and can use the system. |
| 2FA Enabled | bool | Indicates whether a user has successfully completed the 2FA setup process. Used for security auditing. |
| Invite | Link | A button to re-send the initial invite link will appear in this field from the time a new user is created until they have accepted their invite and successfully logged in for the first time. If you mistyped a user's email, you can edit that user, correct the e-mail, and then resend the invite link with this button. |

Exporting Users
The black Export Users button on the right-hand side of the User Management Grid enables you to create a CSV of your users with the same fields that you can see in the User Management Grid. This is useful for organizations with large numbers of users.
Editing Users
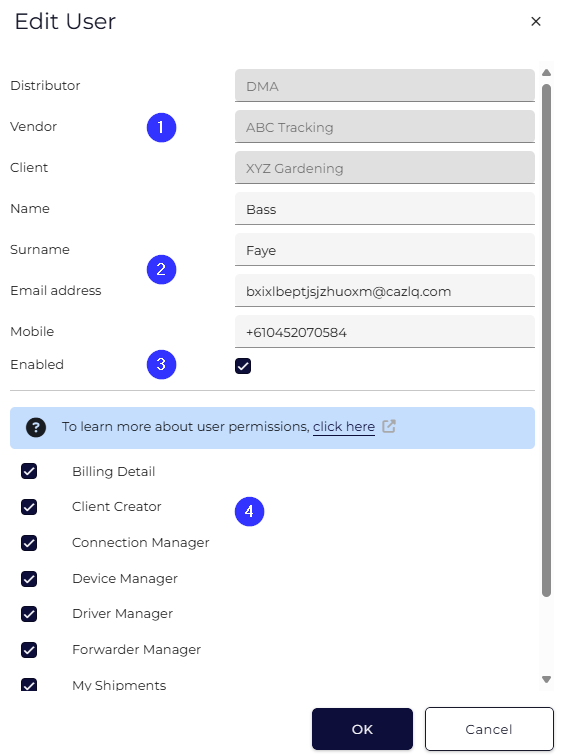
The first column of the User Management Grid contains an Edit button per row which can be used to open the Edit User window for that user. This enables you to change the Device Groups the user has access to, their contact details, and their permissions.

-
Device Groups - you can only change users to be more restrictive than yourself. If you can only see one Client, you can only edit users to have the same as you.
-
Contact Details - If your user has changed their e-mail address, you can amend it here and this will change what they use to log in. Keep in mind, this will not automatically reset their 2FA authenticator.
-
Enabled - Unchecking this box will prevent this user from logging on, but will not delete their information. Use this when someone no longer requires access (deletion is done on the User Management Grid).
- Permissions - Check or uncheck boxes to change permissions. A detailed list of the permissions can be found in Creating New Users in Device Manager - Digital Matter
Deleting Users
The second column of the User Management Grid is the Delete column, and contains a button of the same name per user. Clicking this button will soft-delete that user from the database and hide them from your view permanently.
